The belief in natural heirachies is baked into everything they do.
That's a really clever answer to the ringer light! I should definitely be able to piece something together from there.
It also hadn't occurred to me to just tap the phone itself for the voltmeter (though it feels a little less authentic than doing the line between them, somehow). It's very good to know about the voltage tolerance - I'll see what I can find!
Thank you very much for your help, I really appreciate it!
It's an incredibly useful skillset in my opinion (though I'll admit the saying about everything looking like a nail when all you have is a hammer probably rings truer than I'd like to admit). One of my main hobbies is scavenging furniture on trash day and fixing it up to practice furniture restoration. We got a ton of the stuff in our place that way. Sometimes I fix nice stuff I don't need and give it away on my local Buy Nothing page just to keep it out of the landfill.
I also turn replacement handles for knives and spatulas and other kitchen stuff on the lathe, and help out with carpentry projects for friends and relatives.
The big cost is space for tools and lumber. Where I am at least, tools aren't especially hard to come by secondhand so most of mine are hand-me-downs or purchased at consignment shops. Older tools are almost always better quality than newer stuff, except for safety, where some of the new ones have much better designs or features. I find most of my lumber through Buy Nothing or trash day - haven't bought any for years now.
Doing woodworking when I can get the time - there's nothing like a spinning chunk of wood or whirring bandsaw blade to narrow your thoughts down to just one topic. I have a hard time quieting my mind but that works pretty well. Probably about as close to zen as I get.
Creative stuff, writing/editing a solarpunk TTRPG campaign guide when my mind is in the right place, doing the art for it with a podcast on in the background when it isn't and I want to be distracted. Chipping away at these projects feels good. I can end the day thinking about what I got done and planning next steps.
A bit of volunteering gets me out and into the company of folks I get along with.
Full agree - meat substitutions make this transition extremely easy, you can find a drop-in replacement for almost anything and essentially eat the same stuff you did before. I wrote a list of favorites a couple years ago, it's pretty specific to local stores and I'll admit I forgot some of these existed, maybe my local shops stopped carrying them? https://slrpnk.net/post/1614342. Some local restaurants make absolutely amazing fake meat in-house with seitan (can you tell I live in a big city?) and I've been meaning to find some good recipes for that.
Around here the grocery stores often split meat substitutes between the vegetables section and the freezer section. So if you can't find something and it doesn't have to be frozen, check if they jammed it in between bags of lettuce or something.
They would, but if I'm surreptitiously installing something to make a point, I'm not sure I want to start drilling into concrete. Maybe with a high vis vest during the workday.
Thanks, this was an unusually decent interaction all around
Fair enough. Personally I'm skeptical that there is a "passive corrective method" for individuals to fix problems in either system (maybe a socialist can identify one for us). There aren't many passive solutions at all.
The way to fix these problems in either system is through regulation, governance, and collective action. People just buying other products hasn't worked to correct the flaws in capitalism, regulation has, so you might as well go straight to that either way.
It's to peoples' best interest to choose a better product if they:
- even know there's a problem in the first place. Corporations have a long history of covering up faults in their products, sometimes for decades, before independent tests or reporting reveal them (during which time they're outcompeting more legitimate competition on price).
- competing products exist. Monopolies are a natural outgrowth of unregulated markets. It's always more profitable not to have to compete so endless mergers are a threat which have to be regulated but frequently arent. It's also much easier for an entrenched institution to crush or buy out new startups before they can become a problem. Add in collusion where companies that compete on paper secretly agree not to undercut each others prices and you end up with a market where there is no real competition and no need for costly innovation. And though regulatory capture may not exist in a truly unregulated free market, we certainly see it in real life, where superior foreign products can be outright banned from a market, the entrenched industry's products made artificially cheap through subsidies, and new safety laws kept off the books to protect the corporate bottom line.
- the competing product is actually superior. We frequently see a race to the bottom effect where most people consistently choose the cheapest product available (often because wages have been stagnant for generations and they're poor enough that they legitimately can't afford better) and better, safer, more ethical products are simply priced out of the market, whereupon the companies making them either start cutting corners themselves or go out of business. And we can refer back to point one where just because one product has been revealed to be unsafe doesn't guarantee that the competitor hasn't managed to hide an unknown hazard in theirs.
Asking regular people, many of whom are perpetually overworked and exhausted, to extensively research every product that's made it to market (and to overcome marketing, illegal concealment of hazards, and collusion) strikes me as a kind of Just World Falicy thing, where the 'opportunity' to simply buy a better product becomes a chance to blame people for the bad things that happen to them. They should simply have bought a test kit and figured out that there was lead contamination in their baby formula. They should have studied auto accident statistics from the last five years to notice that that particular model routinely explodes in a fireball with the doors jammed. What did they expect buying something without doing their own research?
They also ignore that companies will cheerfully skimp on safety to save a buck and then spend far more than they saved fighting legal battles against the government to prevent or delay relevant regulations, against their own customers (or their next of kin) who have been harmed by their products, and against any kind of criminal prosecution. They'll also spend millions on marketing to minimize awareness or the severity of the problem and to actively increase sales of the dangerous product. It's not exactly an environment designed for fair and informed decision making.
Speaking of unfair, the history of monopolies, market collusion, and the race to the bottom have given us plenty of examples of companies removing that choice of product quality from the board entirely. If the people making the unsafe or unethical thing buy out all the competition and eliminate or cheapen the former competition's products until the have the same problems, there's no choice. If the competition look at the market and realize they can also take unsafe shortcuts and remain competitive, there's no choice.
There's a long history of rich people framing exploitation as the freedom to choose to accept a dangerous product or job or place to live. After all, if people are poor and desperate and propagandized enough there'll always be someone to make that choice. And the lower they drive the quality of life, the more people will have to choose the same. But it's not about saving you money. They're not doing you a favor. It's about saving money for themselves and framing things so you thank them for it.
Editing to add this link from another comment because I had no idea that (of course) there's organized opposition by entrenched interests to prevent anything for the public good https://www.motherjones.com/politics/2025/06/dark-roof-lobby-white-reflective-roofs-laws-lobbying-urban-heat-islands/
I don't think the current roofs are painted black - they're naturally black because roofing tar and asphalt shingles are black by default (a lot of sheet metal roofing is too but you can at least get that in most colors). So it's not a matter of swapping out paint but adding something new. It also adds a new maintenance cost - keeping the white roof clean/maintained. Paint flakes off, tarps etc wear and become tattered, dirt and pollen collect on the surface. None of this is a dealbreaker by any means but our society seems to run on defaults and there's a lot of inertia in construction and a lot of pressure on builders to keep materials costs down (even if doing so costs the owners or occupants more in the long run).
I hope this continues to take off because it really is a big improvement.
38
The art of recycling/repurposing broken-up concrete (sometimes apparently called 'urbanite')
(slrpnk.net)
I stumbled onto this article while working on a photobash of a solarpunk scene. I think it does a good job of explaining the concept but there seems to be something wrong with its certificates, which might throw an error in your web browser. https://nwedible.com/urbanite-broken-concrete-retaining-wall-as-a-garden-feature/
Just in case you don't want to check the link I'm also going to plagiarize a few quotes and images from the article:

"The marketing term for “old chunks of broken up concrete” is urbanite. Urbanite has a lot going for it: it’s durable and heavy like natural stone, reusing this product in garden and landscape design takes it out of the waste stream, it’s often a uniform thickness which makes it easy to stack or lay as a permeable patio surface, it’s often available in most urban locations, and it’s frequently free for the hauling. Free is good.
Drawbacks to urbanite can include potential contamination – this is more of an concern if your urbanite comes from a torn out commercial parking lot where all manner of auto fluids may have seeped into it than from the neighbor’s pool deck tear-out. Concrete itself can contain additives that might pose a health or contamination risk, although my feeling is that old, weathered concrete has probably already leached the worst of itself out somewhere else.
I probably wouldn’t use urbanite to build edible garden beds, but I can see great potential for turning this waste product in retaining walls, steps, and patio areas."


And a few examples of recycled concrete patios:


This last one came from https://www.terranovalandscaping.com/90/, which has a few other examples, including raised beds, so perhaps they knew their source of concrete was clean, or weren't worried about the potential for contanimation?

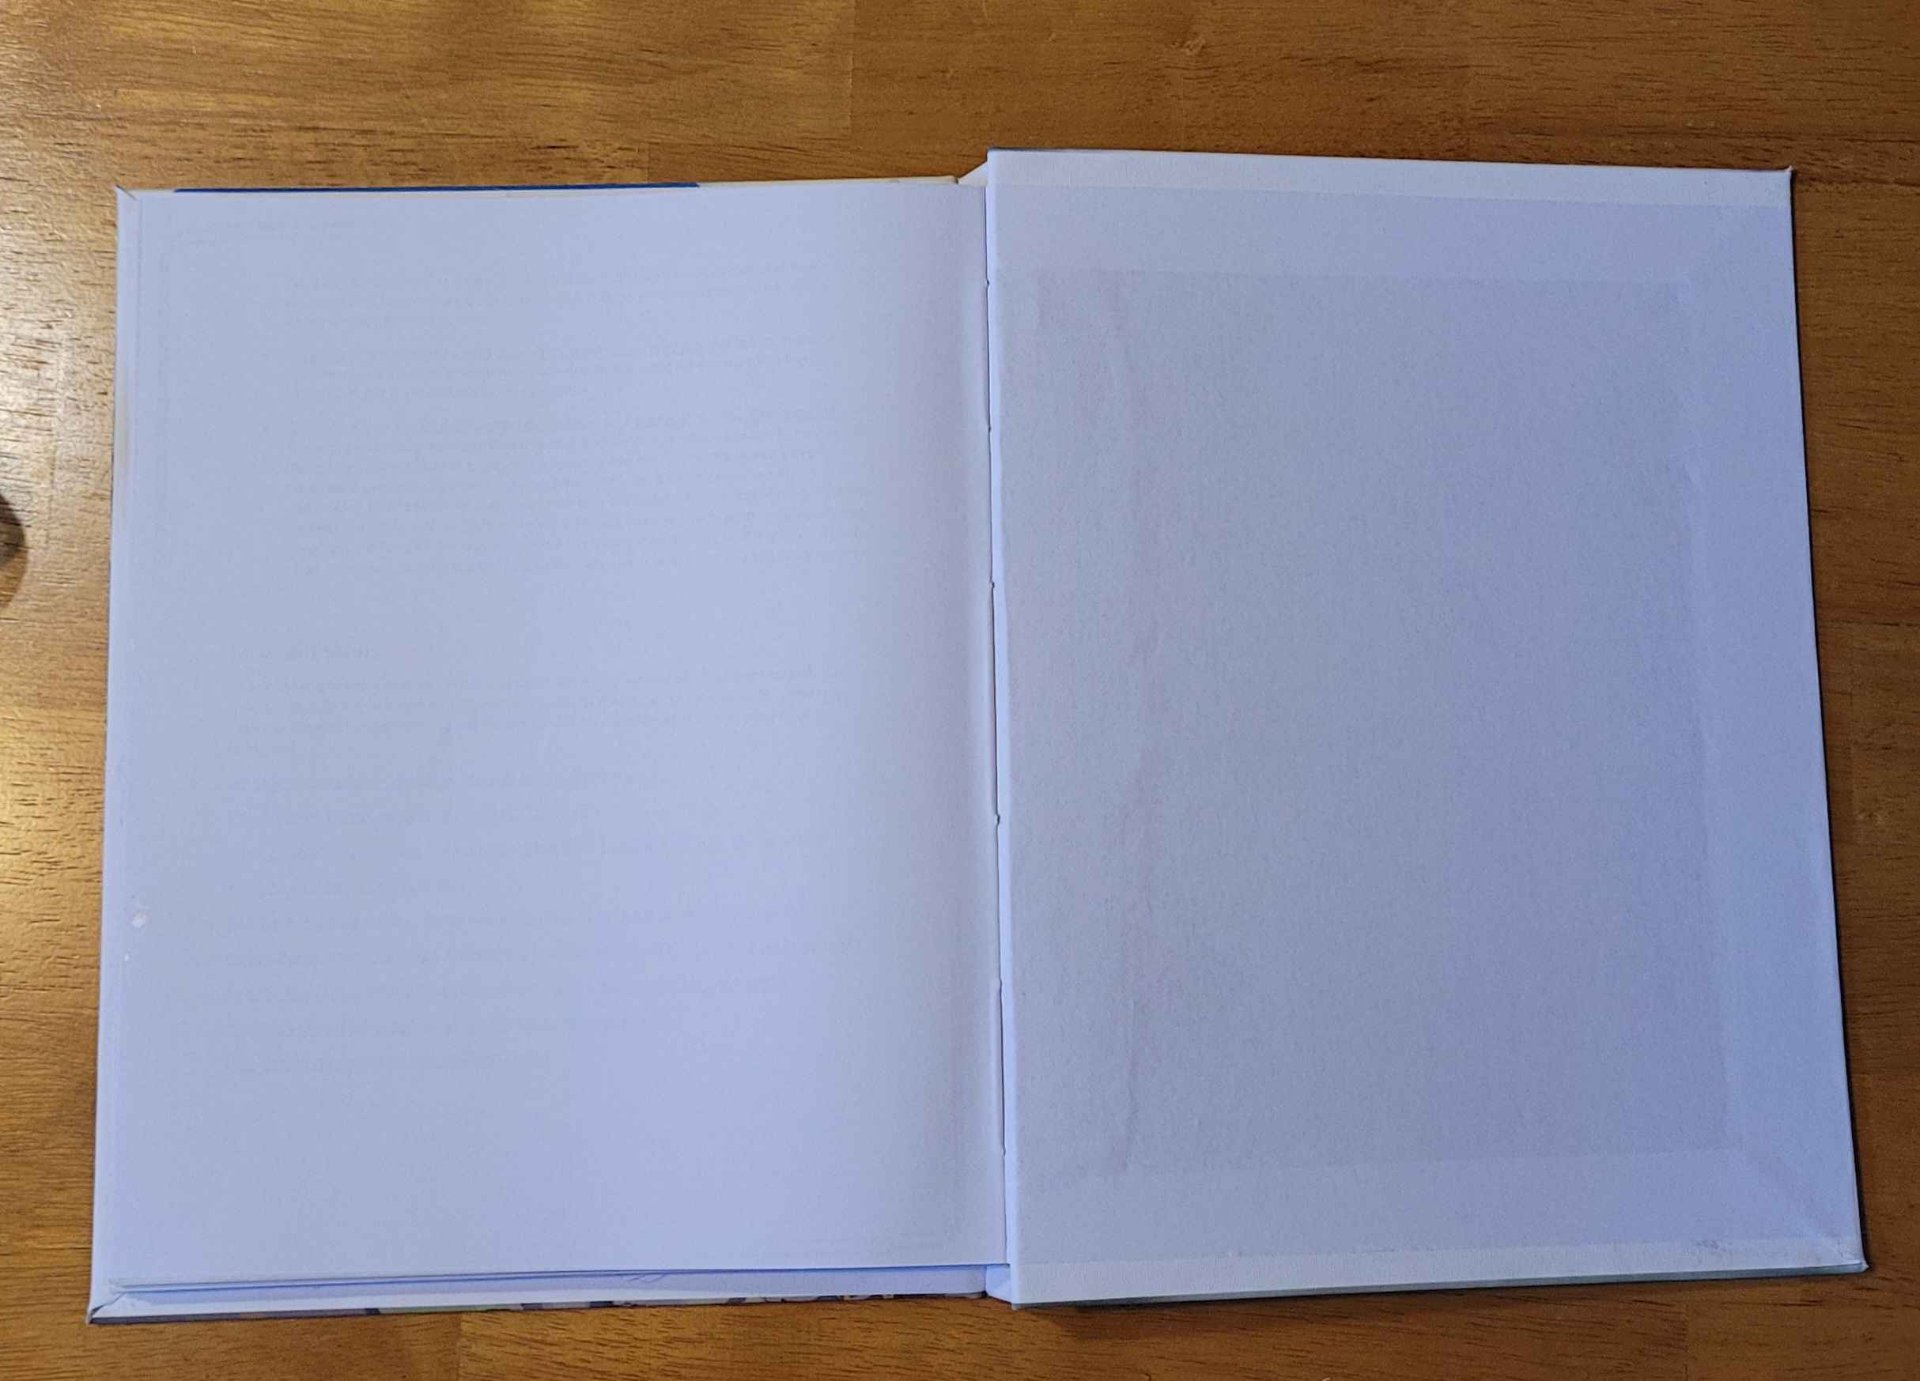
I've actually done a couple posts about softcover books on my movim blog, this one and one previous one. The Fully Automated softcovers are a little fancier, but this one I think is a good example of the benefits of being able to just make a book when you want a physical copy.
I have a few advantages in this project: my SO had already bought a bookbinding kit and book which I was able to use, and I have access to a free color printer, and, through my local makerspace, a plotter printer which can print on canvas. Everything else, the graphic design, the interposing, etc, was done using free tools like GIMP, an online pdf cropping website, and https://momijizukamori.github.io/bookbinder-js/.

It looks like one of the advantages of this hobby is suddenly being able to get physical copies of books that aren't available as anything other than PDF ebooks. I've got a handfull of favorite books from various authors which were extremely self-published, sometimes as serial fiction later edited into a PDF. One or two eventually got a limited print run, or the author made it available on a Print-On-Demand site, but at this point, I think I've found and bought all of those. That leaves a few that I'm very happy to finally be able to hold in my hands while I read them.
Vatsy and Bruno was one of those. Written in 2010 by Adam "Rutskarn" DeCamp, and published on the old version of https://www.chocolatehammer.org/ , Vatsy and Bruno is a high-strung, noire, dark-comedy-adventure story set in a radio-era city under the thumb of vague oppression. It's a fun story, and one that feels like it should be typewritten on paper (preferably cheap, grubby, fish-stained paper with some suspiciously blood-like smears).
Making this one actually took a bit more prep work on the files.
I started with the PDF DeCamp released on his website over a decade ago. This, unfortunately, wasn't really sized or laid out for bookbinding (re. the wide margins, the page size, and all the page numbers being on the right side of the page). I could get really fancy with editing this, but it's just for me, so "good enough done quick" was the order of the day.
I wanted to print this with no extra trimming, so I planned to use 8.5x11 paper folded in half. Unfortunately, the PDF was, itself, scaled for 8.5x11" paper, and when you fold that in half, the aspect ratio changes. So when I fed the PDF into (the tool I use for interposing the pages](https://momijizukamori.github.io/bookbinder-js) it stretched it vertically quite a bit. It was also showing some fairly large margins, which was unfortunate as those came from the original file. So keeping things "good enough" I threw it into an online PDF cropping tool, cropped it closer to what I'd need, and let it stretch the file a little.
I spent a good bit more time on the cover.
The original covers were also the wrong aspect ratio, but they had almost everything I needed.


I used them and a cover from one of the three sections the story was originally released in, to bash this together:

The cover, spine, text, and back cover were all made from DeCamp's own art, just re-arranged to fit this aspect ratio. From there, I followed the same process as before, but with much faster prints (no giant backgrounds) and no trimming the pages (no giant backgrounds) so that part was easy.
Fold, punch, sew, glue:

I took each signature (stack of four pages meant to fold together) and folded each page in half with the bone folder, being careful to make sure I knew which side was 'in'. Then I nested them together.
I made a guide to lay out the six holes in each signature, and used it to punch holes through the fold with the awl. Then I sewed them together following the Penrose Press Pretty Perfect Paperback Guide:


Once the book block was all tied together nice and neat, I clamped it and glued it with three coats of acid-free PVA glue.

My book clamping station certainly looks ragged enough to do the title characters proud.
While it was drying, I swung by the makerspace and printed the cover. I need to remember to oversize these by a few millimeters, because the first one is always a little small. Ah well, maybe I'll find someone with a bookbinder's guillotine someday.
I folded the cover and glued in the book block just like with the previous project.
I find it easiest to attach the cover in three steps, back, spine, front, but I'm sure real bookbinders have better systems. I start with a flat smear of glue down the inside of the back cover, right beside the bound edge and to set the book block down on it. Then I glue the spine with the book upright (this time I tried on top of the bone folder, which has a similar shape). Then I glue the front cover. I squirted some acid-free fabric glue down the spine and used a paperclip to work it further down, to where it hadn't stuck, and then held it in place by hand for a bit to get a closer fit. I like this stuff, it bonds well and it seems to set much faster than the PVA. This time I also used it to glue the bound edge of the front of the book block to the inside of the cover too, so we'll see how that works out.
The results:


Cover size aside, I'm pretty pleased with it. If ever there was a book to glue into its cover the wrong way around, this would be it, but I got that right this time. I'm glad to be able to read it properly, and to finally be able to put it on my shelf.
#DIY #bookbinding
The image shows a capped pipe with some assorted valves sticking out over water. Someone has drawn a >:3 face onto a small round part sticking up from the top.

40
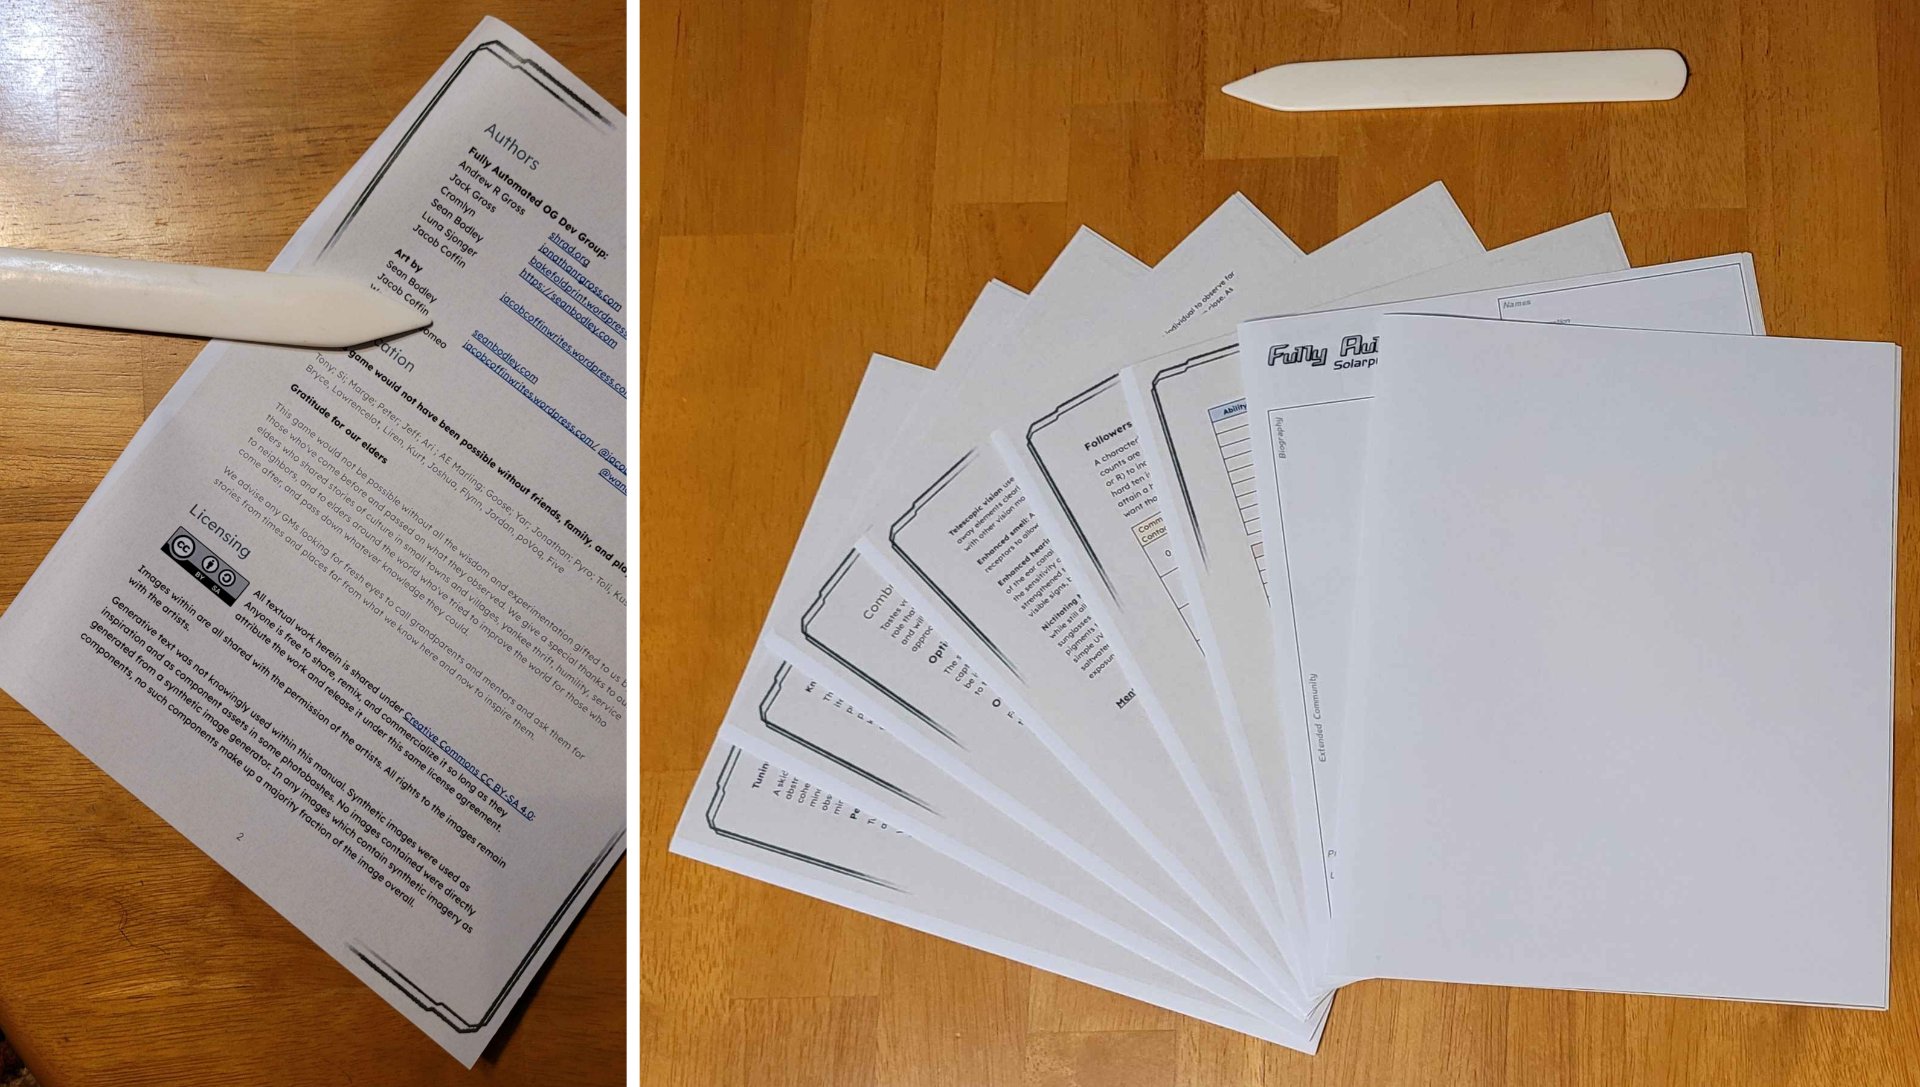
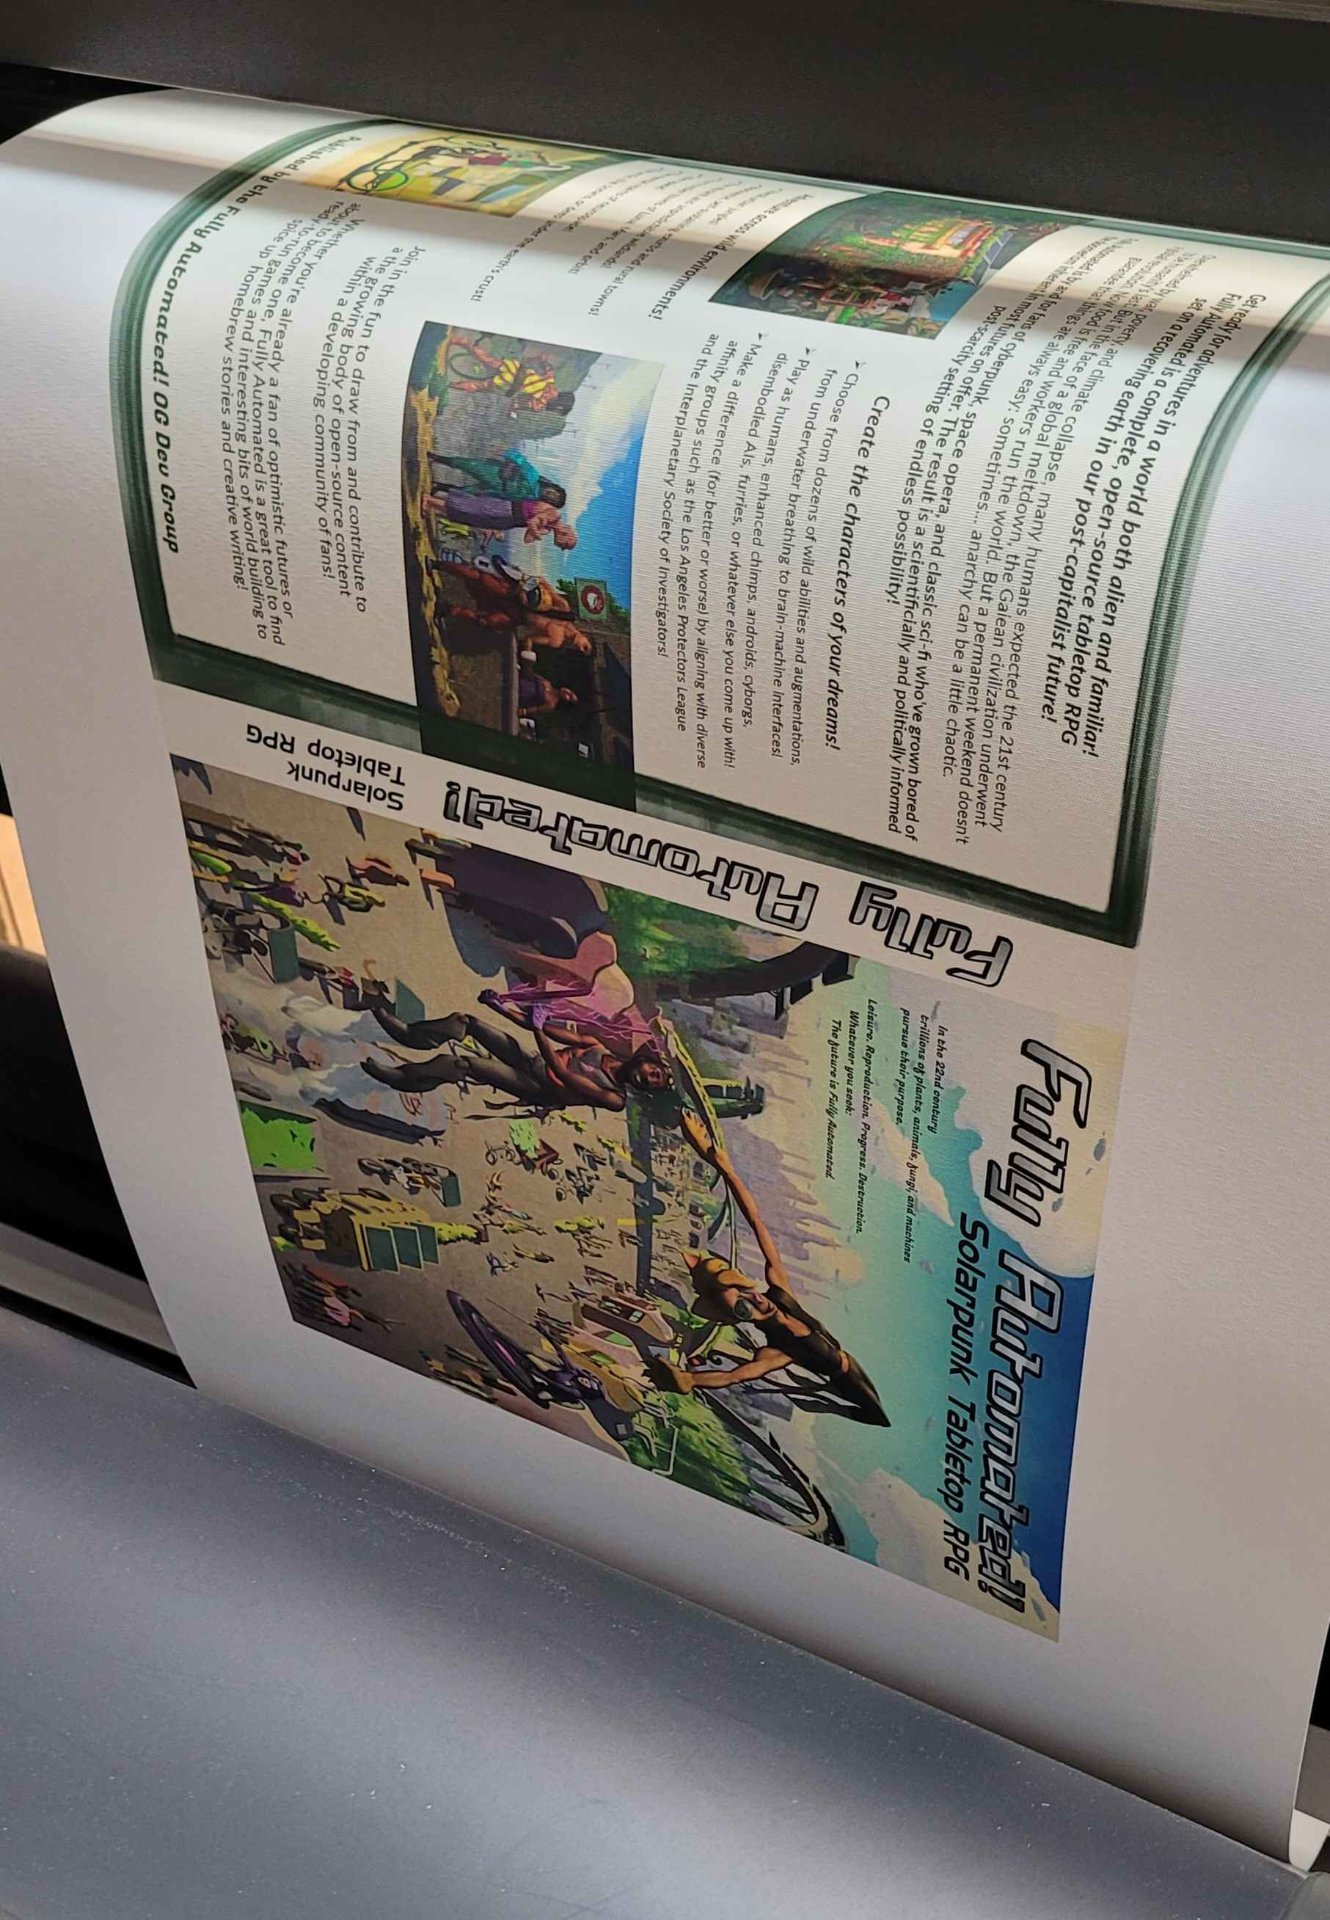
I recently started trying to learn bookbinding (and because I never liked practicing by making something I didn't need, I'm starting with a 266-page solarpunk TTRPG rulebook I helped make).
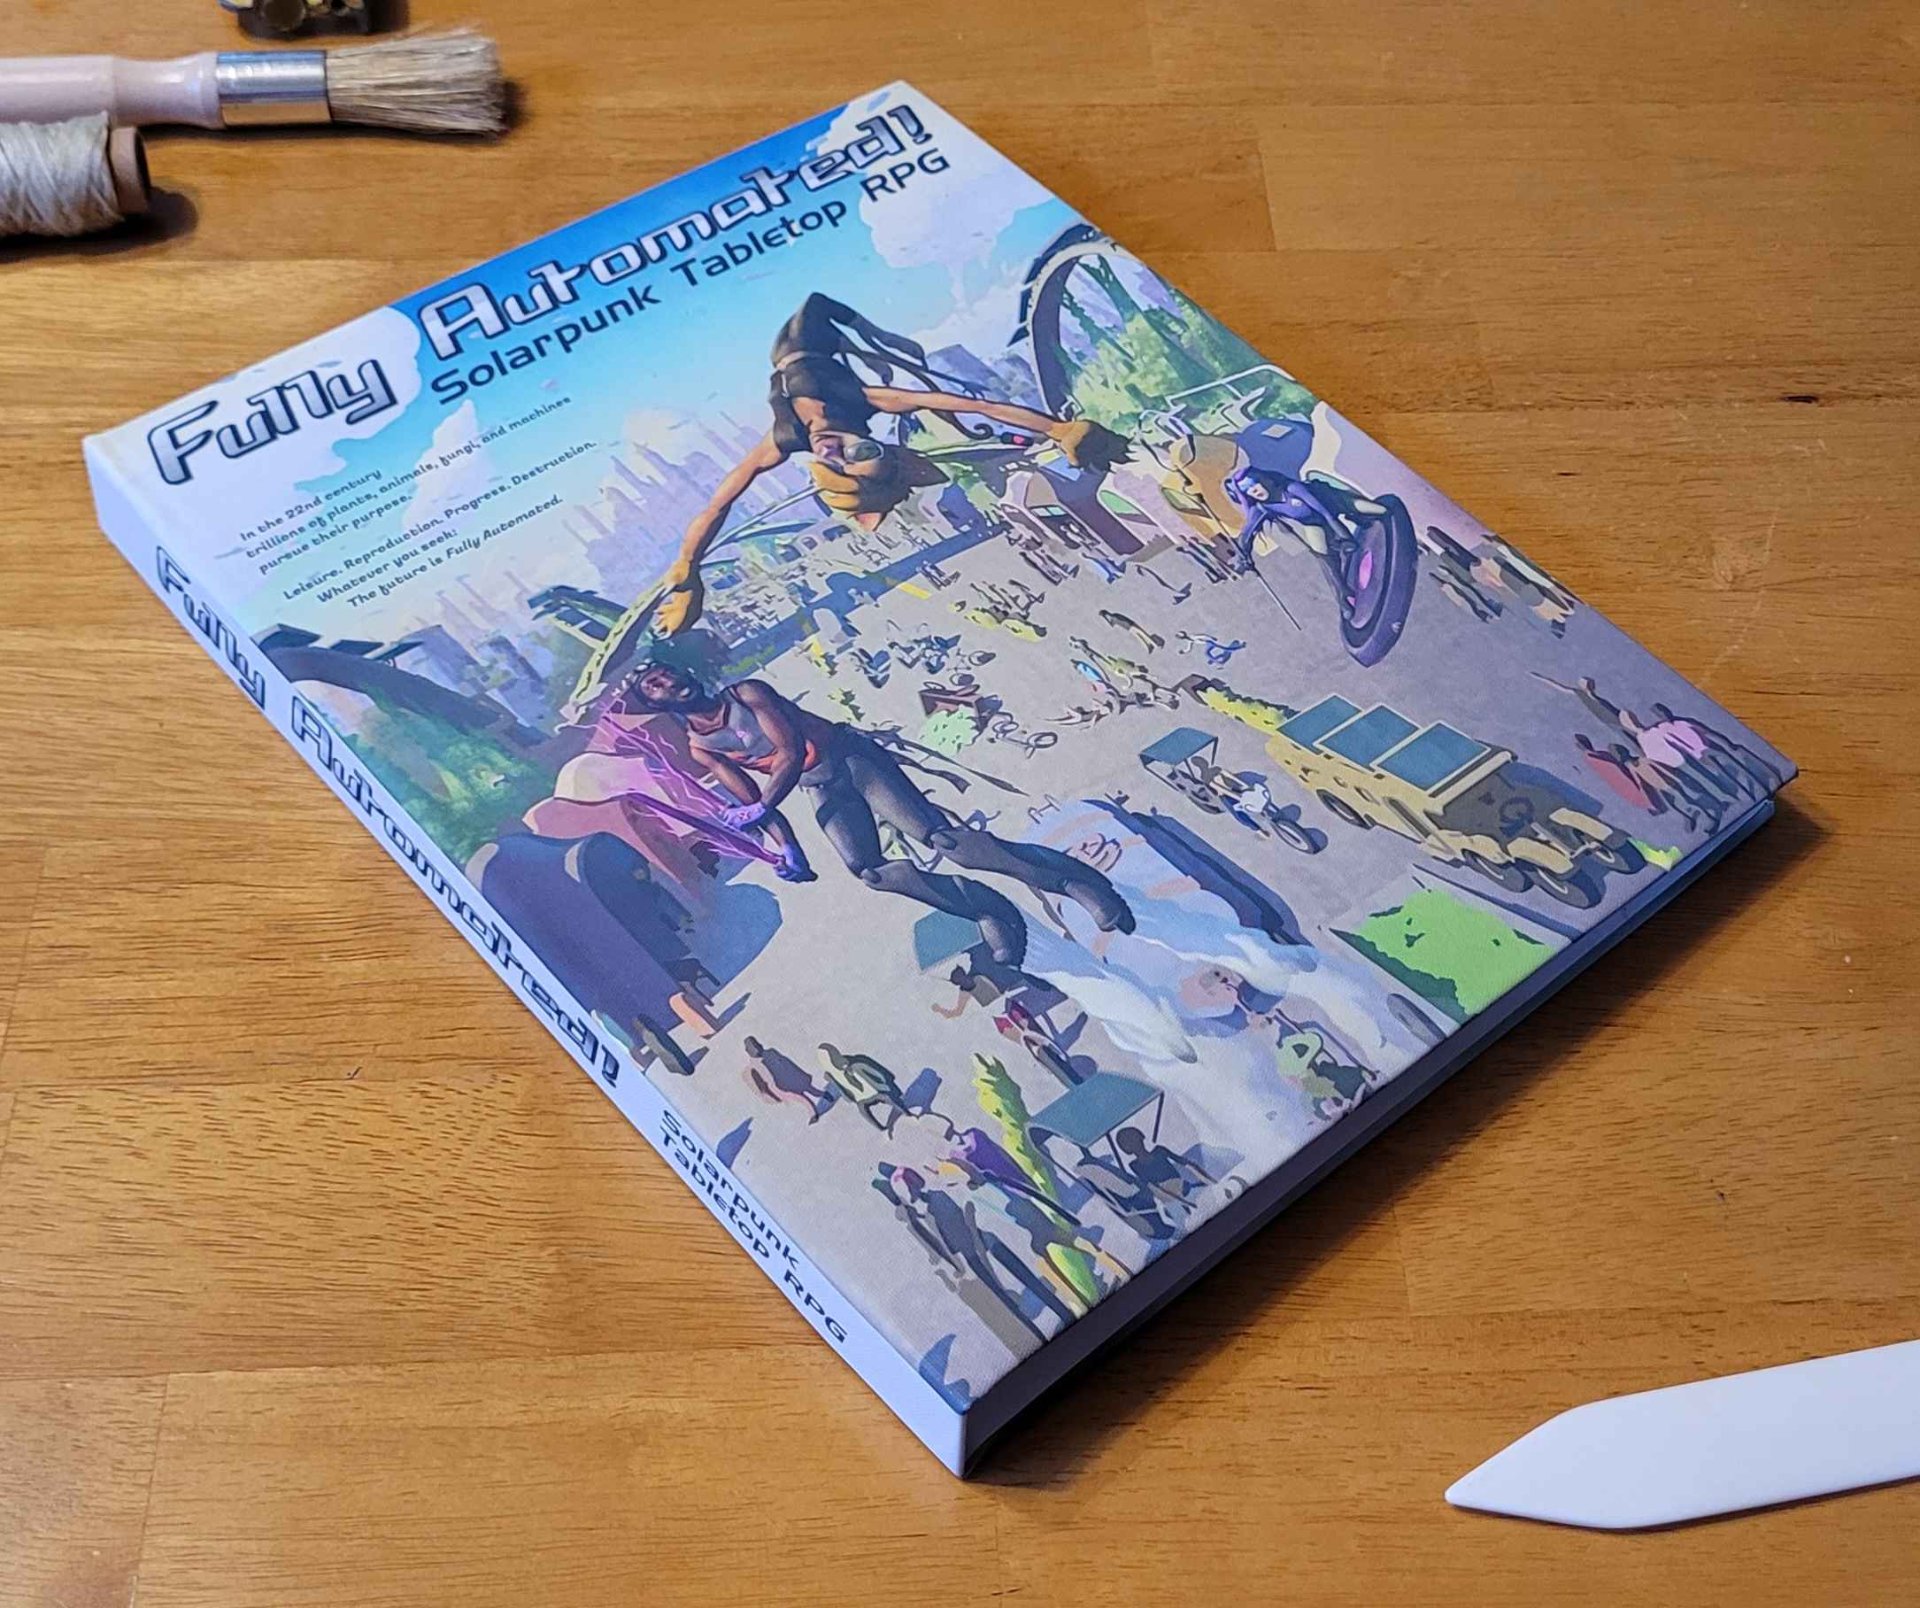
I joined the Fully Automated discord a while back, mostly because I was looking for a place to talk worldbuilding in the genre. I read the lore/setting part of the rulebook and it actually helped me start thinking bigger than I had been around ways the world could be better. If there's a solarpunk timeline from our modern day, through conflicts and crumbles and collapses, gradually rebuilding towards something eutopian, then they're much closer to that high-tech, post-scarcity end-state than the solarpunk stuff I normally write. But there's something kind of fascinating about that world, and it makes for a great place to tell stories.
I offered them the use of the art I'd already made, and then I got involved in writing and editing the lore, including contributing a couple sections around rural areas and reuse, which, true to form, they expanded into something bigger than I had come up with on my own.
Since the game is an open source, all-volunteers thing, we didn't do a print run, just released a series of PDFs. But I have free access to a printer that can do 11x17, a plotter printer that can print on canvas, my SO's unused bookbinding kit, and enough patience to learn to bind at least a few copies, so I decided to give it a try.
The first step was rearranging the pages into signatures. These are small pamphlets of folded papers that get sewn and glued together to form the book. This turned out to be way easier to do than I expected, as there are several online tools for interposing PDFs. I found and really like this one: https://momijizukamori.github.io/bookbinder-js/
This allowed me to take the regular letter-sized (8.5"x11") PDF and rearrange it into signatures of four or five 11"x17" pages, with two pages per side. It handled reordering the pages so they work correctly once the signature is folded together and stacked with the others. We also took these interposed files and made them available on the FA! website.
Once I had the interposed version, I could print off the signatures:
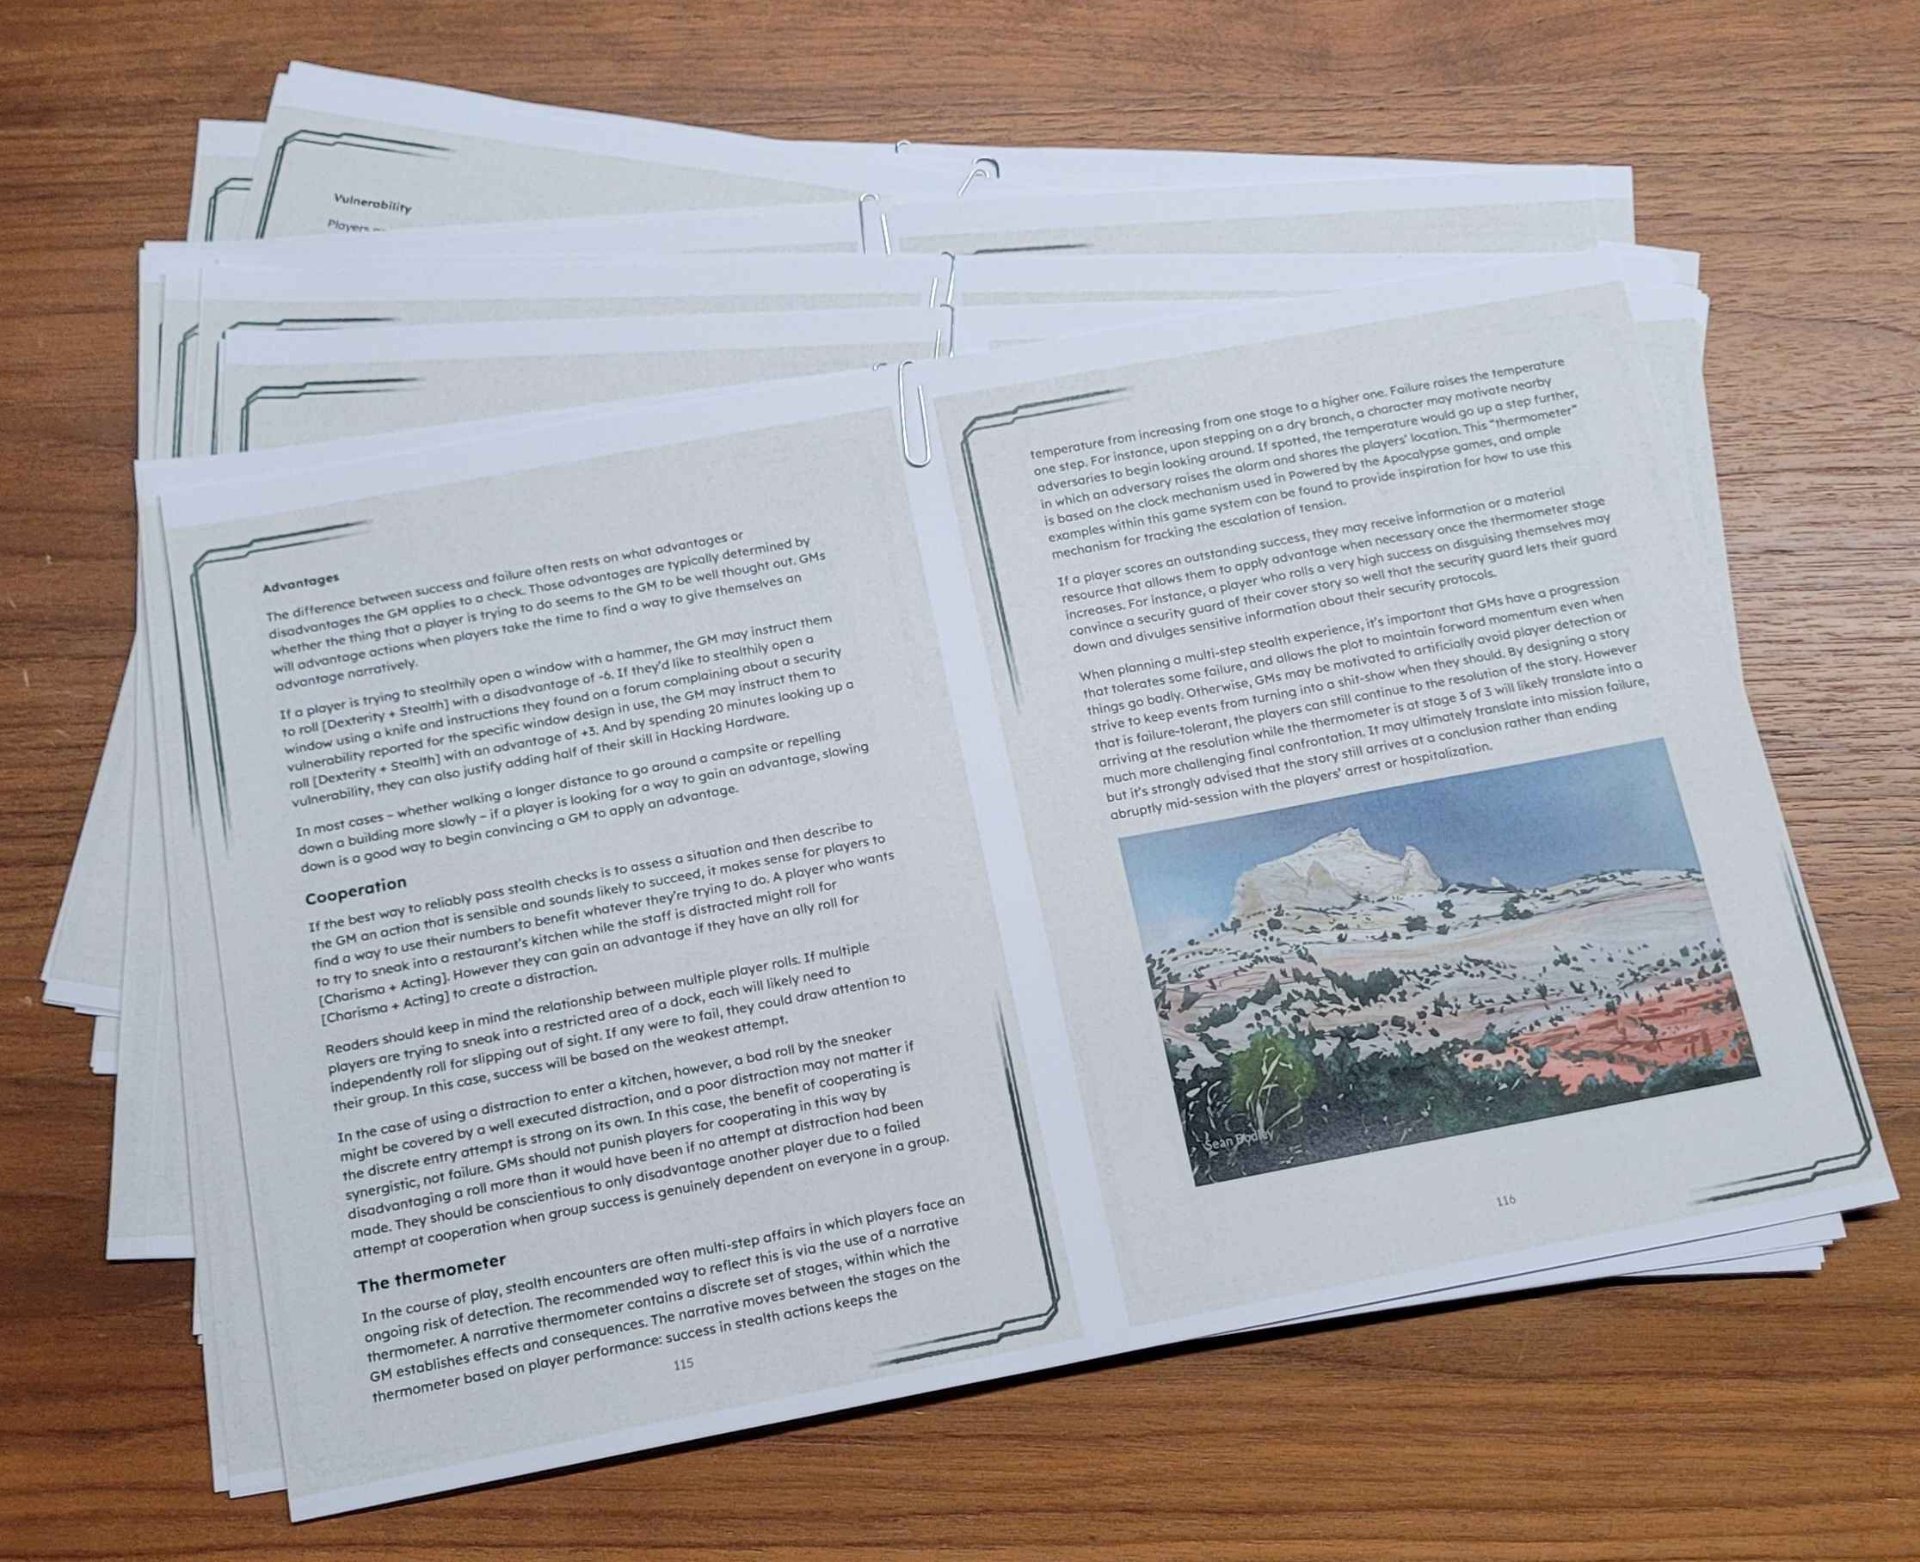
I really recommend printing each signature separately so you can paperclip them together and keep careful track of which pages are inside it. It's really, really easy to completely lose the plot on the numbering - I almost couldn't figure out how to put a four-page signature back in order once or twice, if it had been mixed with other ones I'd have been really confused. But it's easy as long as you keep them in their sets and remember which side is up (because its the only sheet/side where two page numbers show in order).
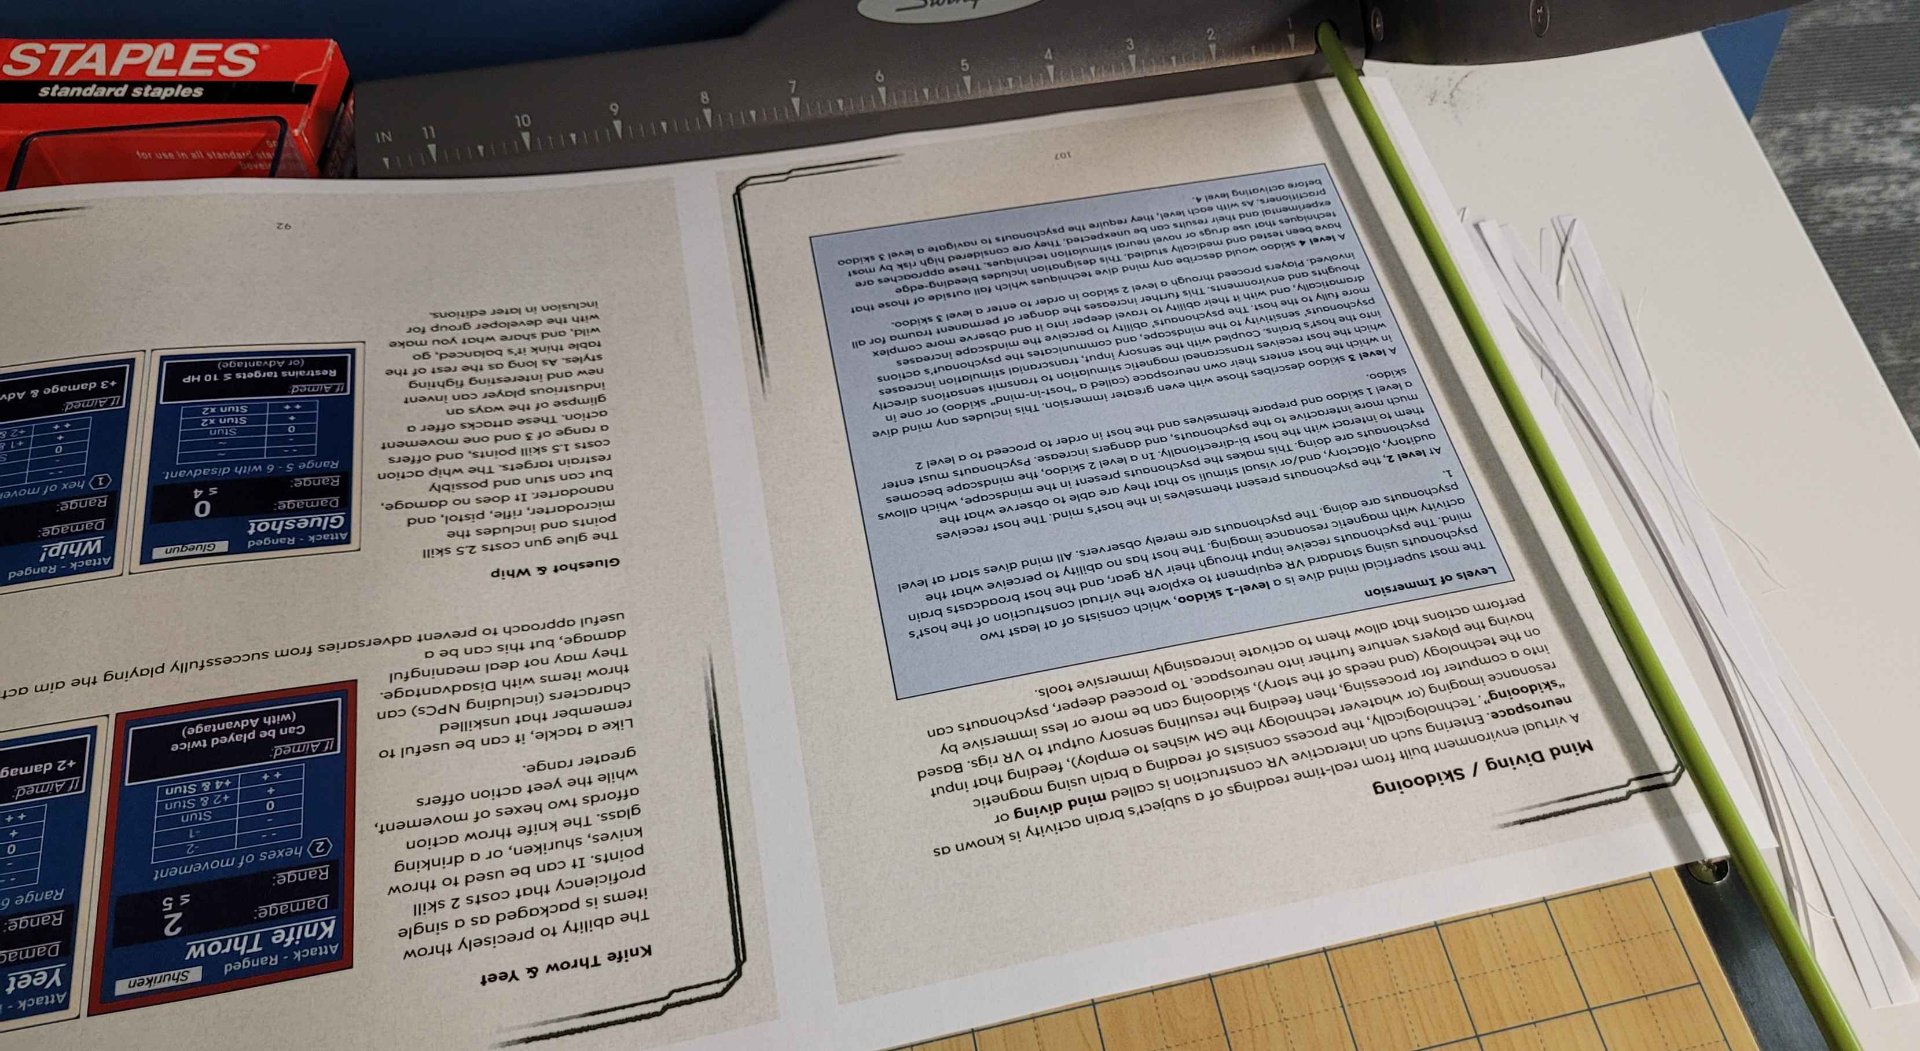
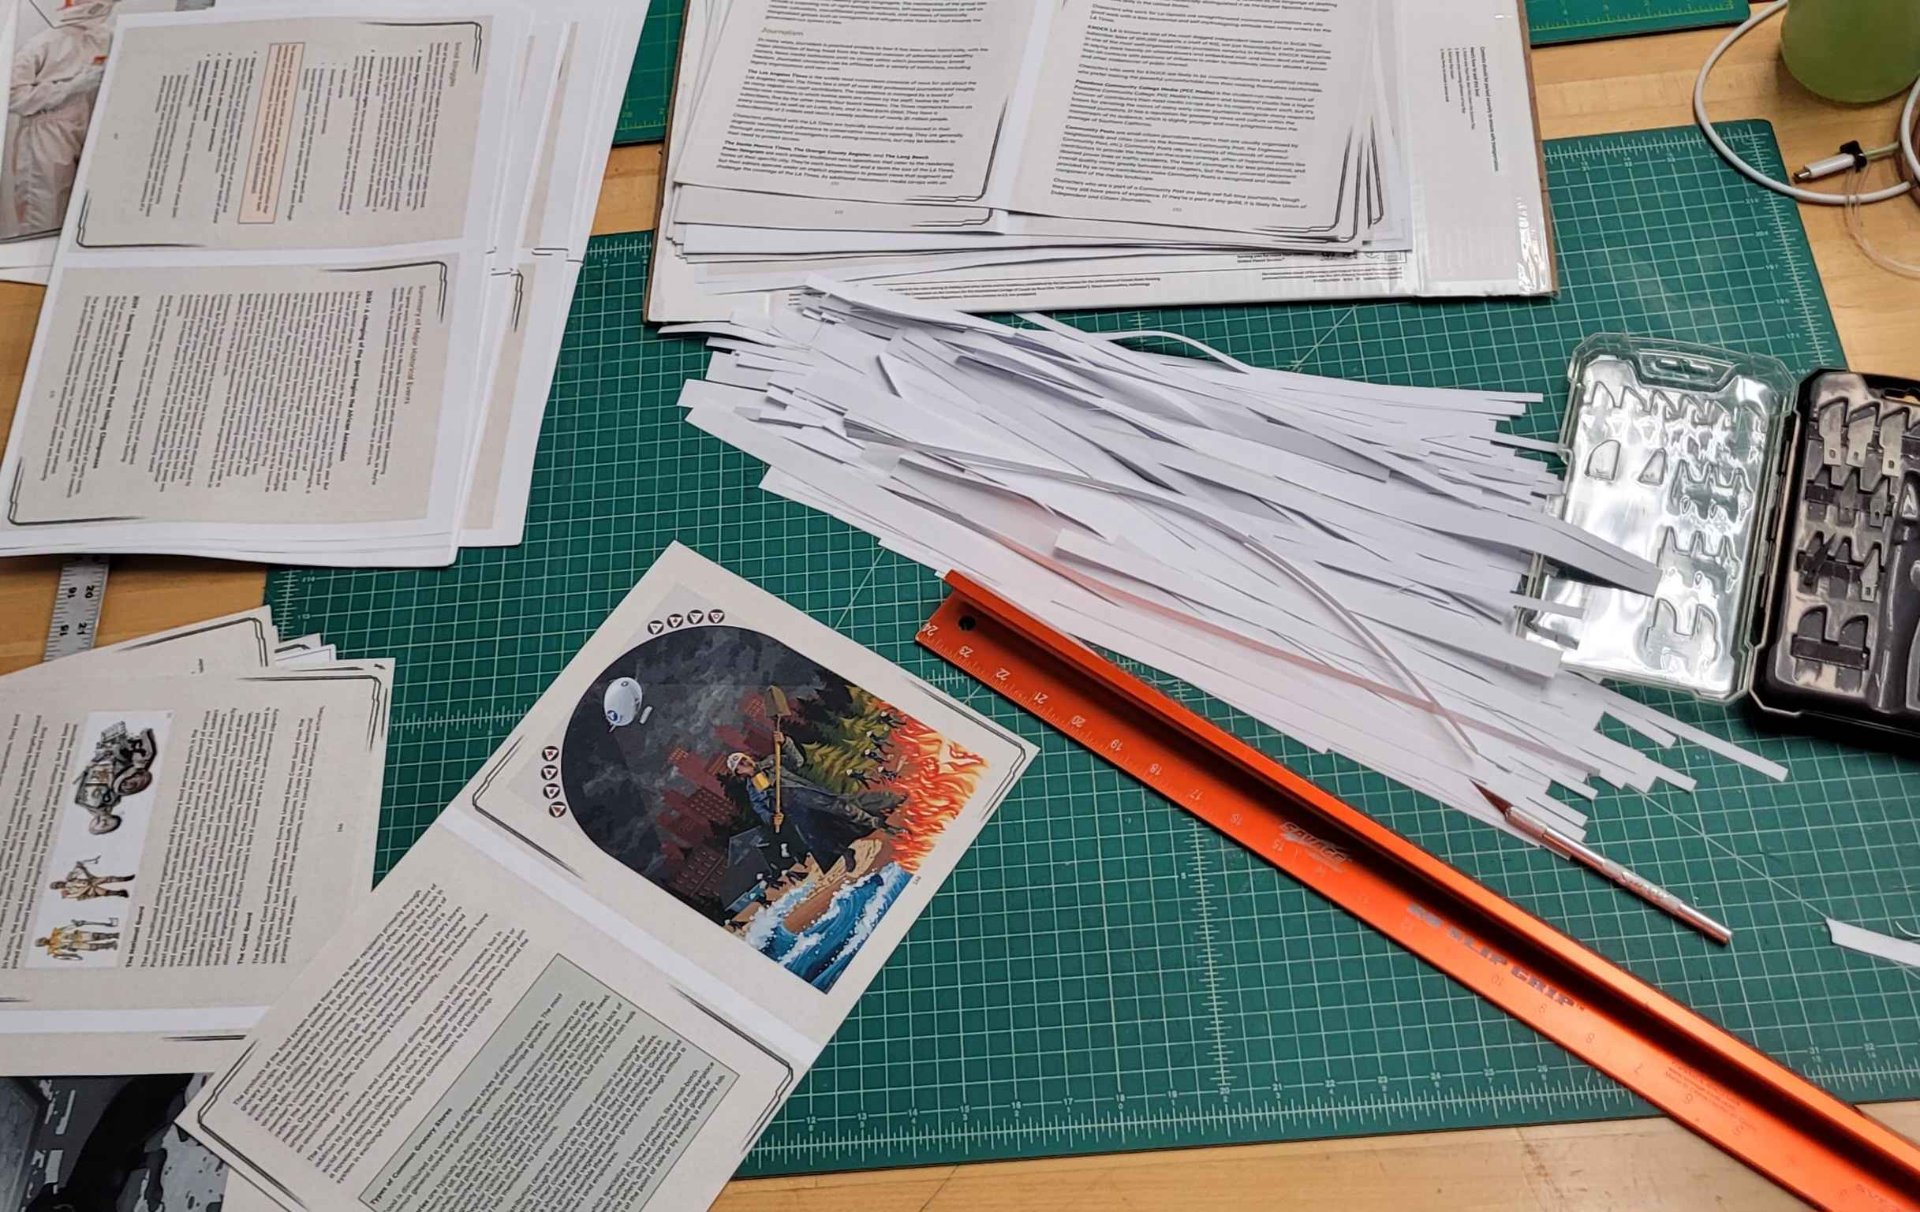
The free printer I had access to couldn't print without leaving a margin so I had to trim them by hand. I started off using a papercutter on the short sides, but eventually switched to using a straightedge and scalpel on all the sides.
The next step was folding the signatures folio-style using a bone folder:
And then punching holes so I could sew them together. Some guides have you sew each signature separately, then sew those together, but the one I followed (and recommend) does them all at once.
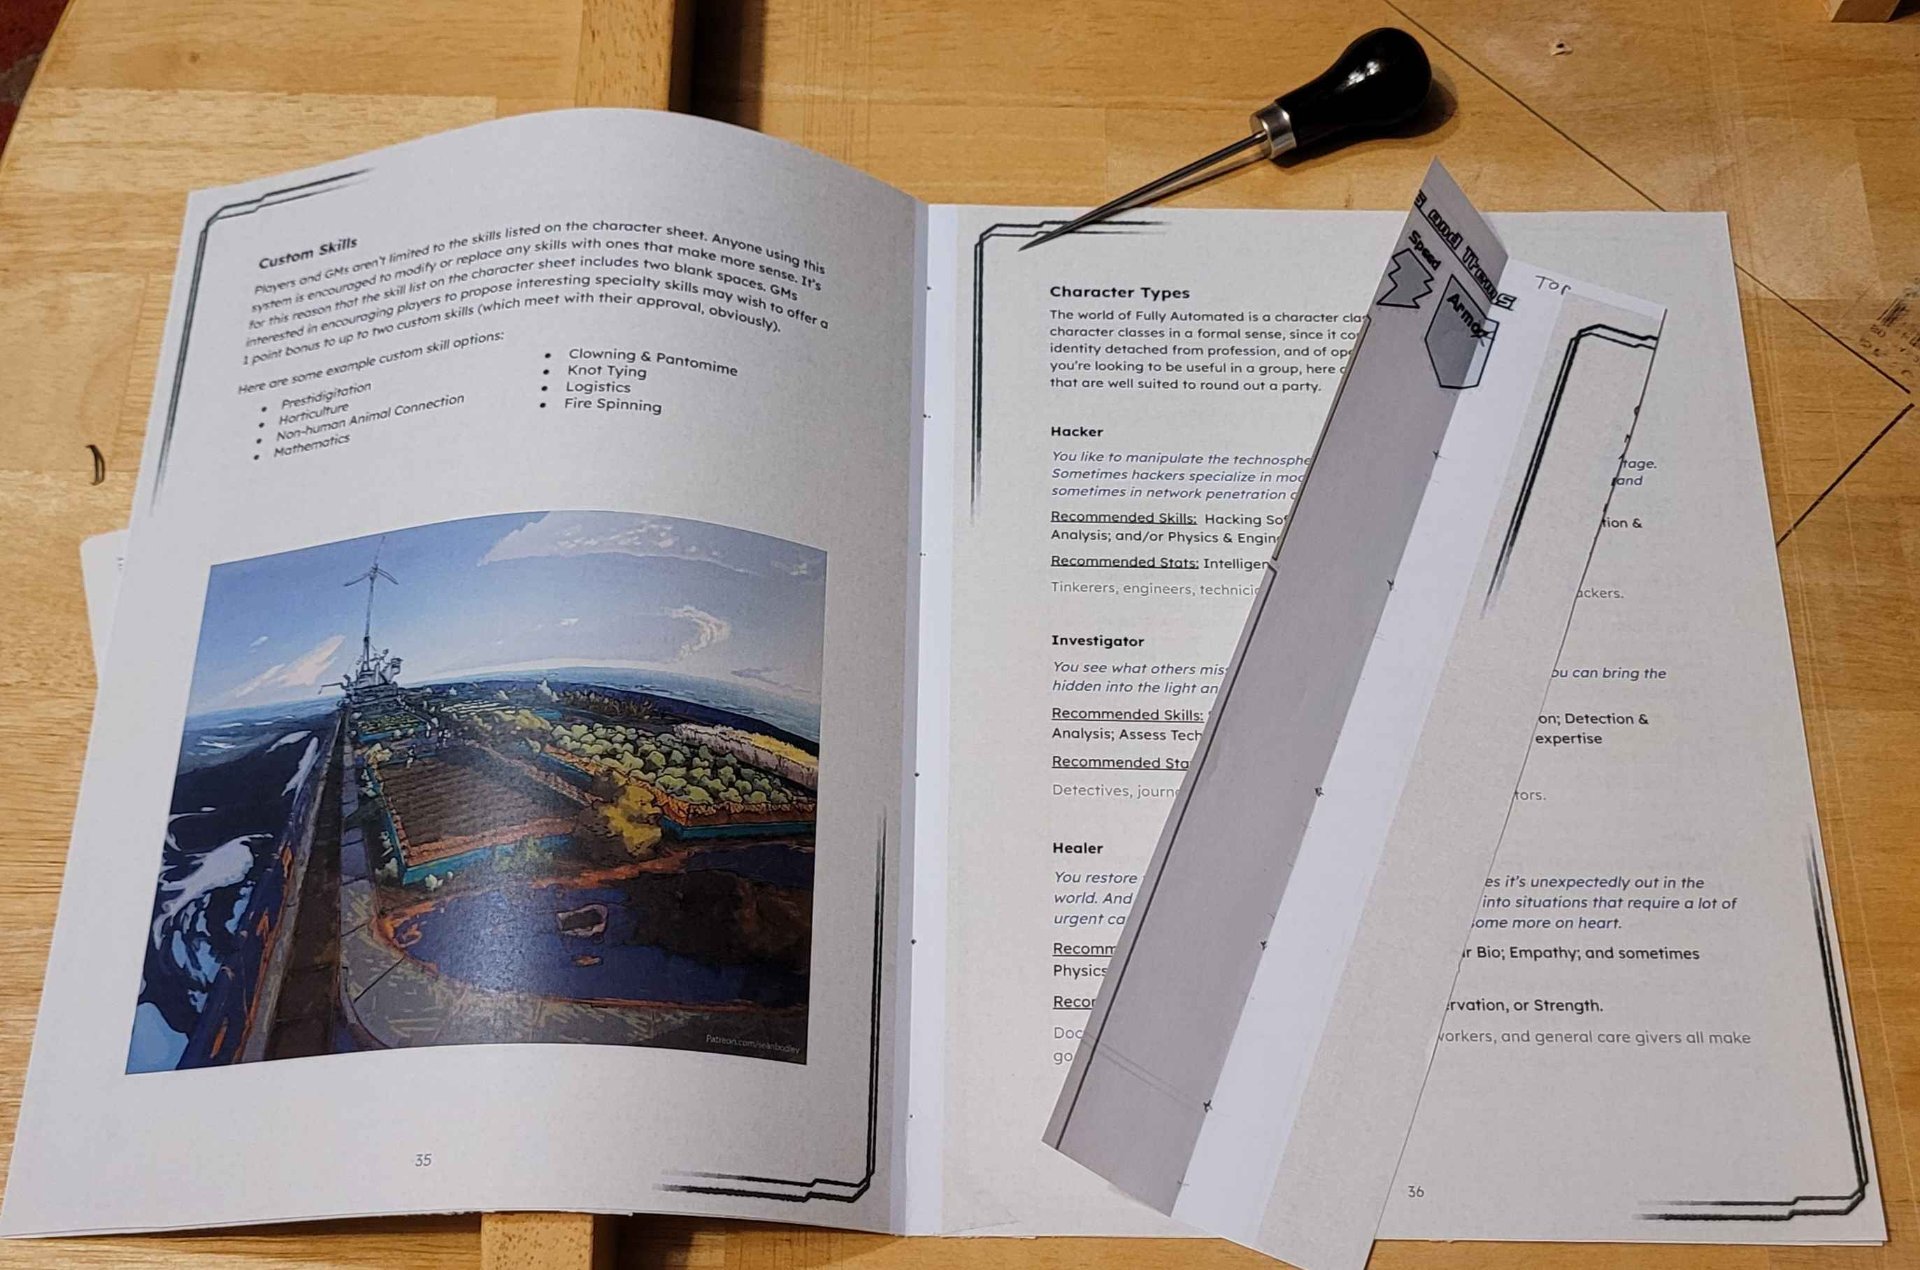
The folded piece of paper is a template marked and punched so all the holes in all the signatures line up as closely as possible.
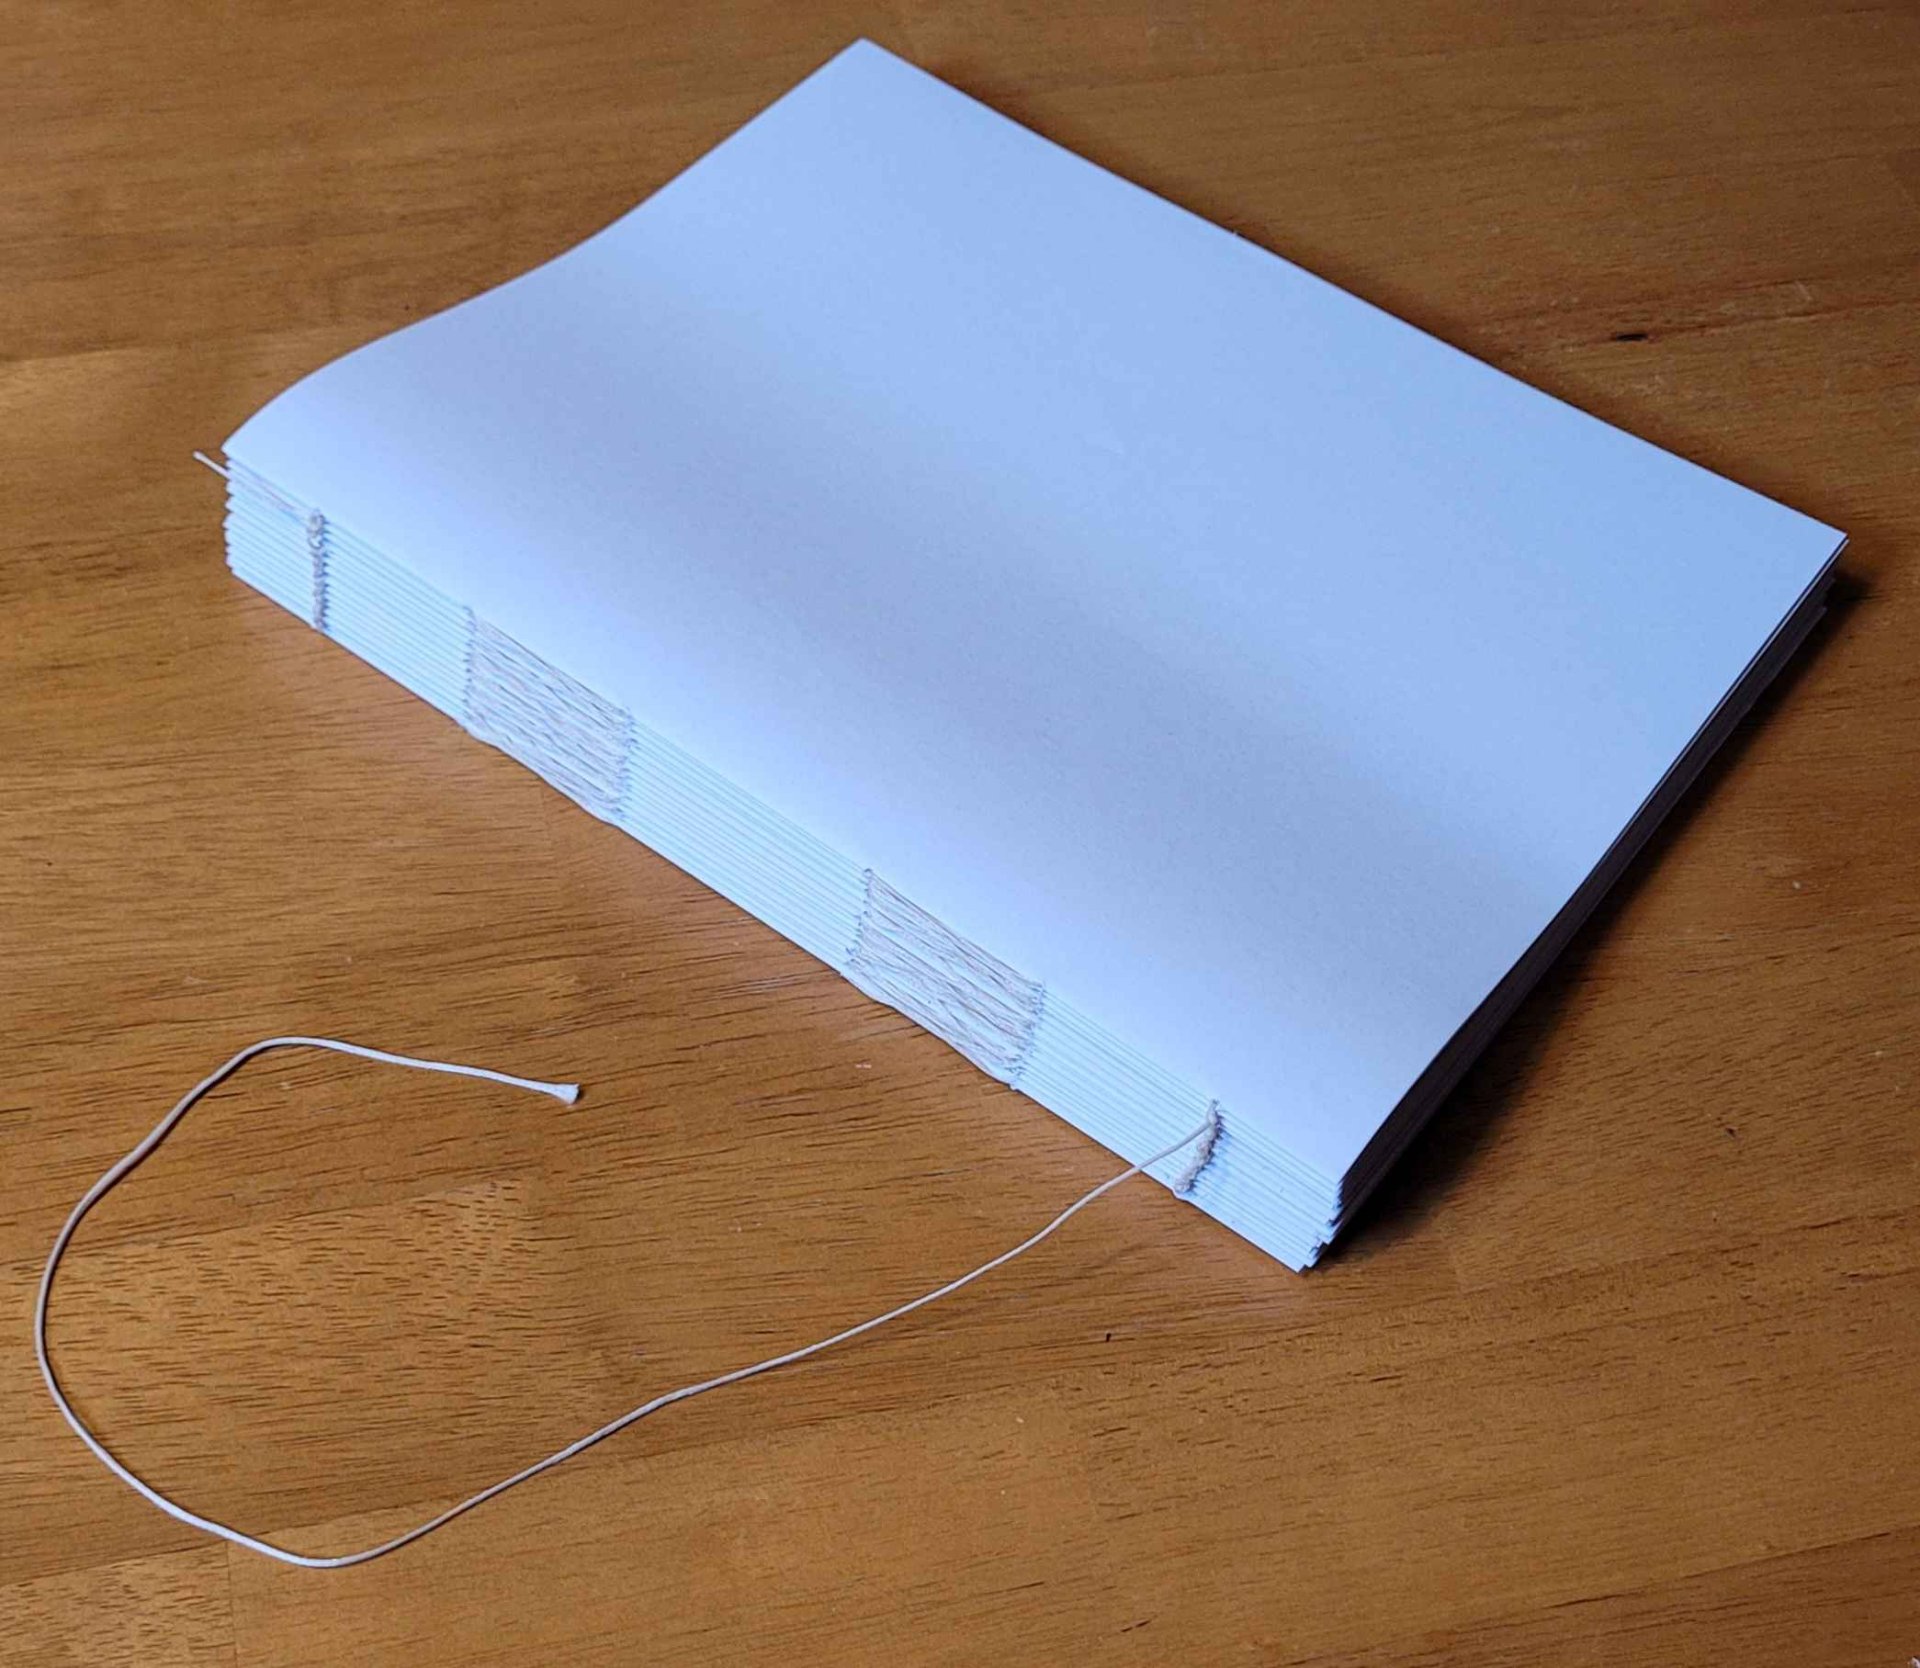
Next, I sewed it together using the Penrose Press guide, being careful to pull the threat as tight as I could before tying it off on each signature. I really like how secure this seems to make the binding.
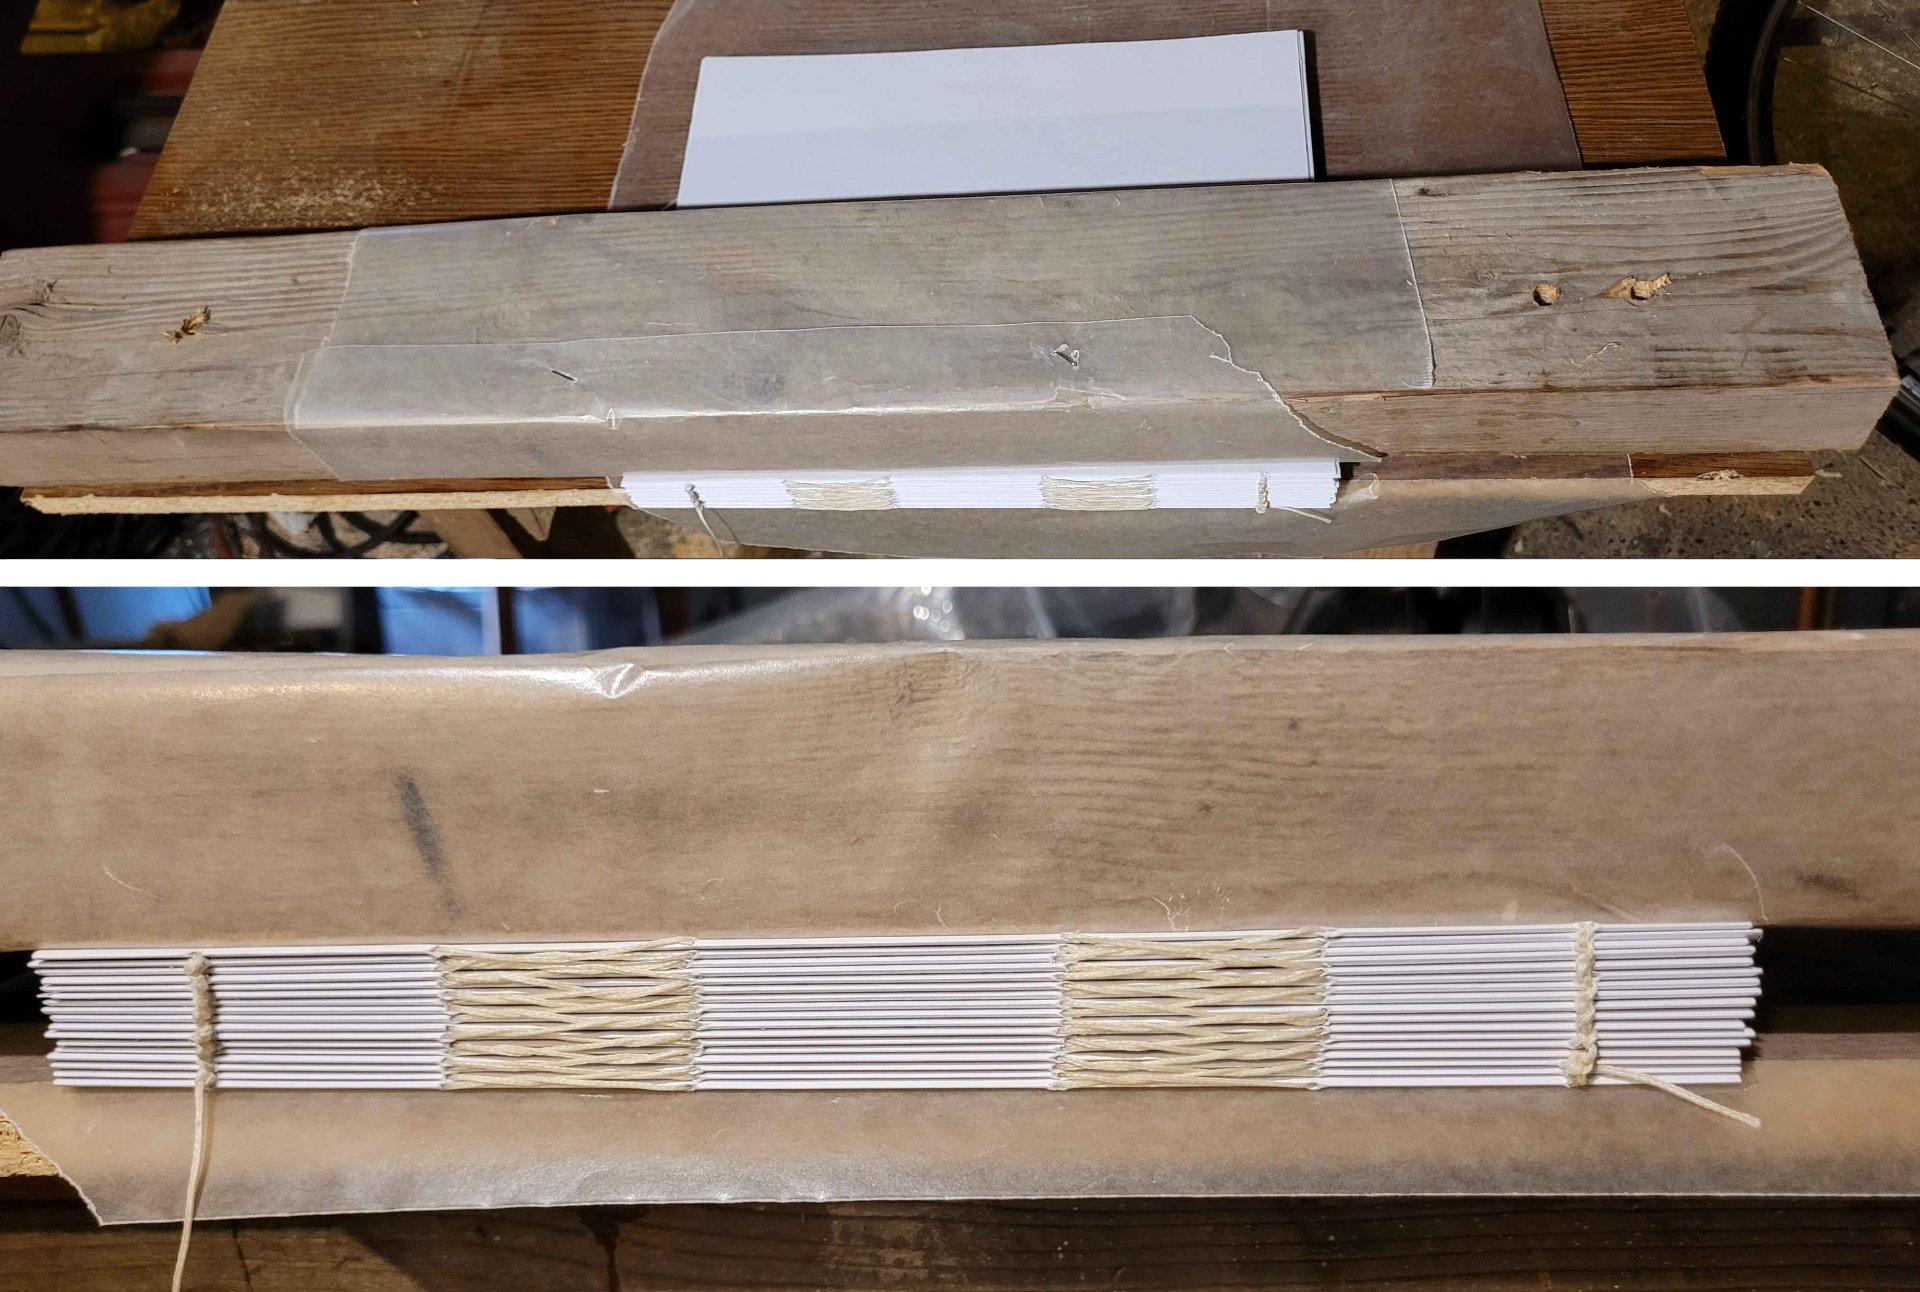
Even if you tie it tight though, it'll still have some gaps. That's were clamping and gluing it helps! The guides I followed suggested just stacking books for weight at this part, but I went ahead and built a really ugly book press with a piece of scrap particleboard, scrap 2"x4", some wax paper, and a couple deck screws. I pre-drilled the holes, wrapped the boards in the wax paper, and screwed them together so the book block could be clamped between them:
That's when scope-creep hit and I switched plans from making this first copy a softcover book to making a hardcover.

I followed my SO's bookbinding book, and this guide for the spine, and added a section of cheesecloth (in place of mull, which I didn't have) and manila paper in roughly the dimensions they specified. These help hold the spine together and attach it to the cover (called the case).
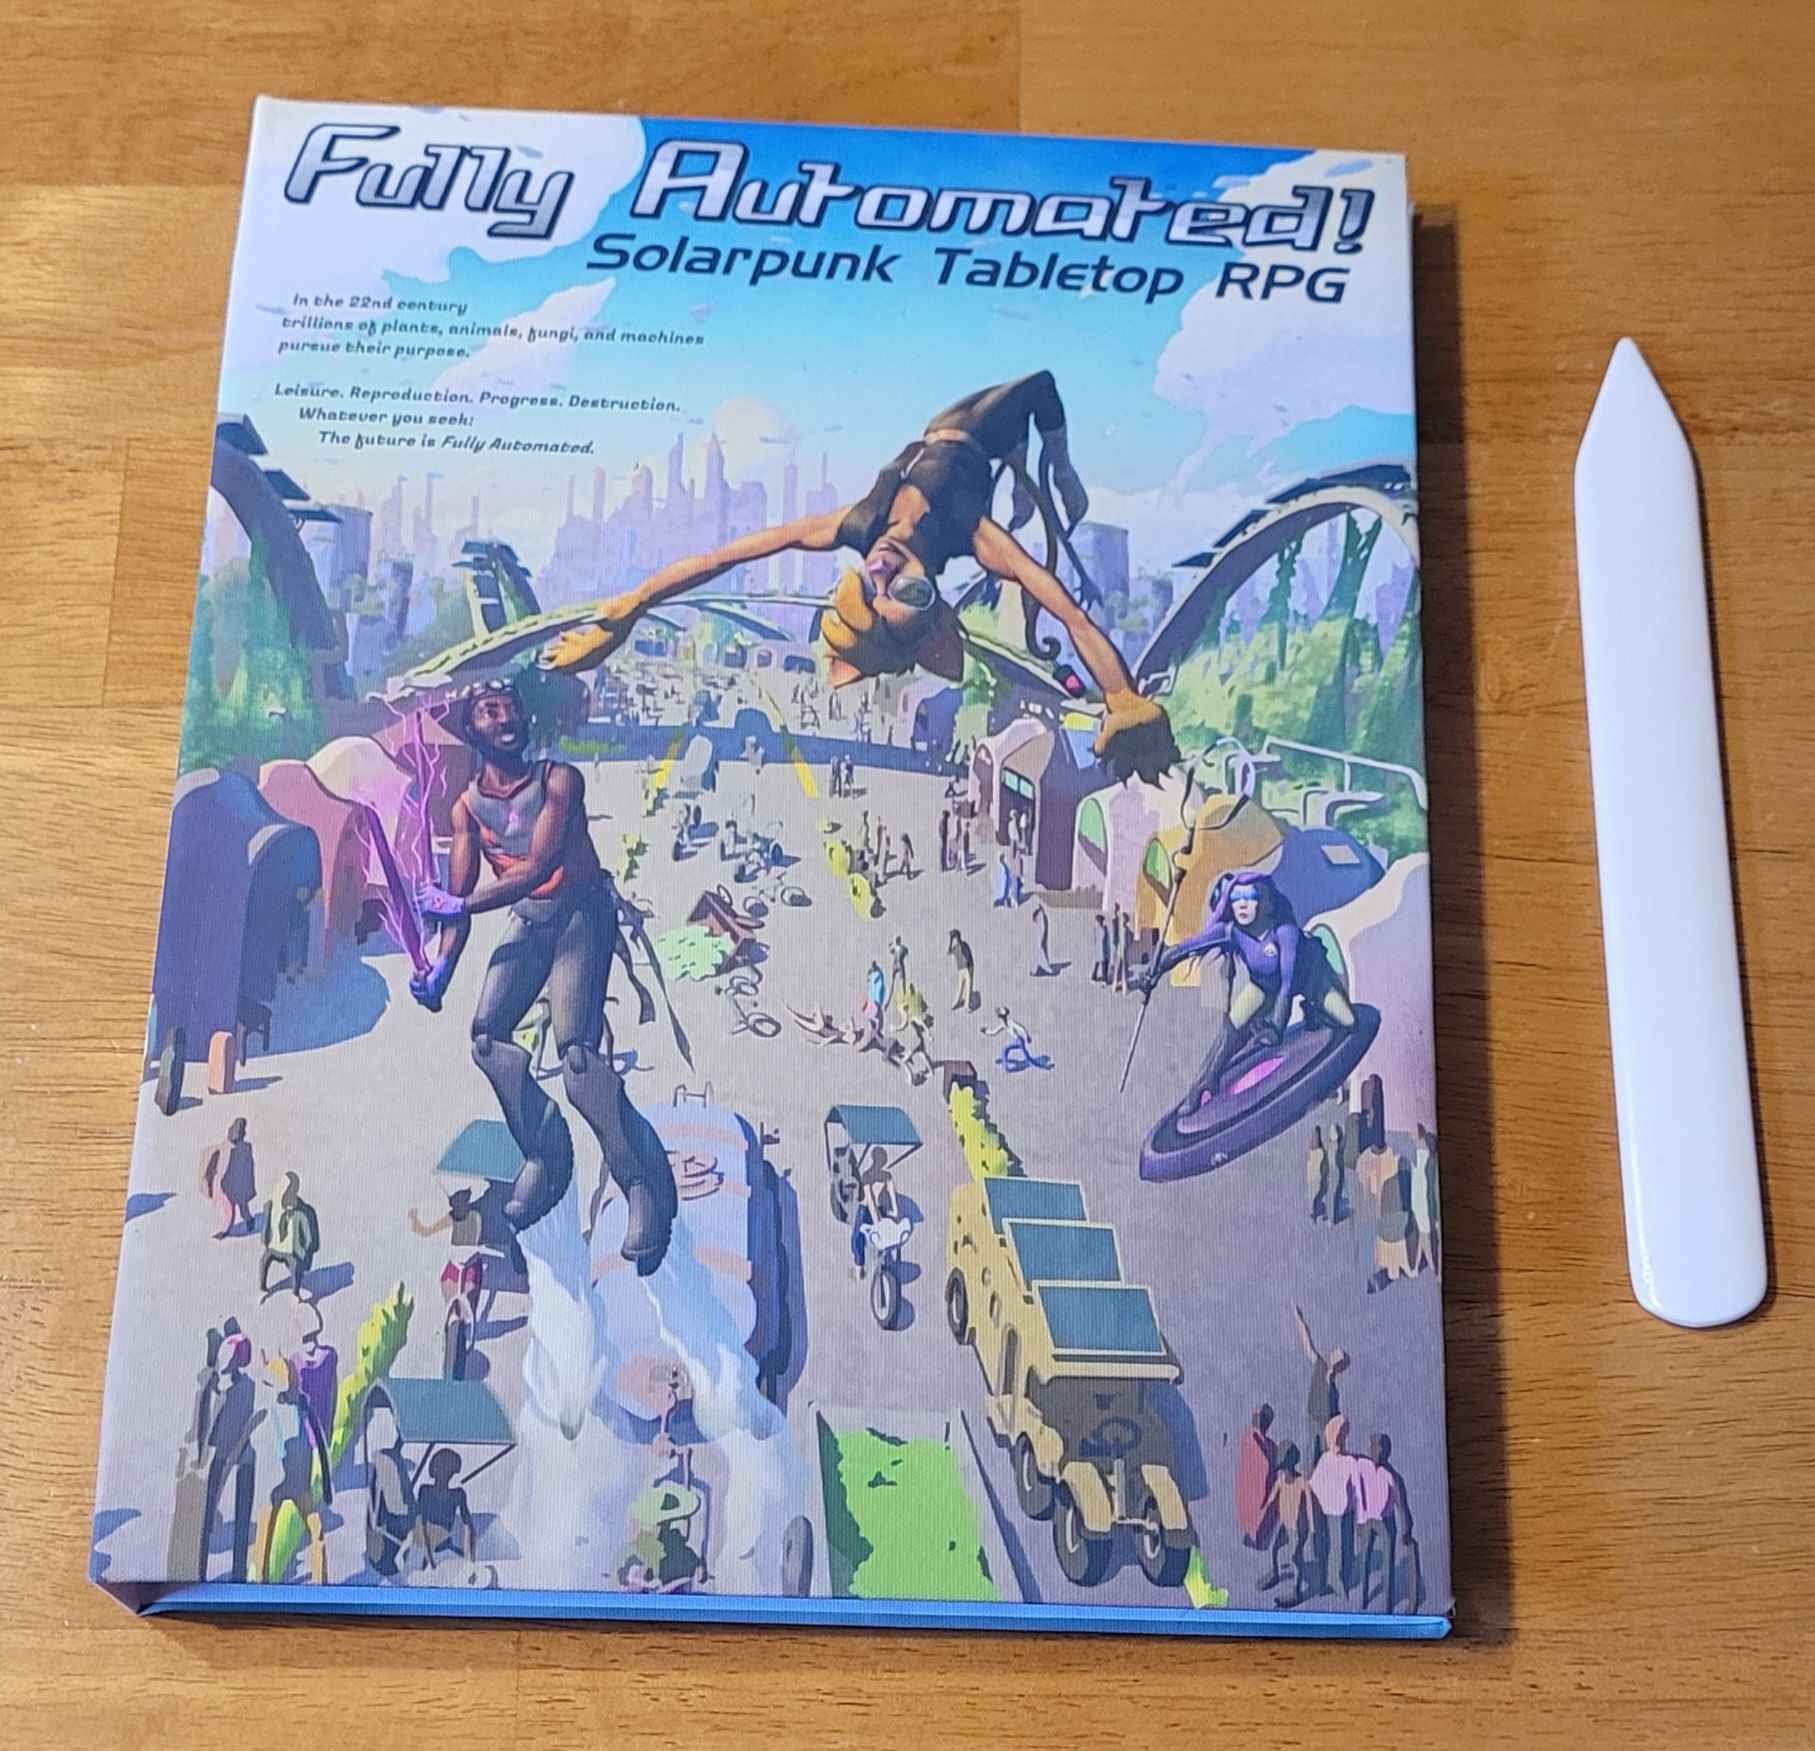
Next, I roped the Fully Automated folks into making a back cover for me, and I put together a printable version with a spine and everything. I took a lot of measurements, made my best guess, then went to our local makerspace to print it on their plotter printer:
It's slightly large but I'm happy with it!
The next steps came pretty much entirely from this guide.
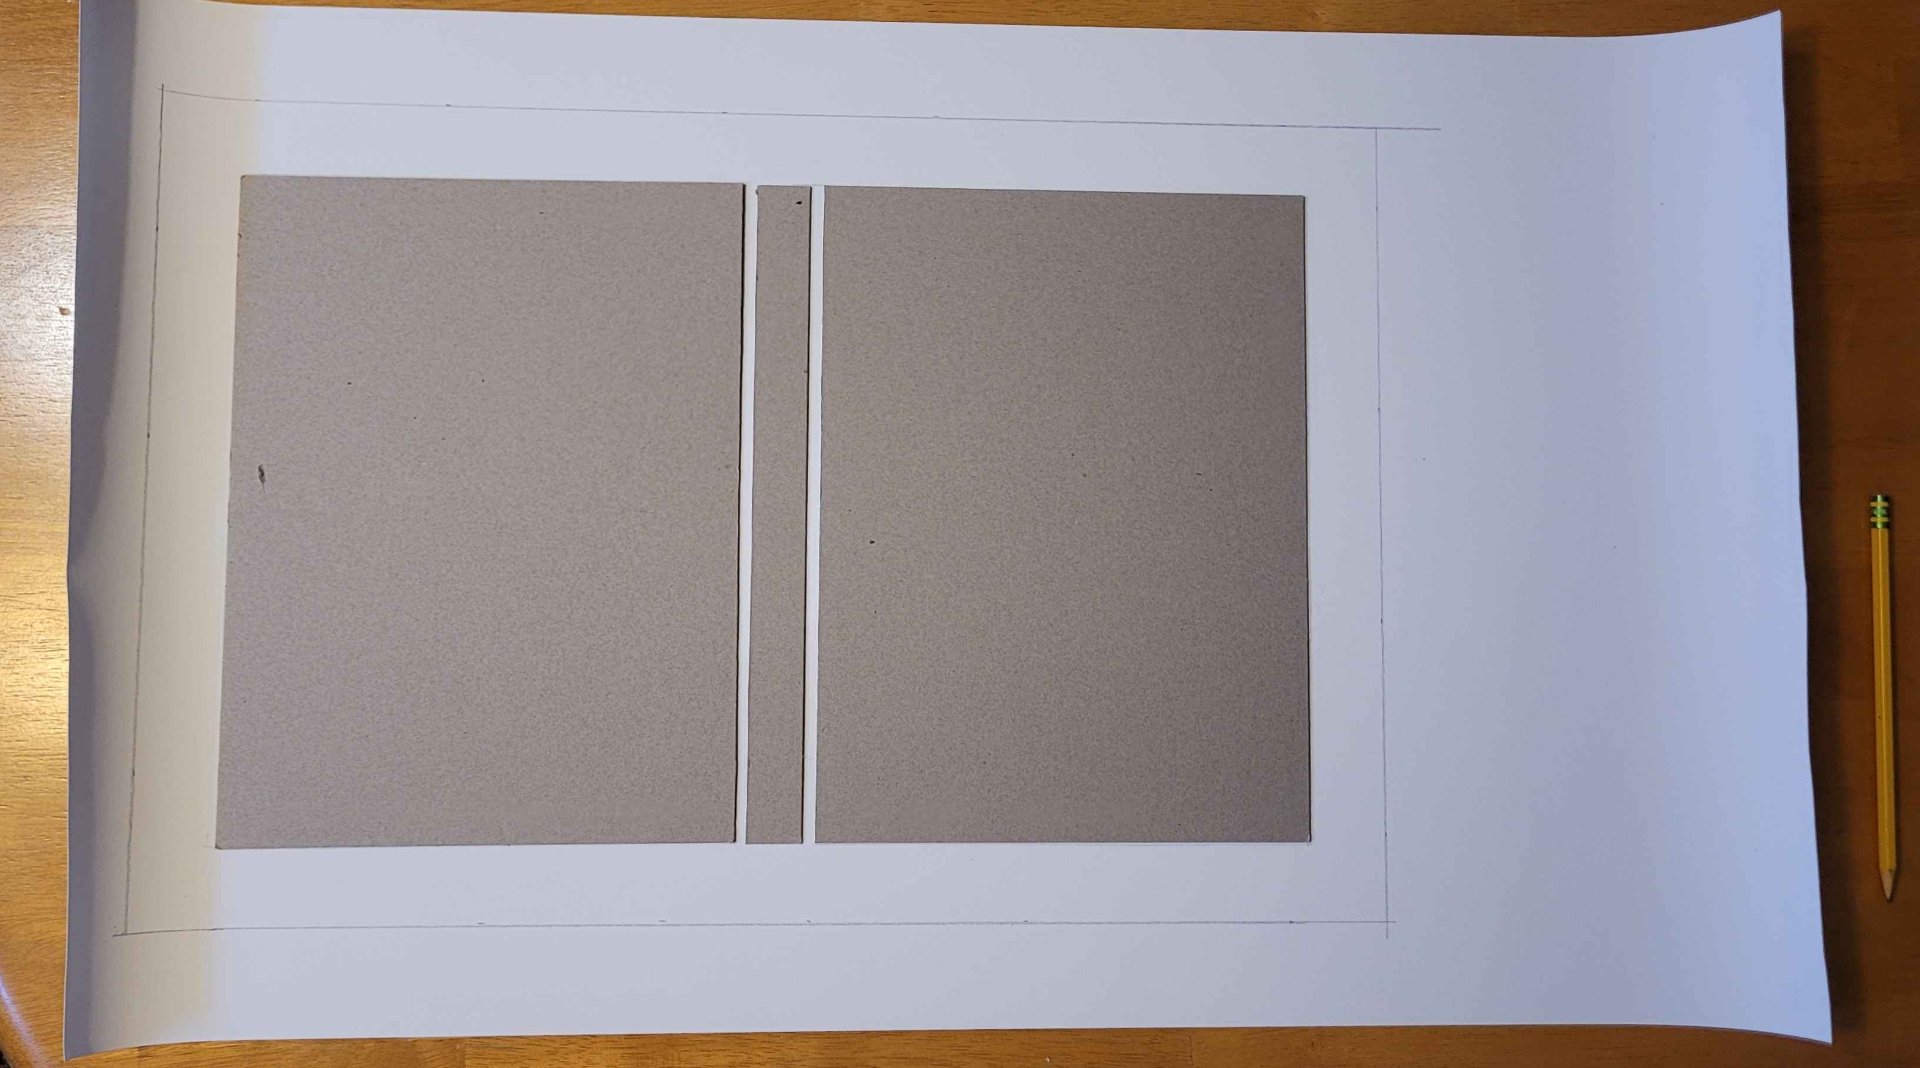
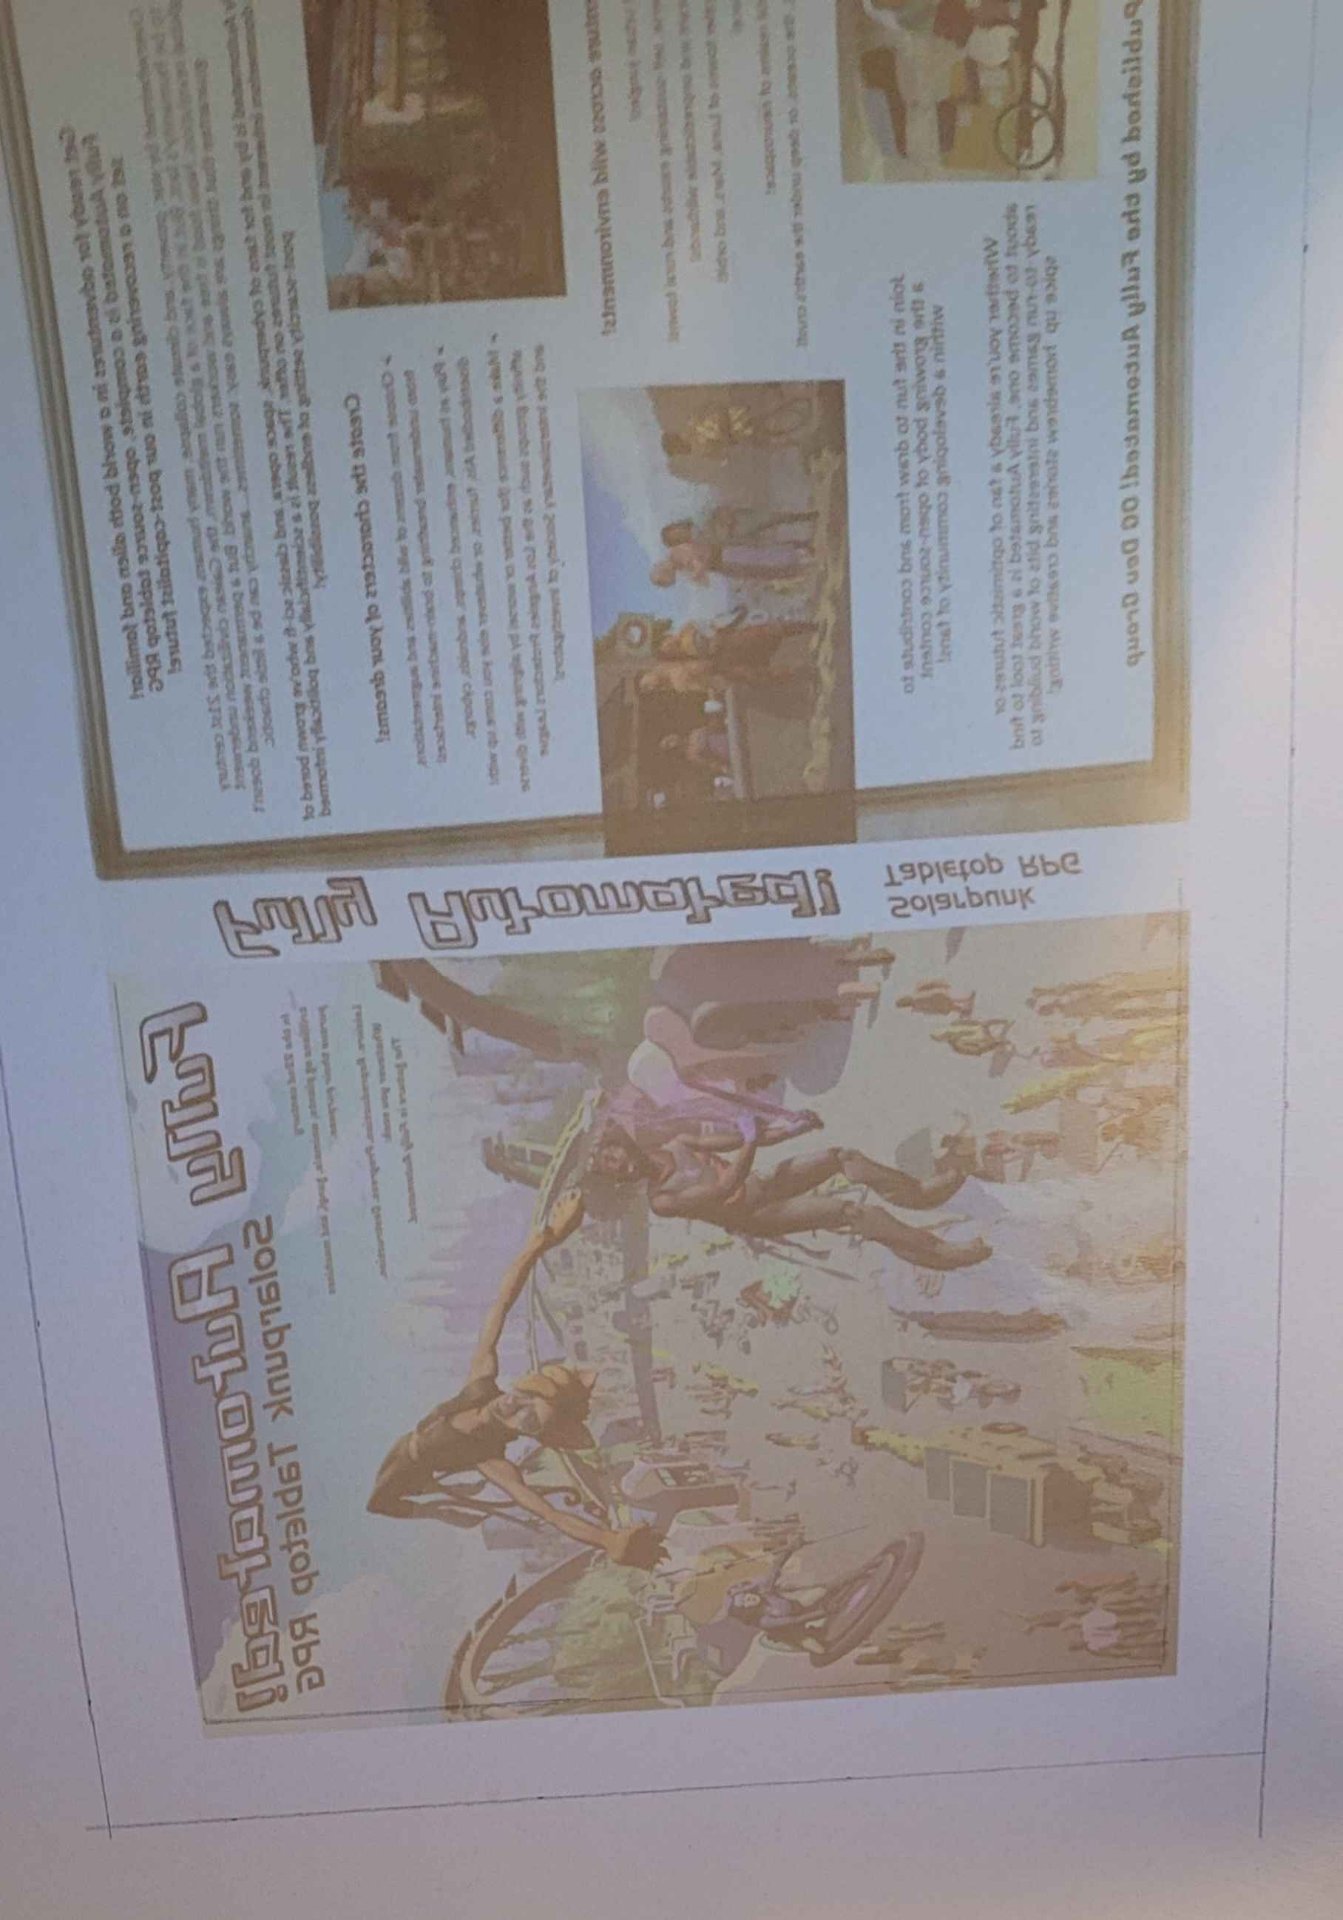
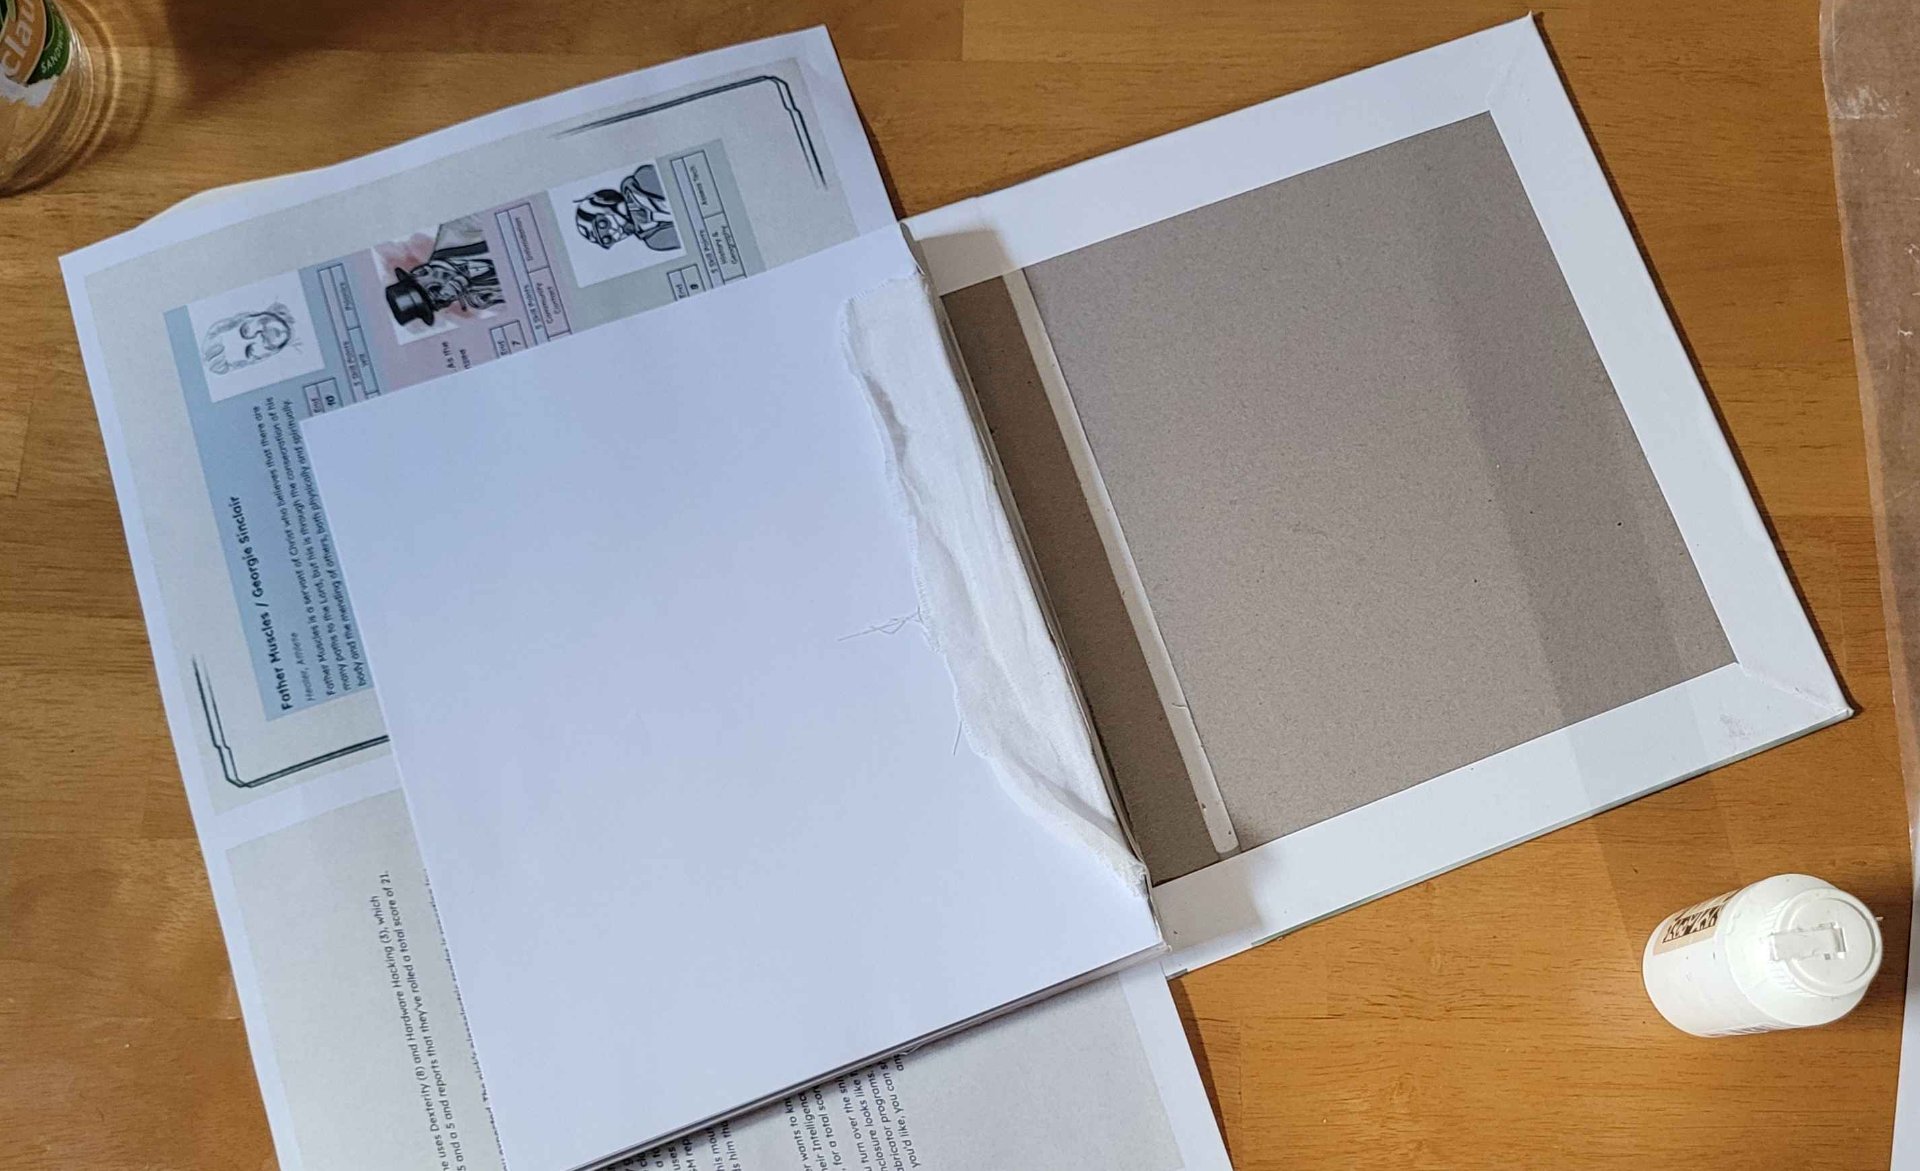
I cut some bookboard (stiff cardboard) to size, and did my best to line it up with the image showing through the canvas. Once I had them in place, I traced them lightly onto the back of the canvas in pencil, held it up to the light to see if it was good, and made corrections until I had good lines. Then I measured out to the edges of the sheet and trimmed it down:

Then I glued the bookboard to the canvas:
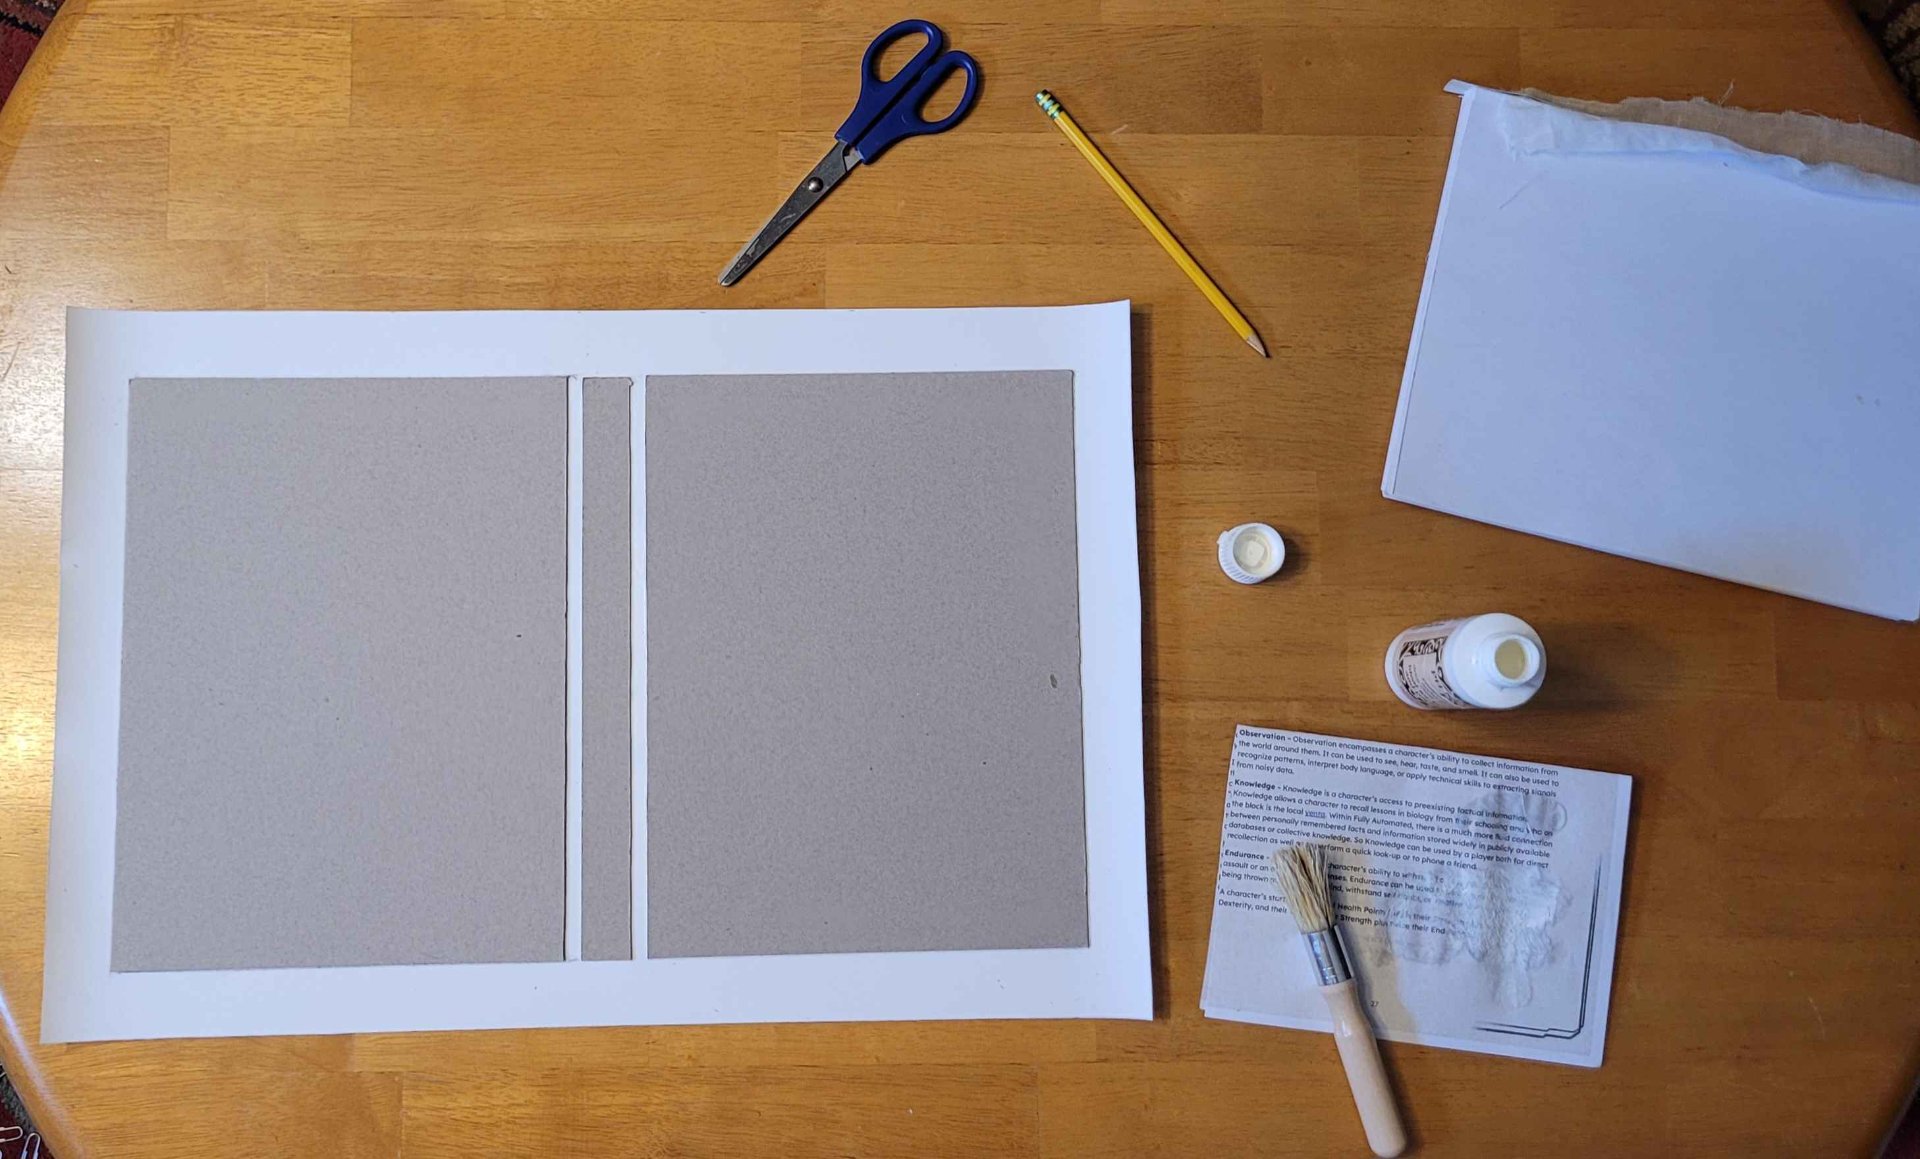
I forgot to take some pictures for the next step (sorry) so you'll have to rely on my descriptions. First I cut the corners off the cover at a 45 degree angle 1/8" out from the corner of the bookboard. I used a carpenter's square to mark the angle. Then I folded the sheets over the bookboard and glued them.
Then it was time to glue the book block into the case. This happened fast enough that I didn't dare stop to take pictures. I slipped some wax paper between the endpaper (a blank sheet I included on front and back when I used the interposing software) and the rest of the book block. Then I painted it with glue as quickly as possible, being careful to first glue the cheesecloth to the paper, then painted it over with glue as well. Then I carefully closed the cover onto the sheet. The endpaper was just about a liquid at that point, despite how lightly I stippled on the glue, so I'm glad I didn't have to try to make changes. I flipped it, and let it dry for awhile.
Then I repeated those steps on the other side and left a heavy laptop sitting on it.
Its always tense waiting while the glue dries on a project, hoping its not clamped crooked, or the glue isn't running and sticking to something it shouldn't. Especially when you're combining the end result of two other projects. Luckily this one turned out mostly okay:
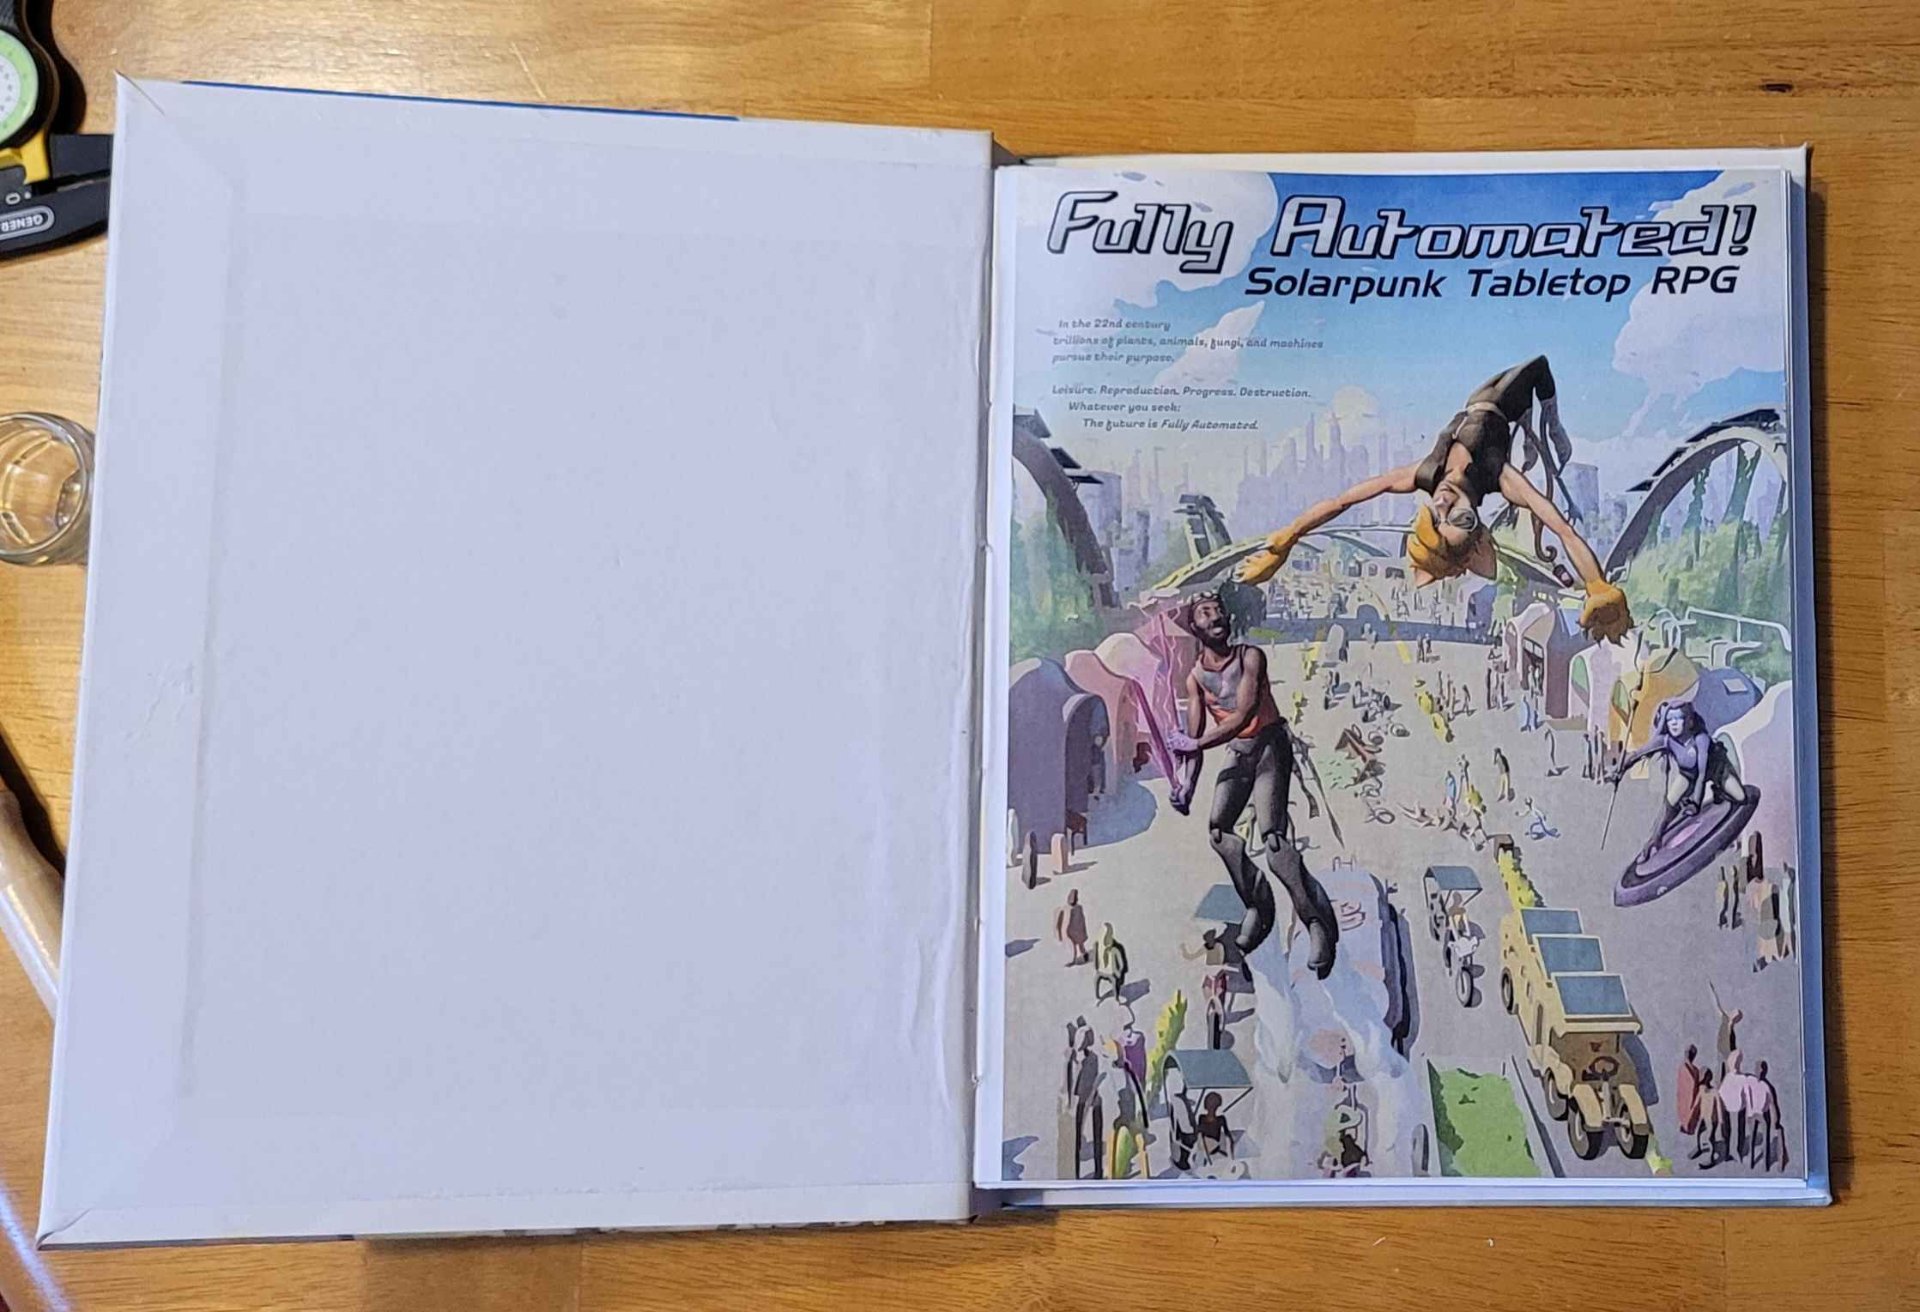
I can see where the endpapers stretched (just like one guide said they would) causing them to reach further towards the fore-edge than I'd have liked. But it generally looks pretty smooth and clean so I'm not very bothered by that.
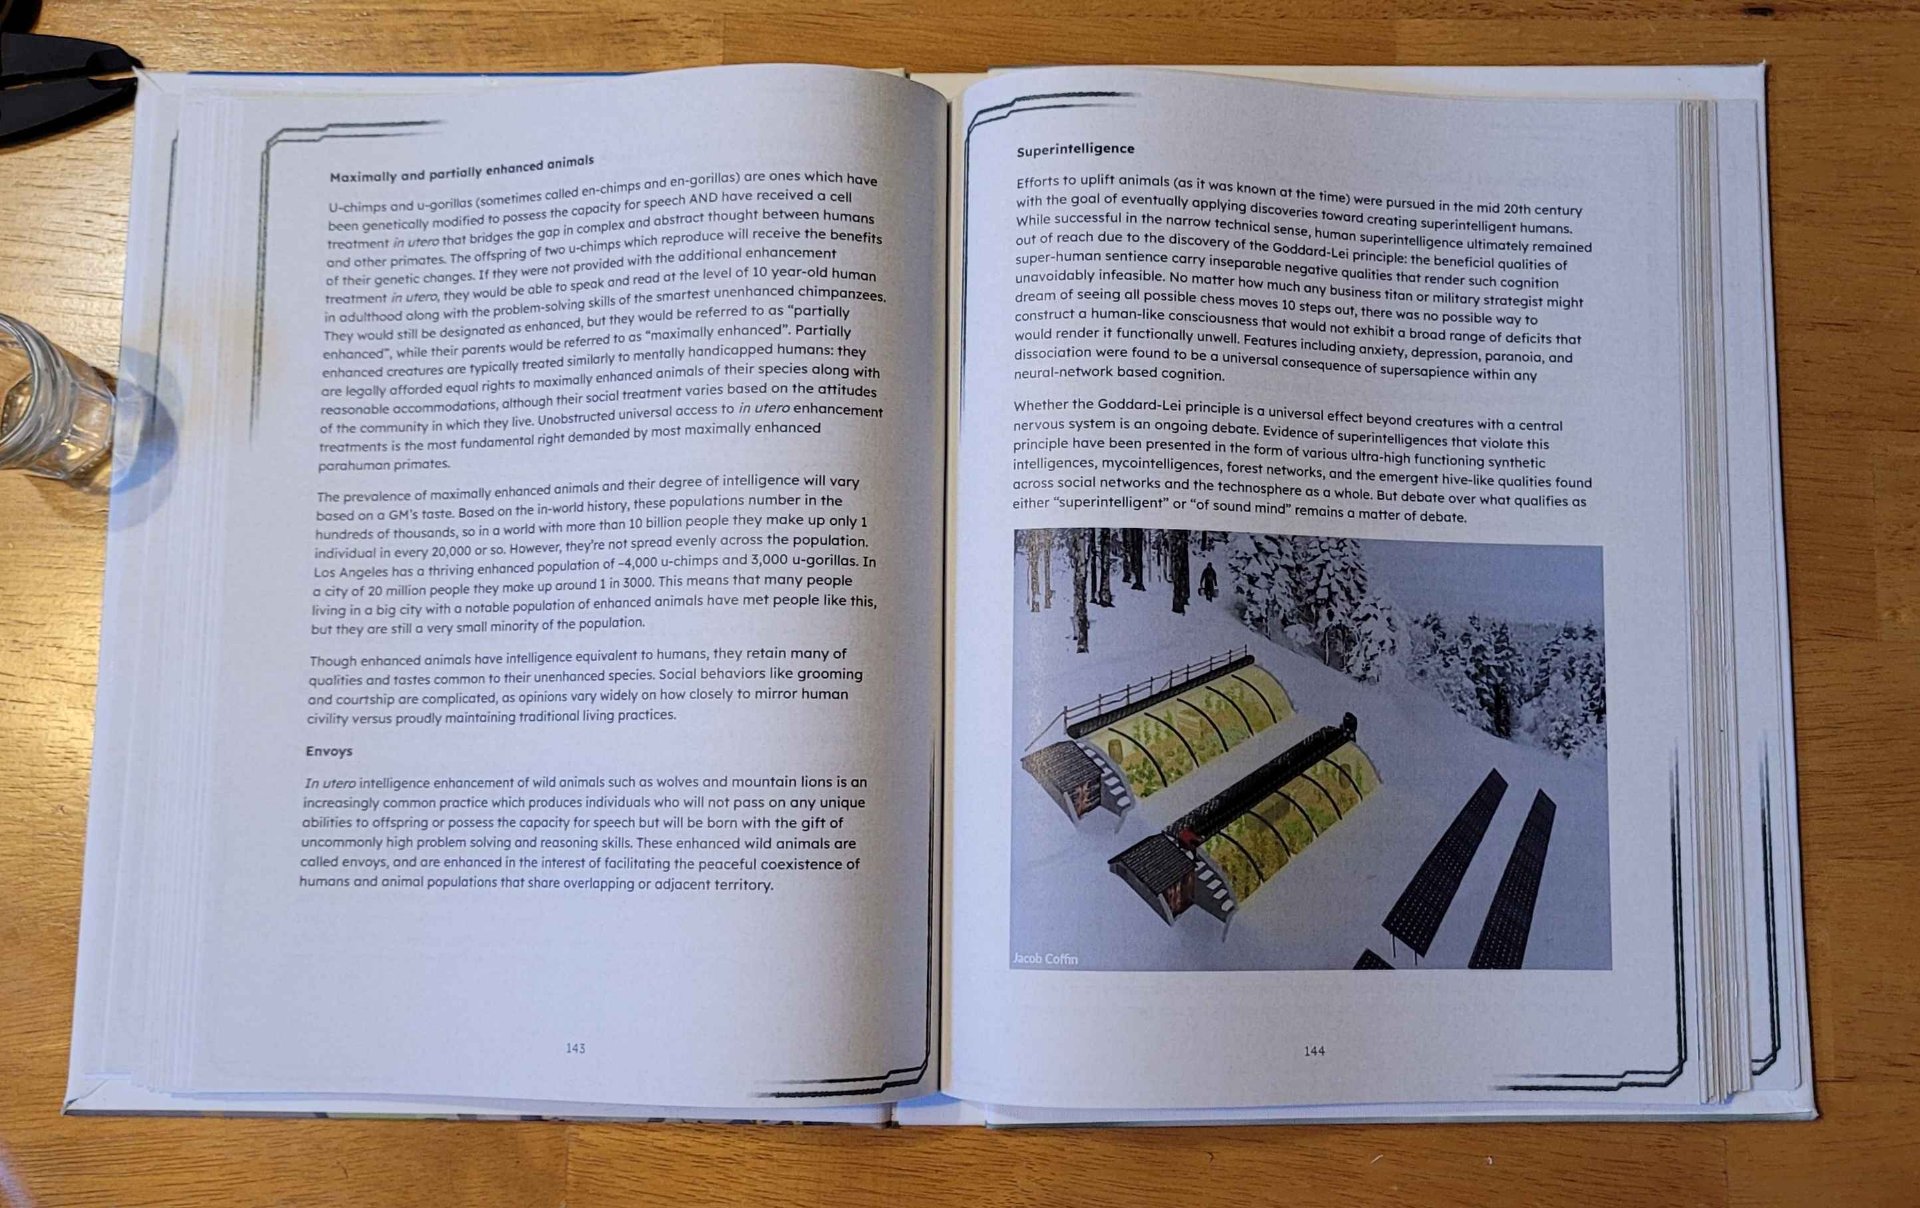
All in all, I think not bad for my first bookbinding project!
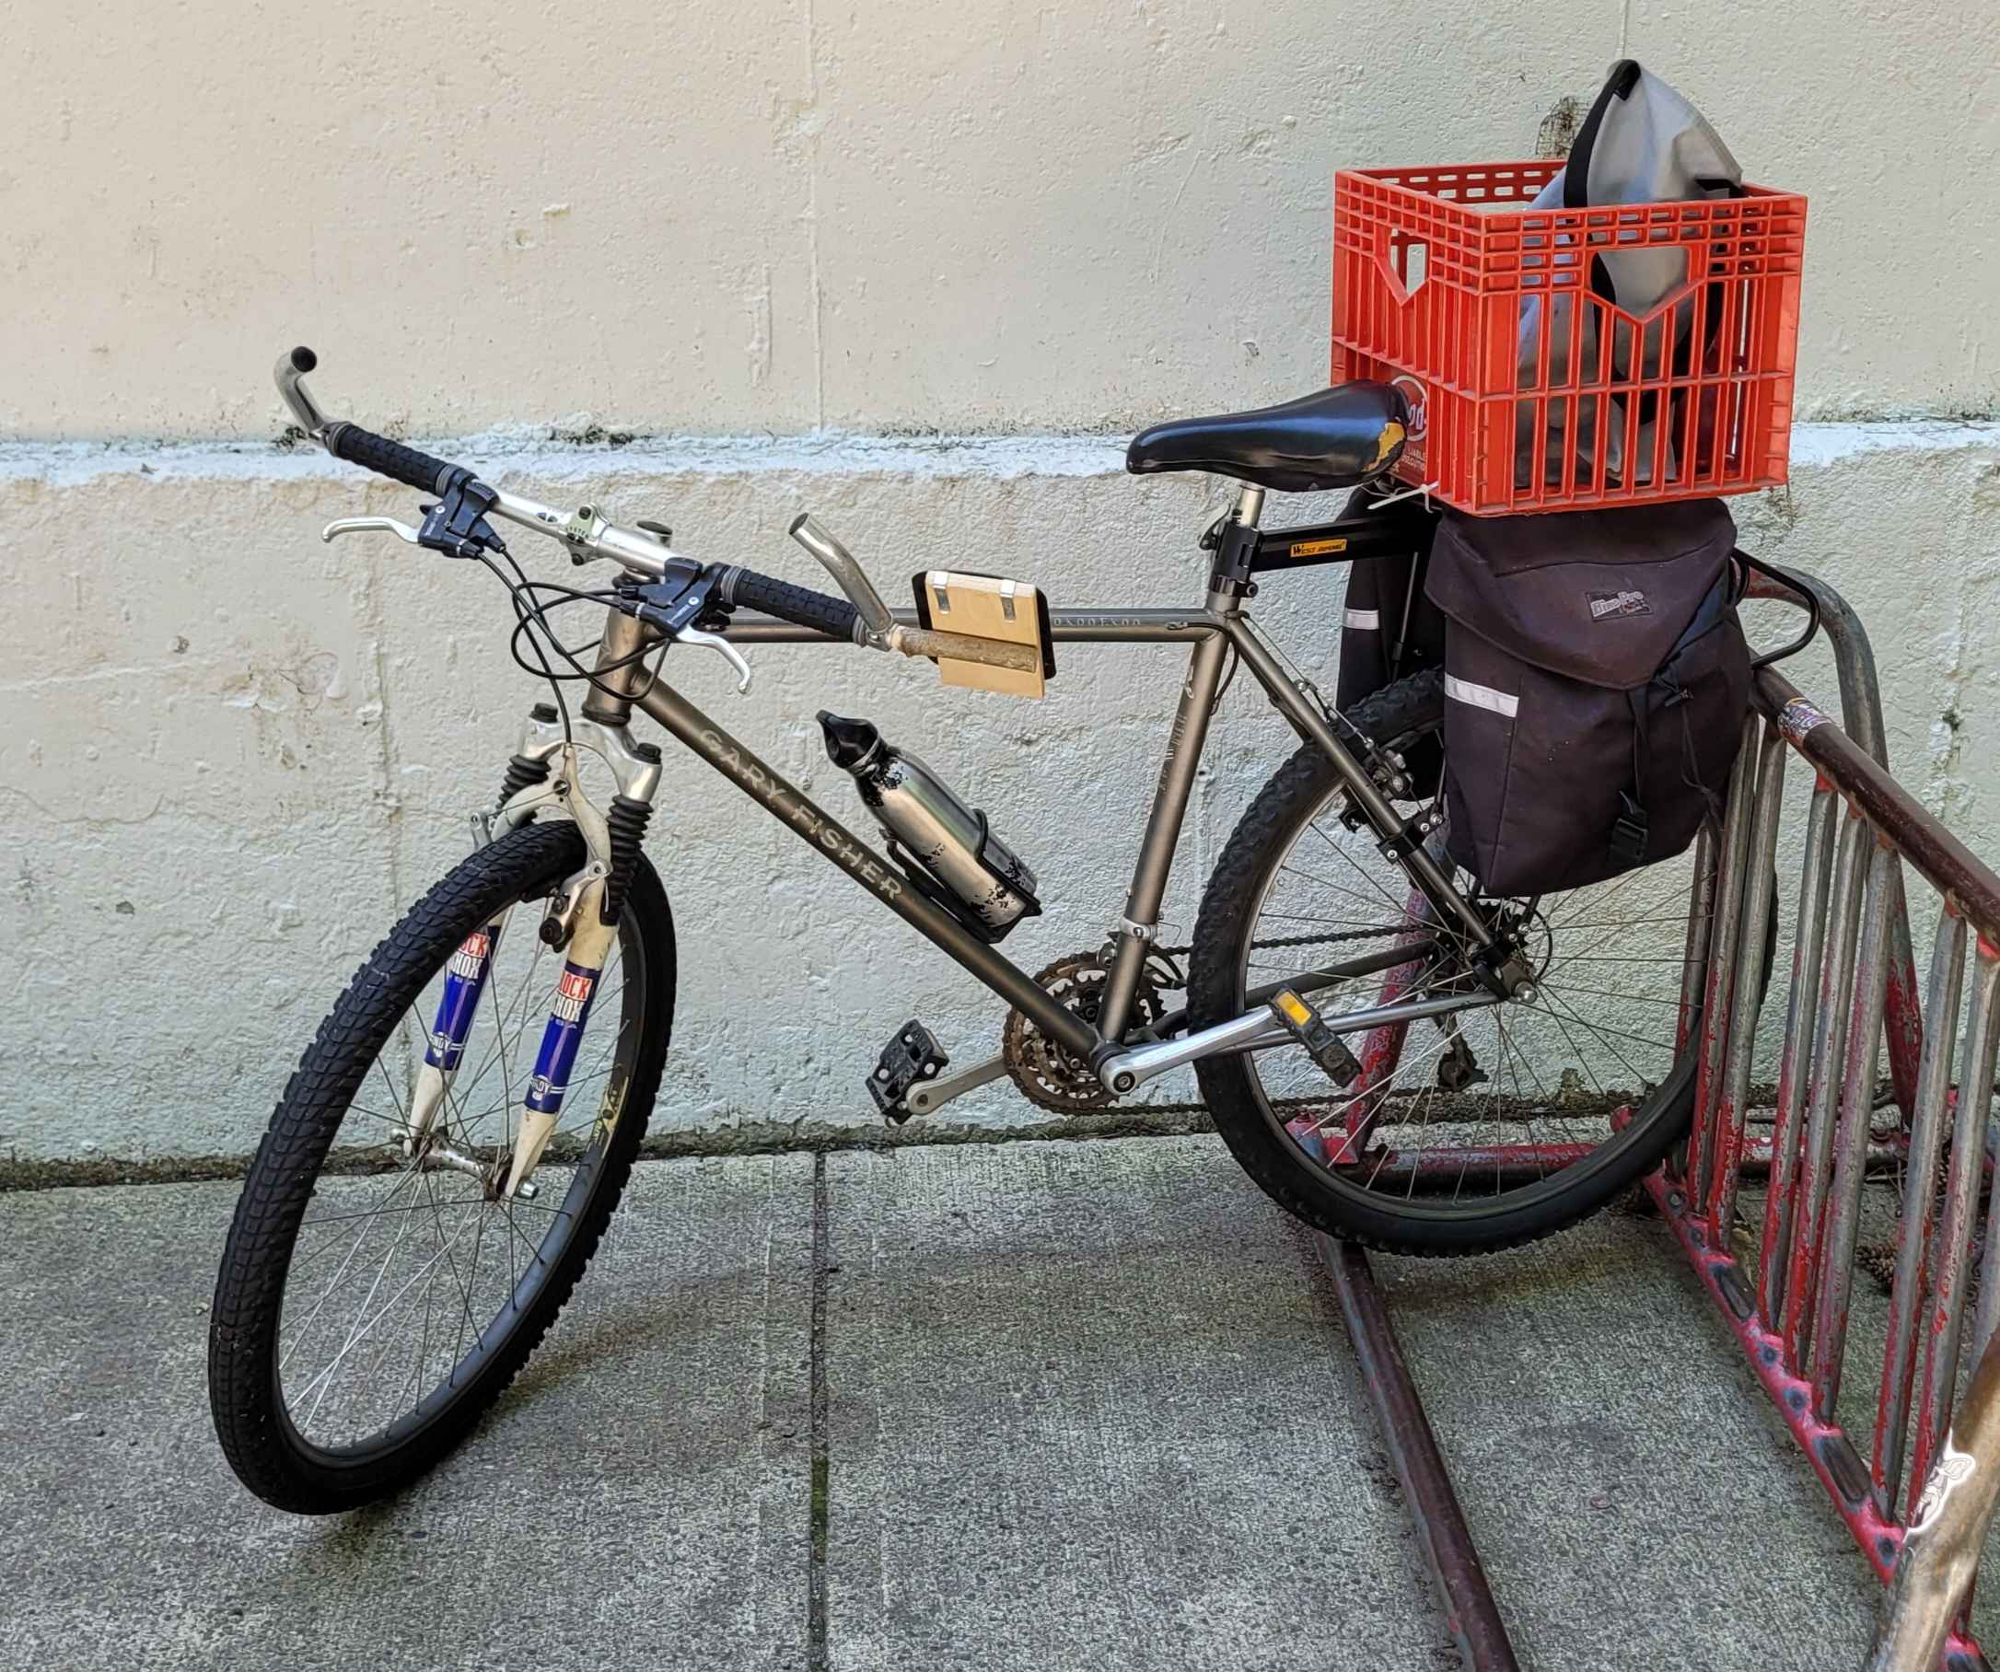
I've made a few trips to the hardware store and other errands over the years, using a backpack on my bike (years ago, when it was my only transportation, I hauled a small amount of groceries in a backpack and just made multiple trips) but this is the first trip I've made since I started trying to turn this mountain bike into a cargo bike. I've got the rear rack I talked about in that post, some basic secondhand fabric panniers secured with straps and zip-ties, and a milk crate from a consignment shop. I went for a pretty light grocery run for the first trip, just two totes of frozen stuff, and it rode just fine on the way home.
Thanks for all your advice! I think I'm going to upgrade to bucket panniers at some point soon, but I'm glad I can at least start using it like I'd planned.
36
A bit of progress on converting my mountain bike to a cargo bike (rear rack added with simple modification)
(movim.slrpnk.net)
I previously posted looking for advice on turning my old steel-framed mountain bike into something I could use to haul groceries and maybe some bits of furniture I find on trash day.
I got a ton of helpful suggestions, and started out on what I think will be a gradual project as I make incremental improvements to this bicycle.
Step 1 was adding a rear rack, so I could add cargo panniers, or a basket behind the seat.

I settled on this one because I liked the extra support legs, and because it claimed to be able to support more weight than most other designs (something I remain skeptical about, but I'm pleased with the overall construction so far).
I did find that the right side seat stay was too crowded for two of the wraparound attachments to fit, so I'd need to use the built-in attachment point just above the rear gear.
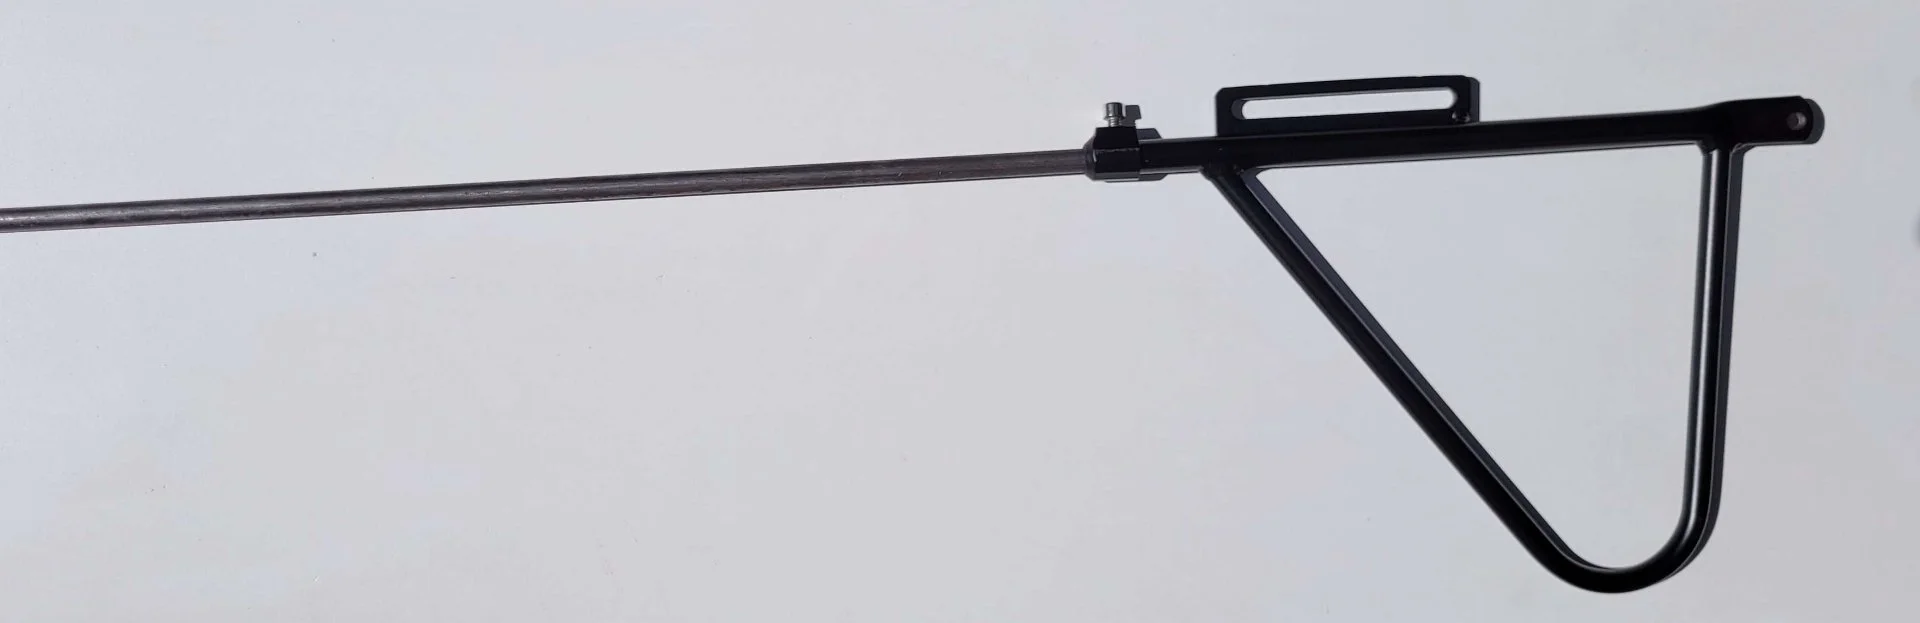
Unfortunately, the lower support rod segment was too short to reach the attachment bolt. But that was fixable - the rod was just a length of 3/8 steel round stock with a flattened section where it bolted to the wraparound attachment bracket. It would be pretty easy to make one of my own.
I started by buying some 3/8” steel rod and a fresh can of propane for my offbrand bernzomatic torch (on two trips, one by train, one by bike because I didn’t realize the old one was empty till I tried to use it).
 (Test fitting the 3/8 rod into the upper section of the telescoping rear post)
Then I got some of my old forging tools together. Without a proper forge or anvil, I knew it’d be pretty sloppy blacksmithing, but I didn’t need this to be particularly fancy.
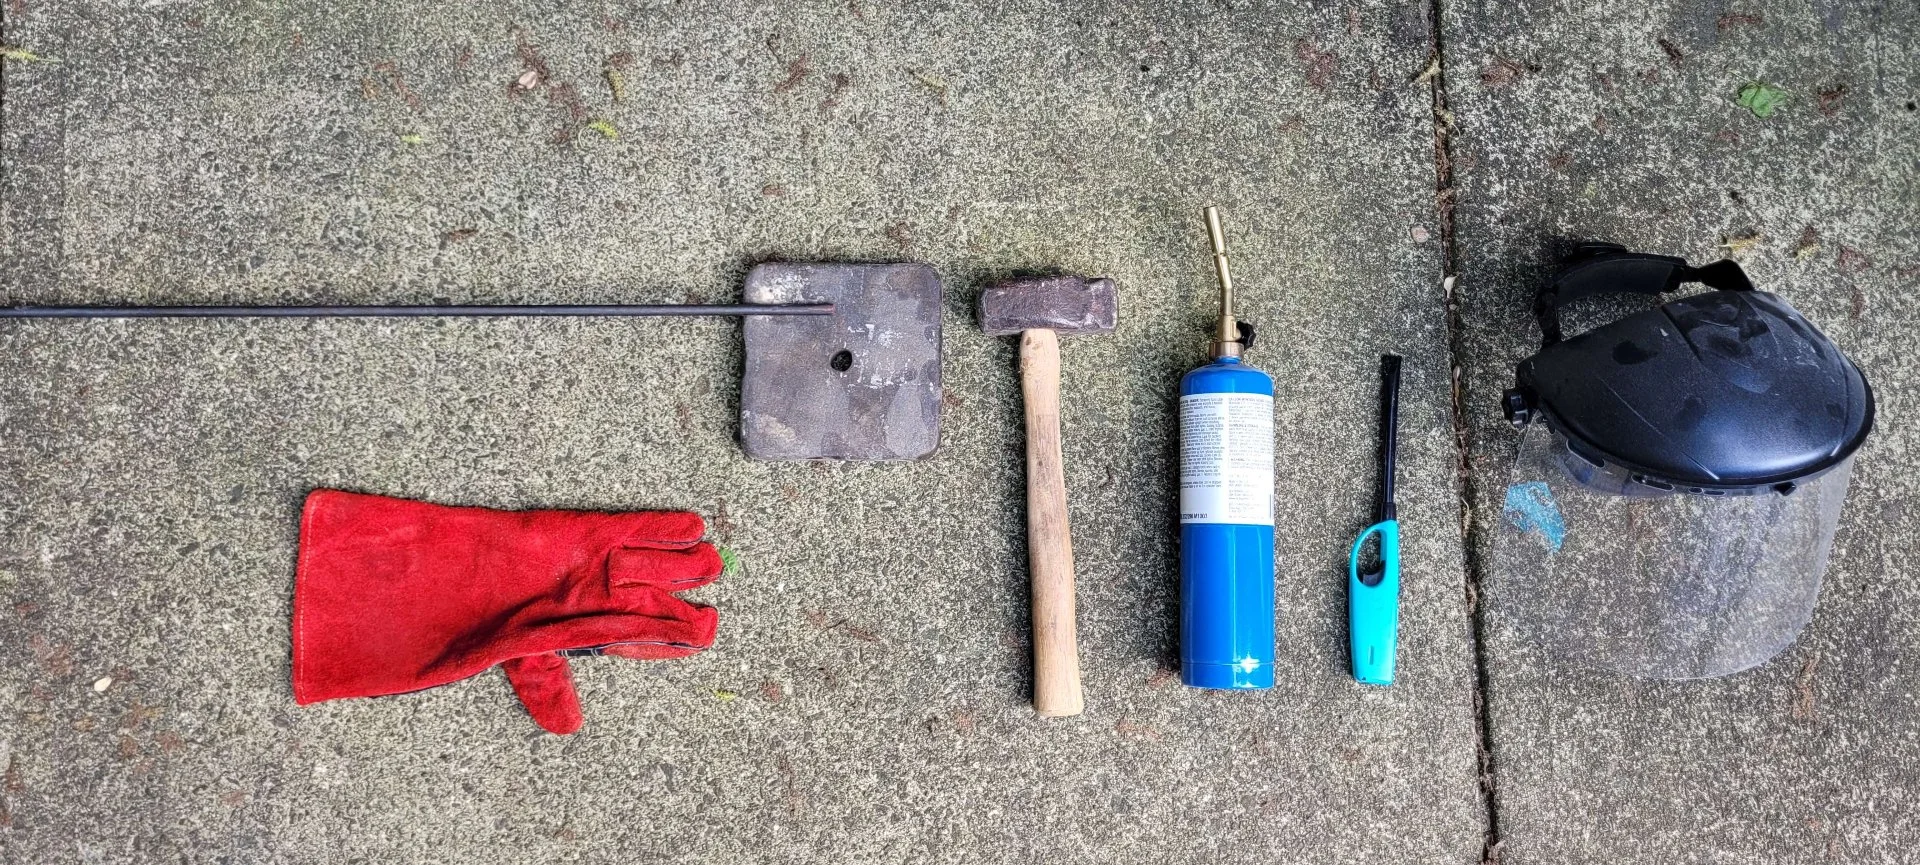
From left to right: 3/8ths steel round stock, fireplace glove, a steel block I found on the side of the road (my anvil, at the moment), my favorite forging hammer (combination round peen and straight peen), offbrand bernzomatic torch, lighter because I couldn't find my striker, and a face shield because you should wear safety goggles while forging (and this was easier to find)
I didn’t take any pictures while working because I didn’t want to waste additional fuel. Basically I just heated the end up as much as I could without a way to contain the heat, and hammered the daylights out of it whenever it seemed to be as hot as it’d get. It was halfway closer to cold forging than proper blacksmithing but I managed to spread the end of the rod flat enough to drill a hole through safely.

I used the drill press, a metal-drilling bit, and a bunch of tap oil, and went through the center of the piece without any real difficulty.
Once the hole was positioned, I used the grinder to clean up the overall shape of the forged part a little. Like the old wisdom says: a grinder and paint makes me the welder (or blacksmith) I ain’t.

(Top: the new one. Bottom: the original/stock part)
I decided to go much longer than necessary, which I suppose adds a little weight, but also some strength as we’re not relying on as much of the hollow tube it attaches to for structural support.

Once it was cleaned up and the oil removed, I spraypainted it. It would have been easy to go with Gloss Black to match the rest of the bike rack (I had a can of it handy) but I decided to paint it blue. I’d just put some work into making this part custom, and I’m working on rethinking if my goal needs to be to make something look like a product in the first place. For now I don’t mind calling a little attention to it.
Plus, the bike never looked great, which works great for me. One of my relatives found it rusting in a sandpit, gave it to me my first job away from home, and I’ve replaced piece after piece back when it was my sole means of transportation. For quite awhile it was held together with zip ties and various kinds of tape (and featured a fender made from cut-up gatorade bottles and duct tape) and the overall look meant it wasn’t exactly a high priority target for theft.

I gave the paint the full 24 hours to dry, then assembled the last bit of the rack.

Looking decent!
I have some panniers a relative gave me to hang over the rack if I can ever figure out how these straps work, but I wanted to see if it would work with a big steel basket I got out of a dumpster awhile back.

Turns out it’s ridable, though heavier than I'm used to. Cargo would likely make it even more tippy, though maybe not more so than those child seats I've seen around? Just the same, I suspect if “bicycle pickup truck” was a good idea, more people would be doing it so I'll swap on the panniers soon.
Next steps will be to add panniers, better brakes (per the previous post), and I think a frame bag and a handlebar basket.
Edit: I've removed the basket and I think I understand the paniers. I just don't trust the attachment system to stay attached and not get tangled up in the rear wheel and chain. Each side has an adjustable strap with a hook, and a loop of strap sewn on. It just seems like with the flex and stretch of the cloth bags as the bike moves and bounces along, it'd be too easy for the hook to come unhooked, at which point it'd be awesome at snagging a spoke or something. So I've got it hooked together I think the way it's intended, and a few zip ties should make sure it stays that way. When I go to buy bigger panniers someday (these are fairly small) I think I'll want ones with buckles or something more secure but still removable.
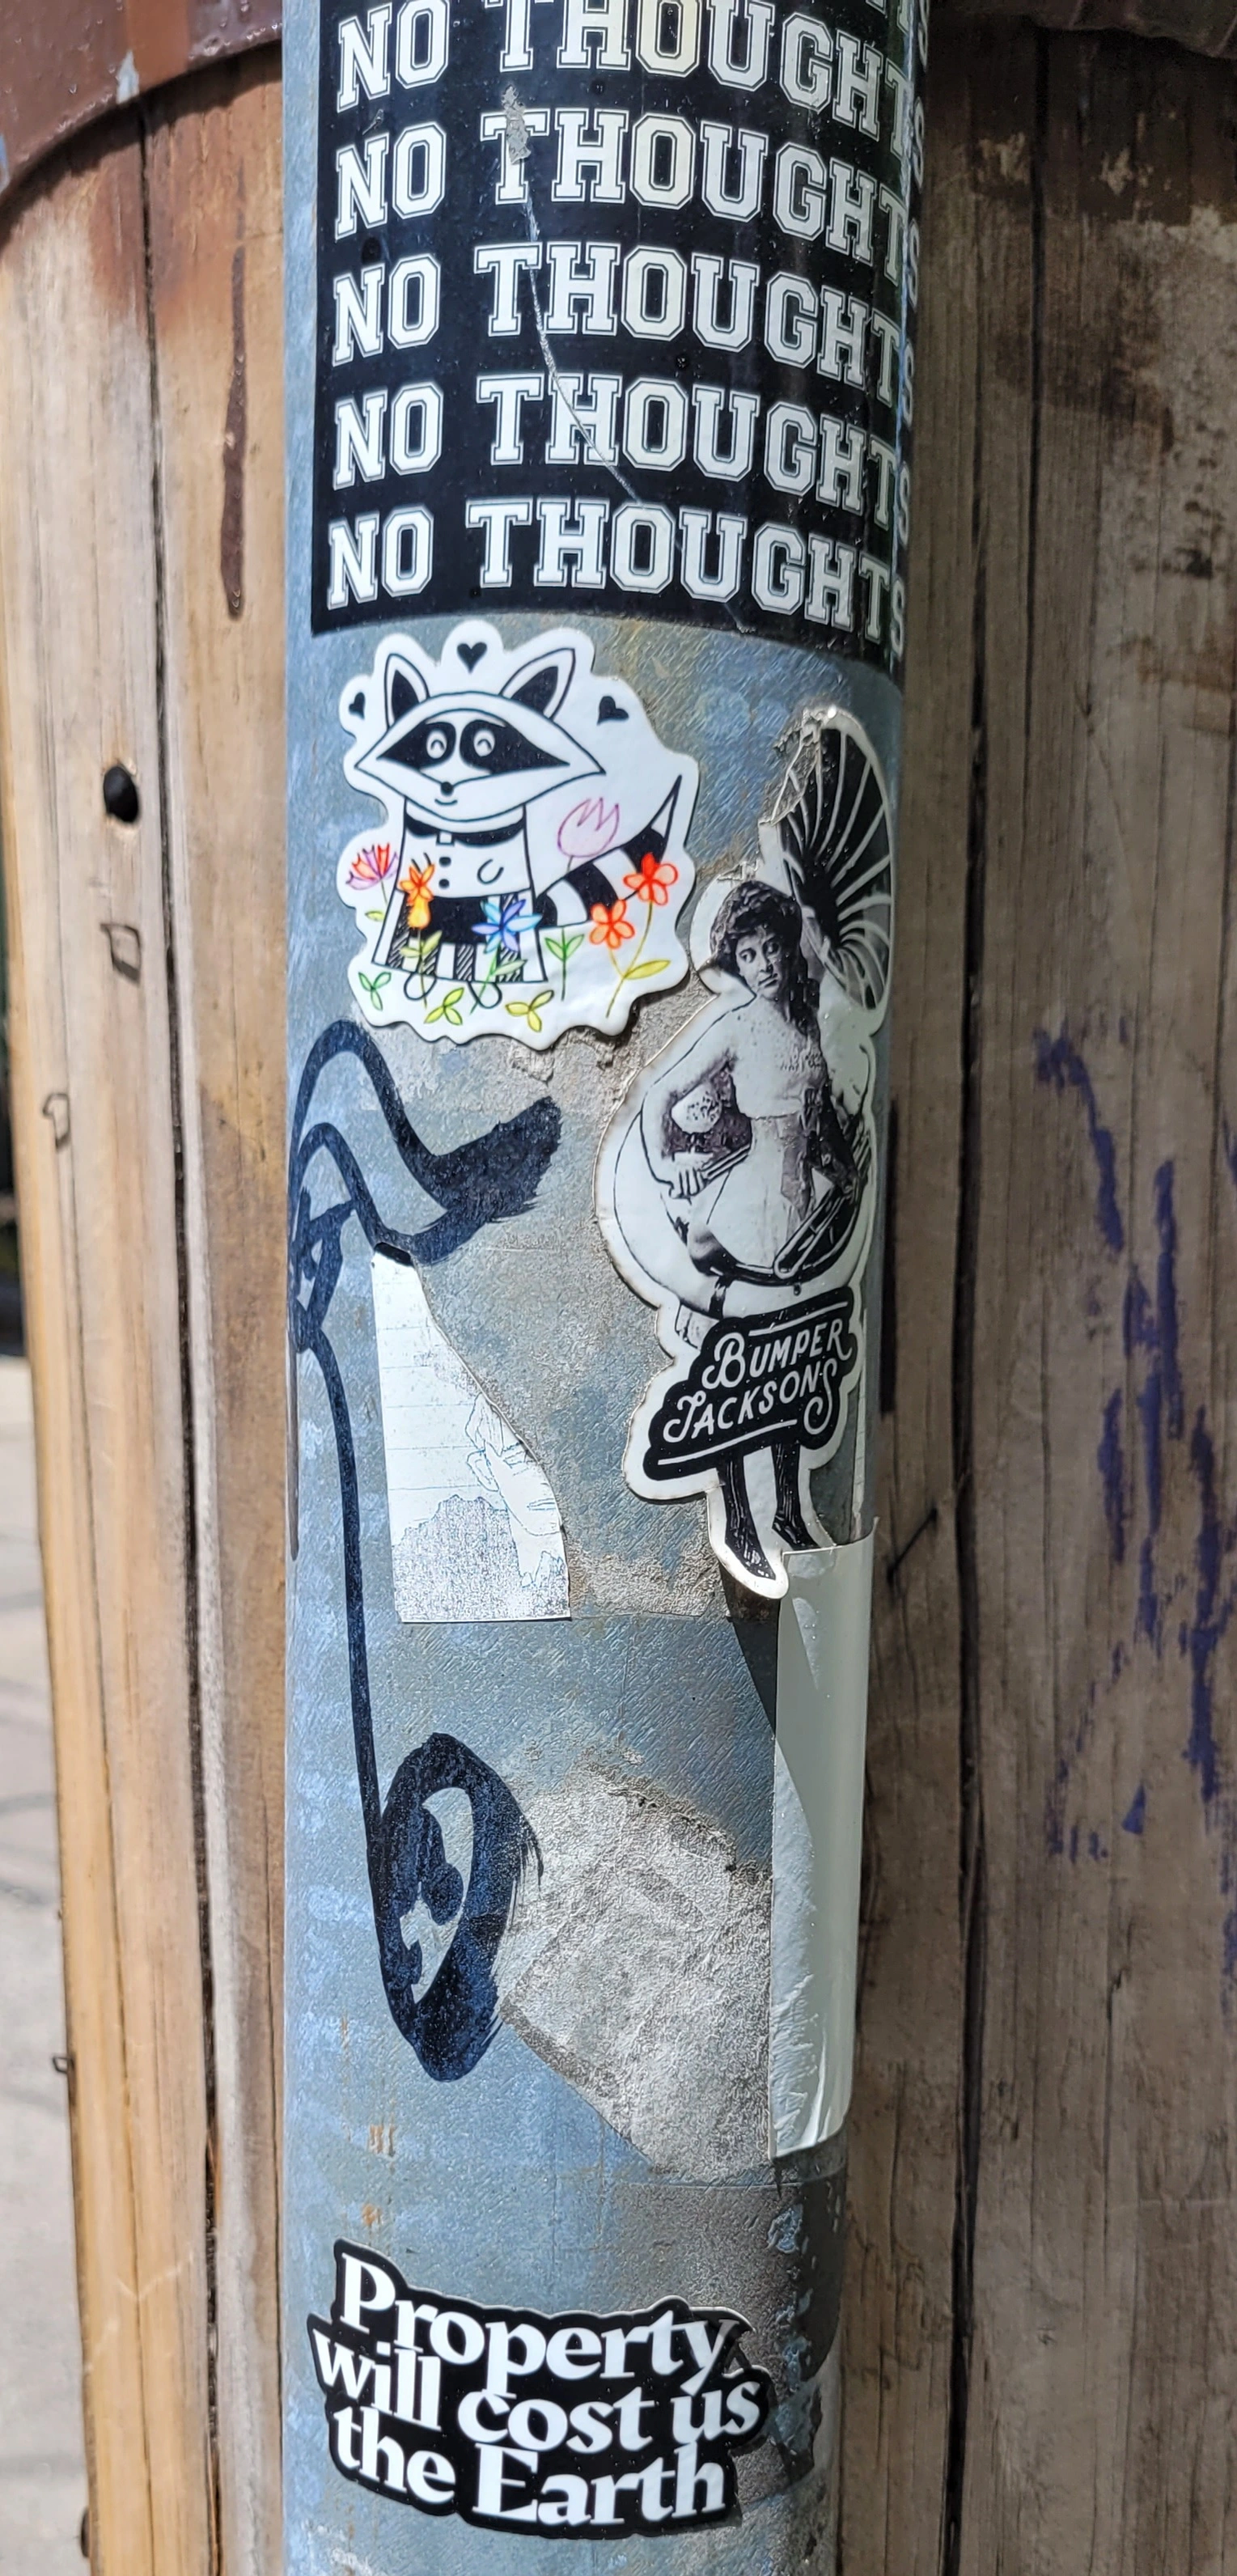
The image shows several stickers attached to a metal pole. Near the center is a black and white cartoon raccoon in a dress surrounded by colorful flowers.
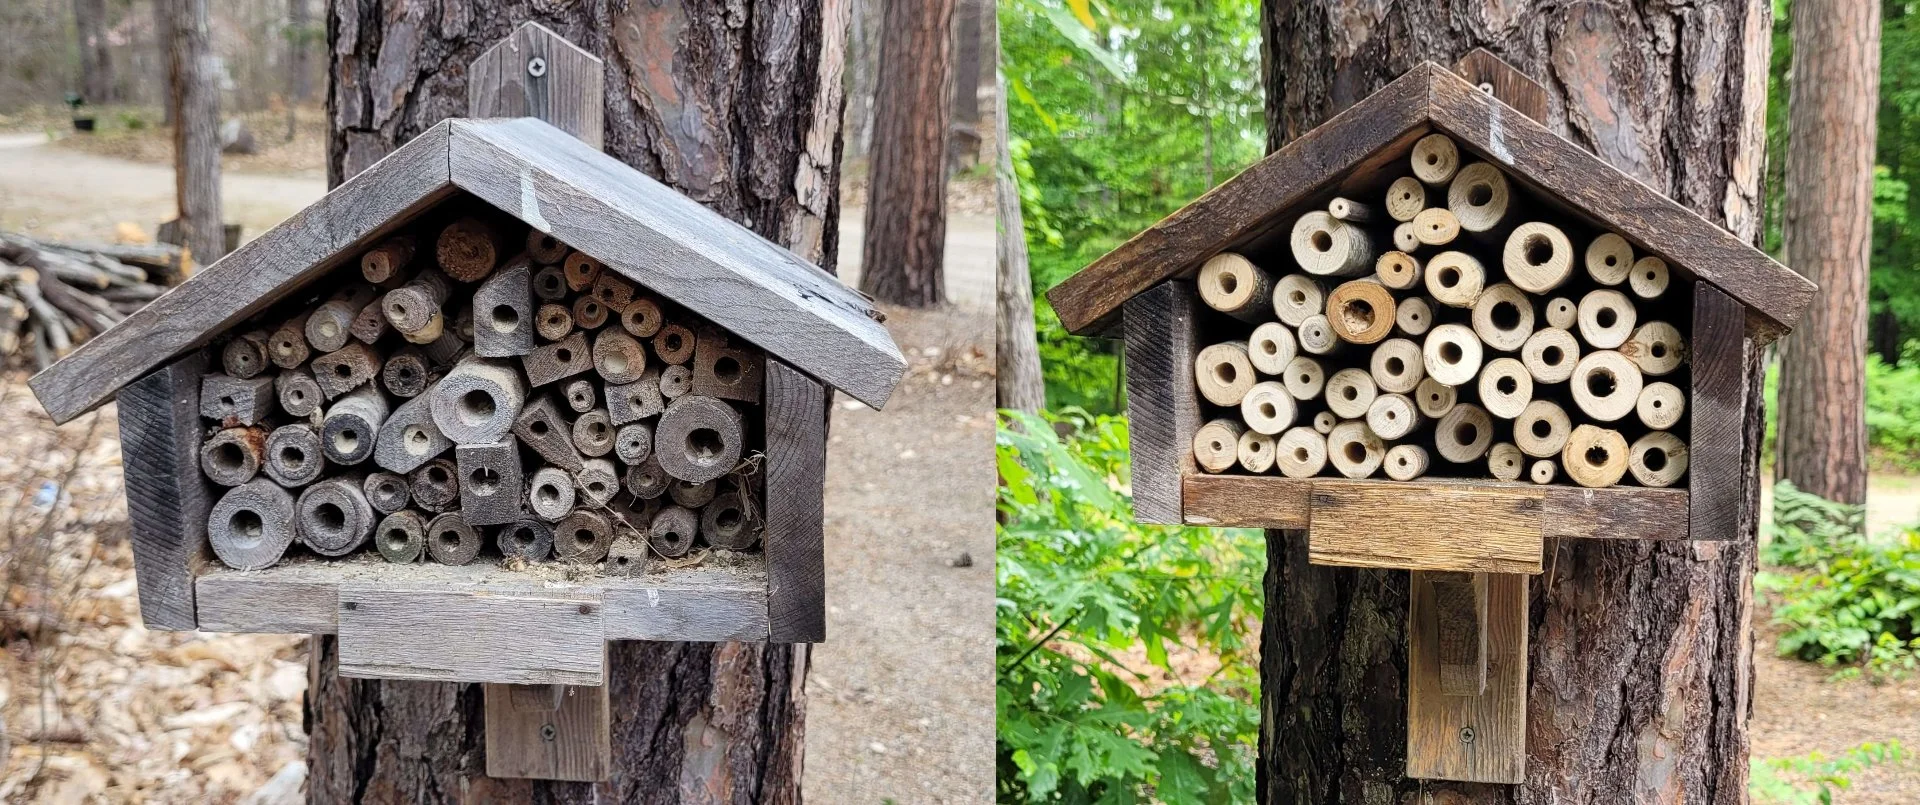
I posted awhile back after making a home for solitary bees, sharing that it had gotten some use. Its important to replace the sticks annually to prevent parasites from being passed from bee to bee as holes are reused.
Thanks to some winter storms, we had lots of downed branches to clear, so I had no shortage of sticks available for use as future bee housing:
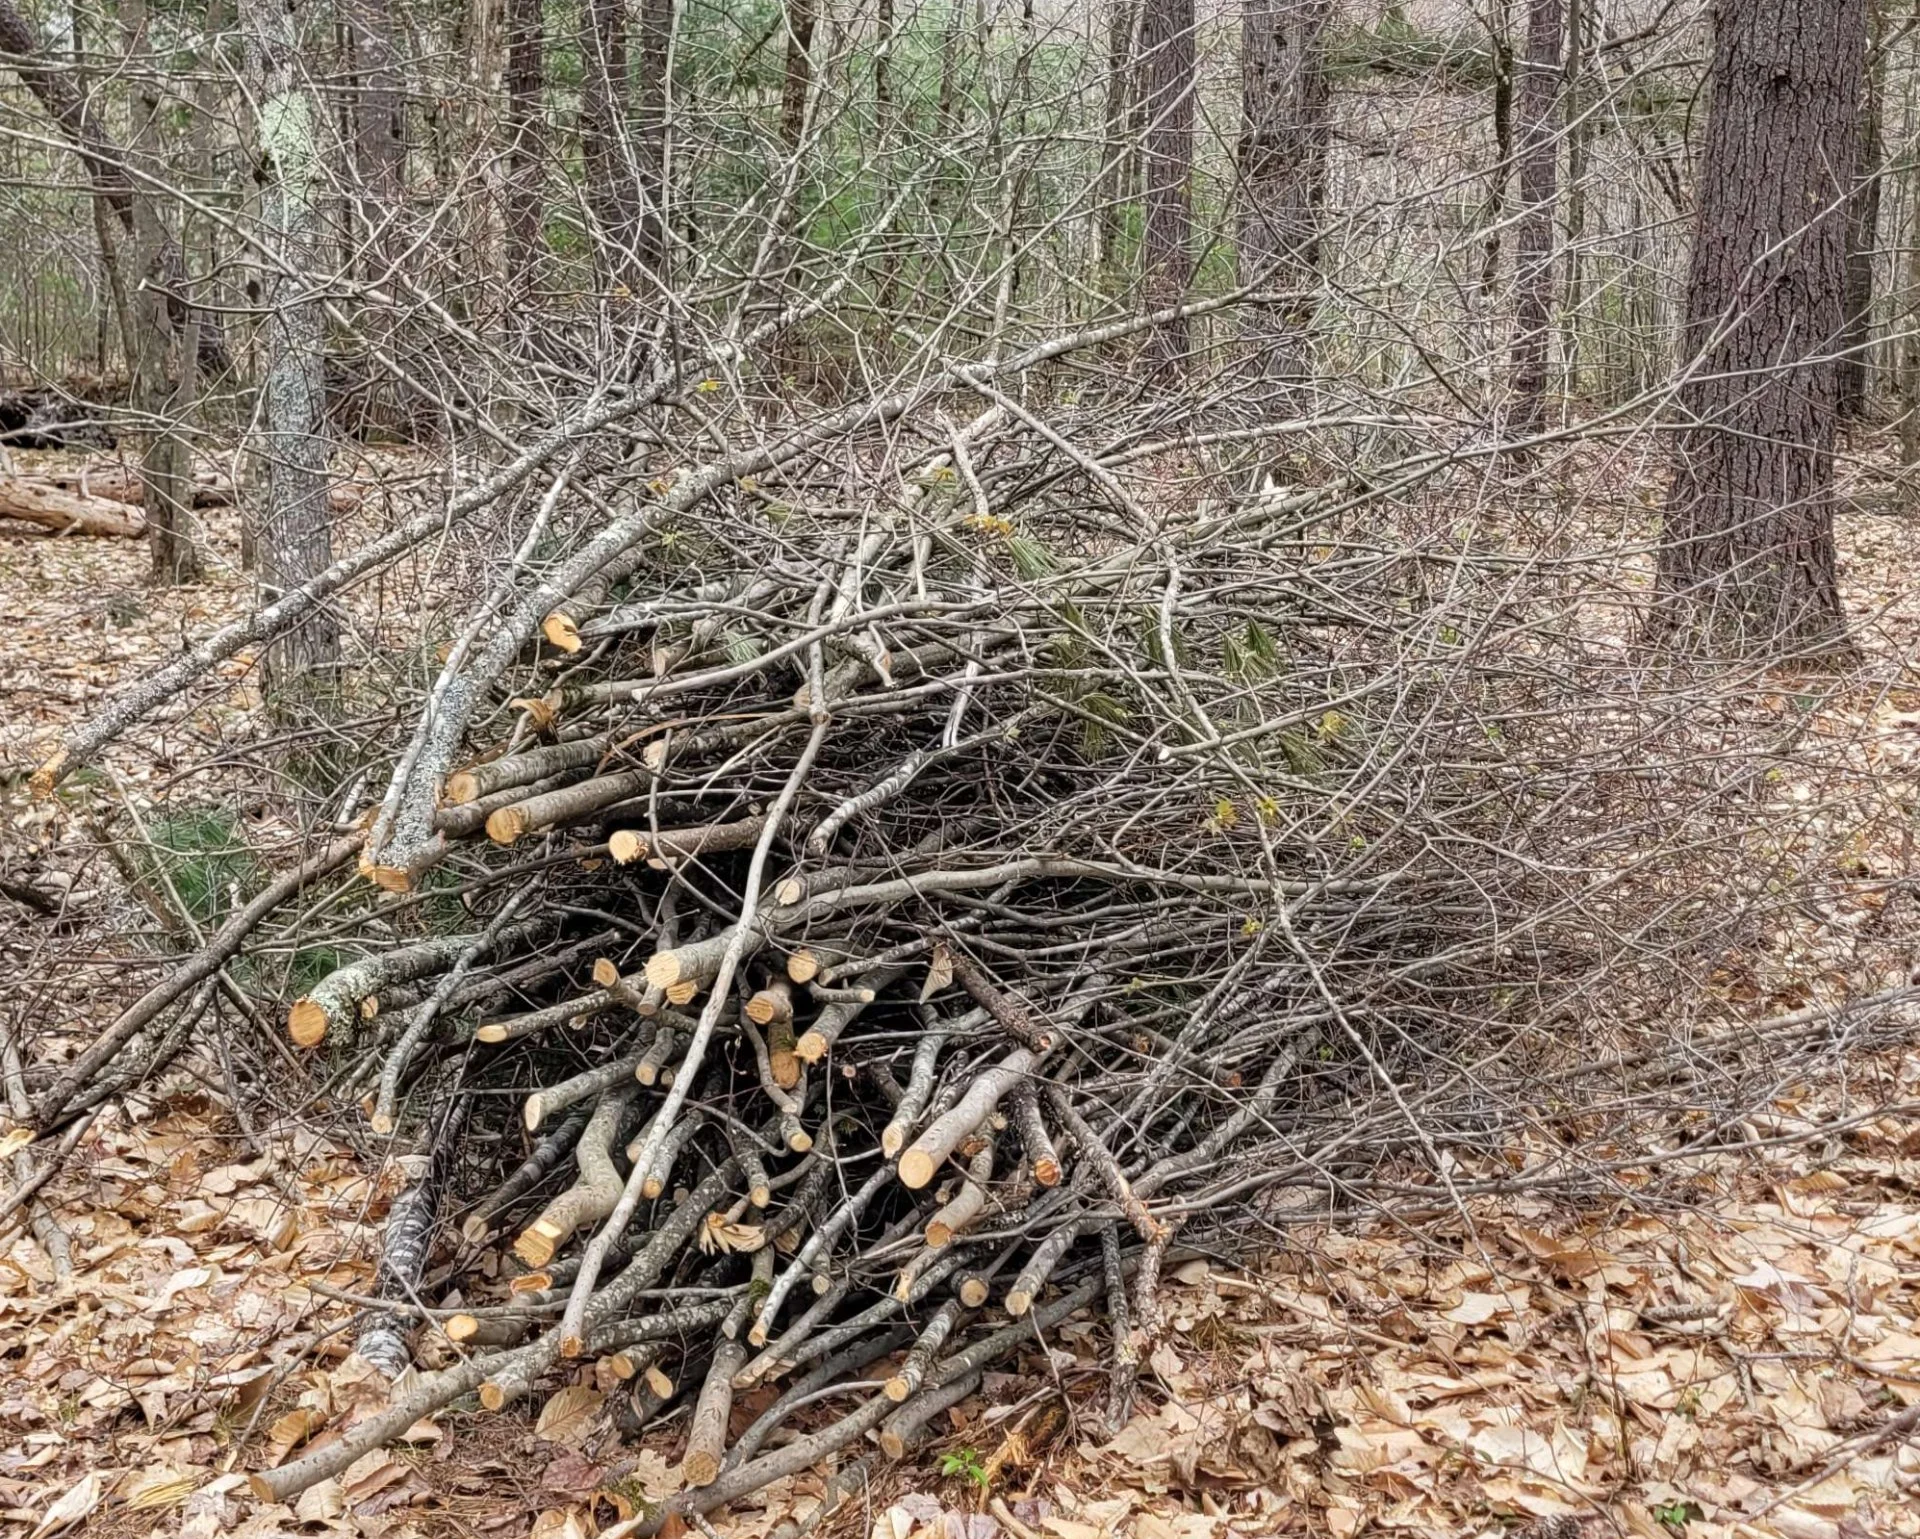 (One pile of many)
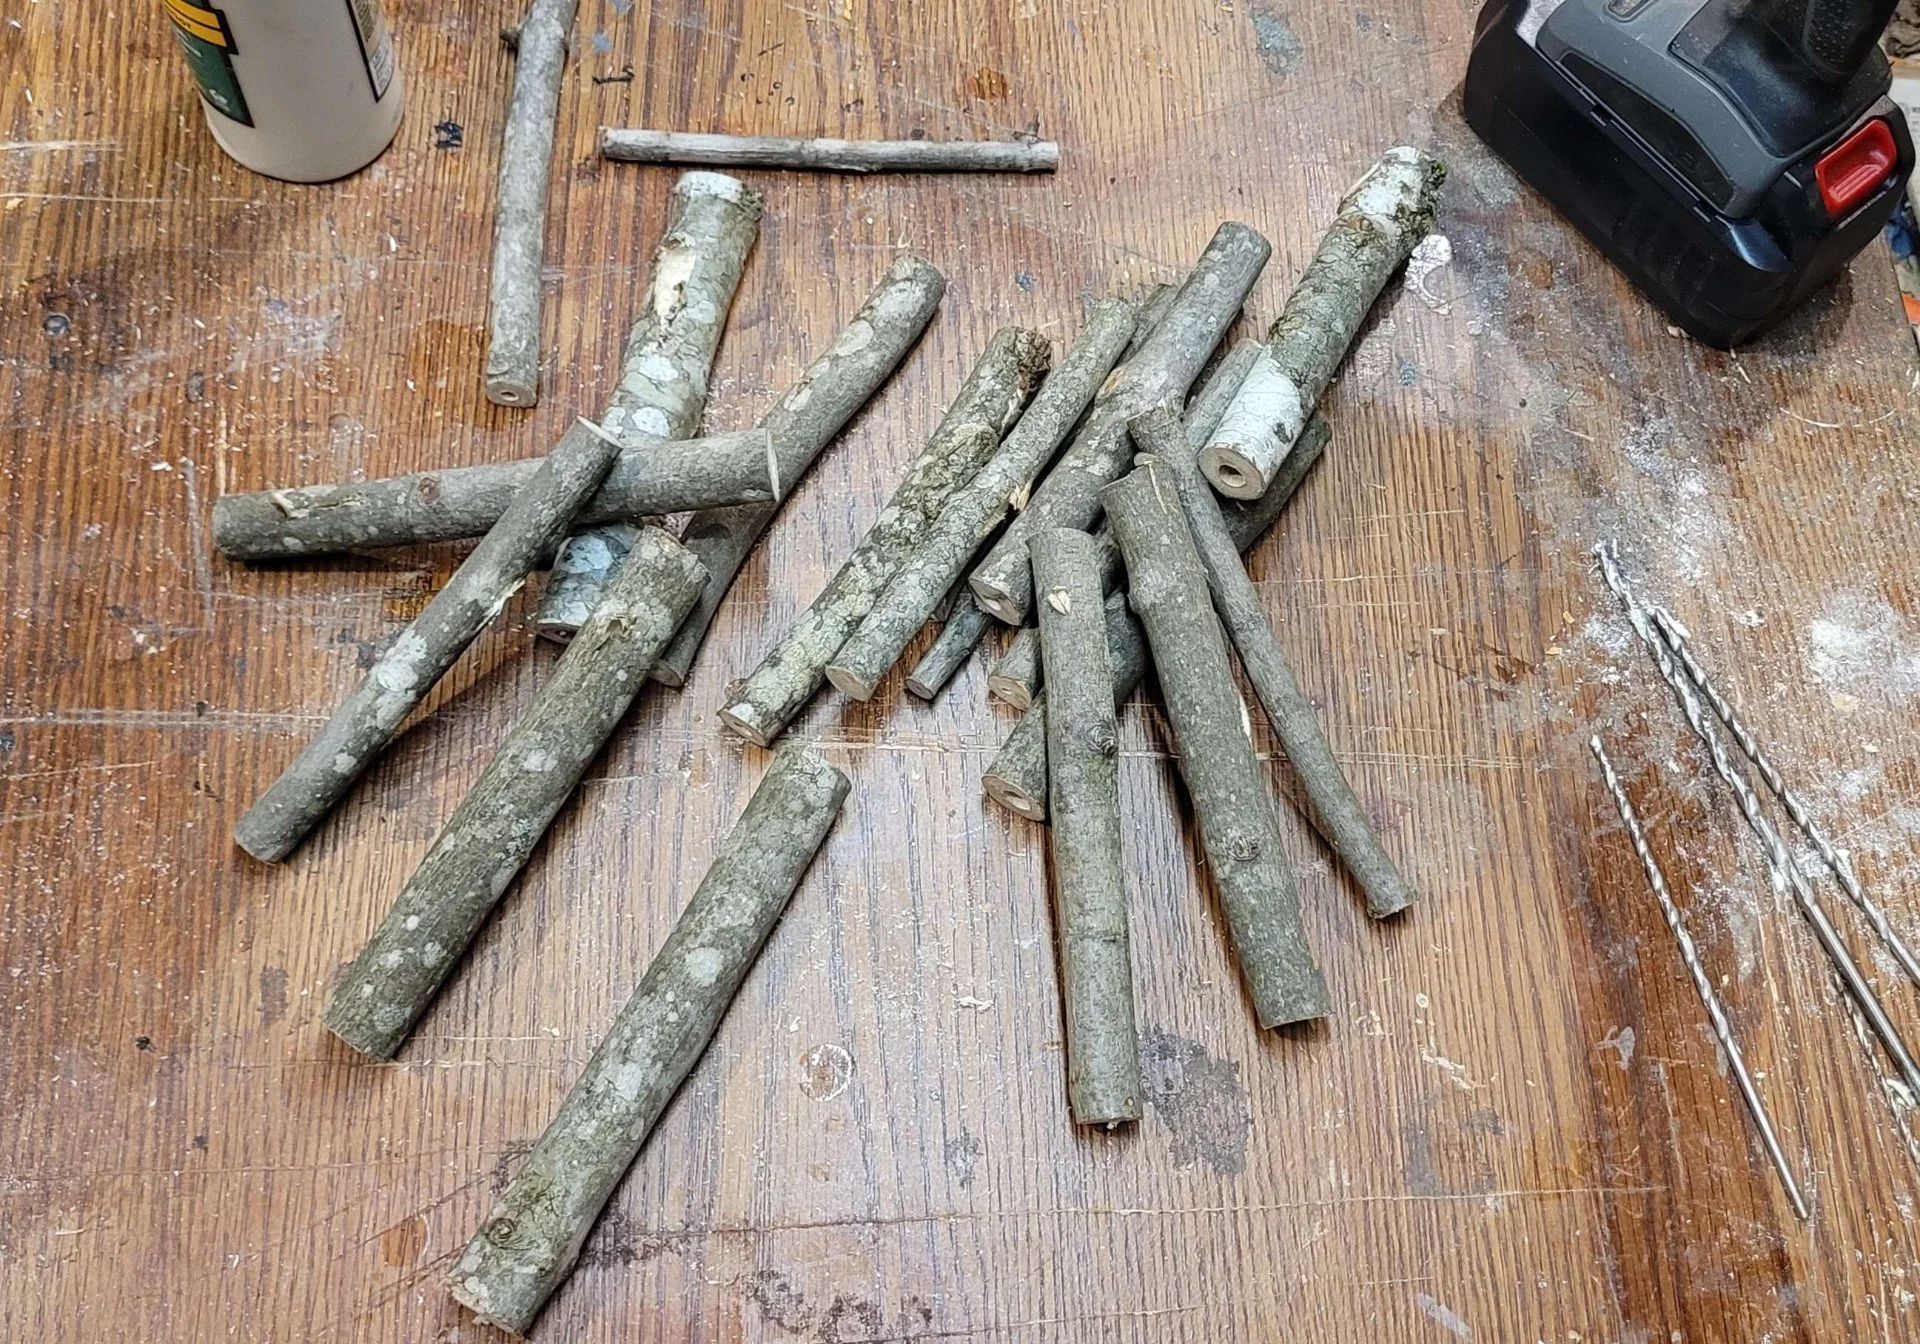
The holes need to be between 5" and 6" deep, so I started cutting the sticks into 6.5"-ish lengths.
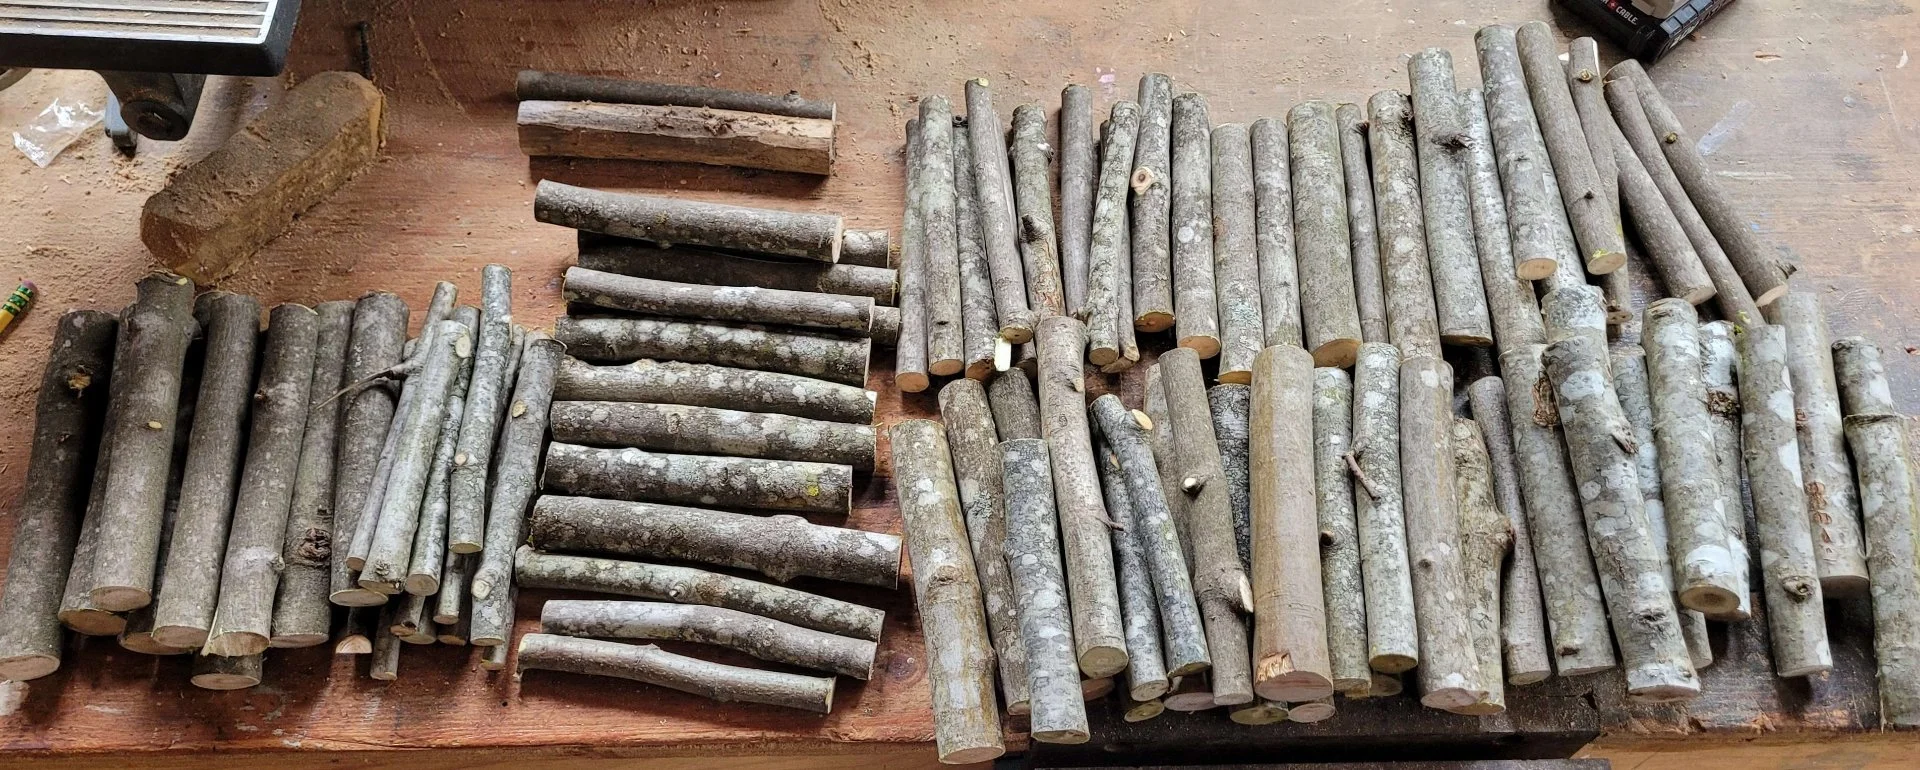
This doesn't look like much but it took a lot of eight-foot branches to make these piles.
The next step was drilling holes. Different size bees need different diameter holes, so I read a few guides and picked out a range of drill bits between a metric #2 and a full half-inch (I don't think solitary bees care about unit standardization) to make sure any potential tenants can find a cozy caliber to call home.

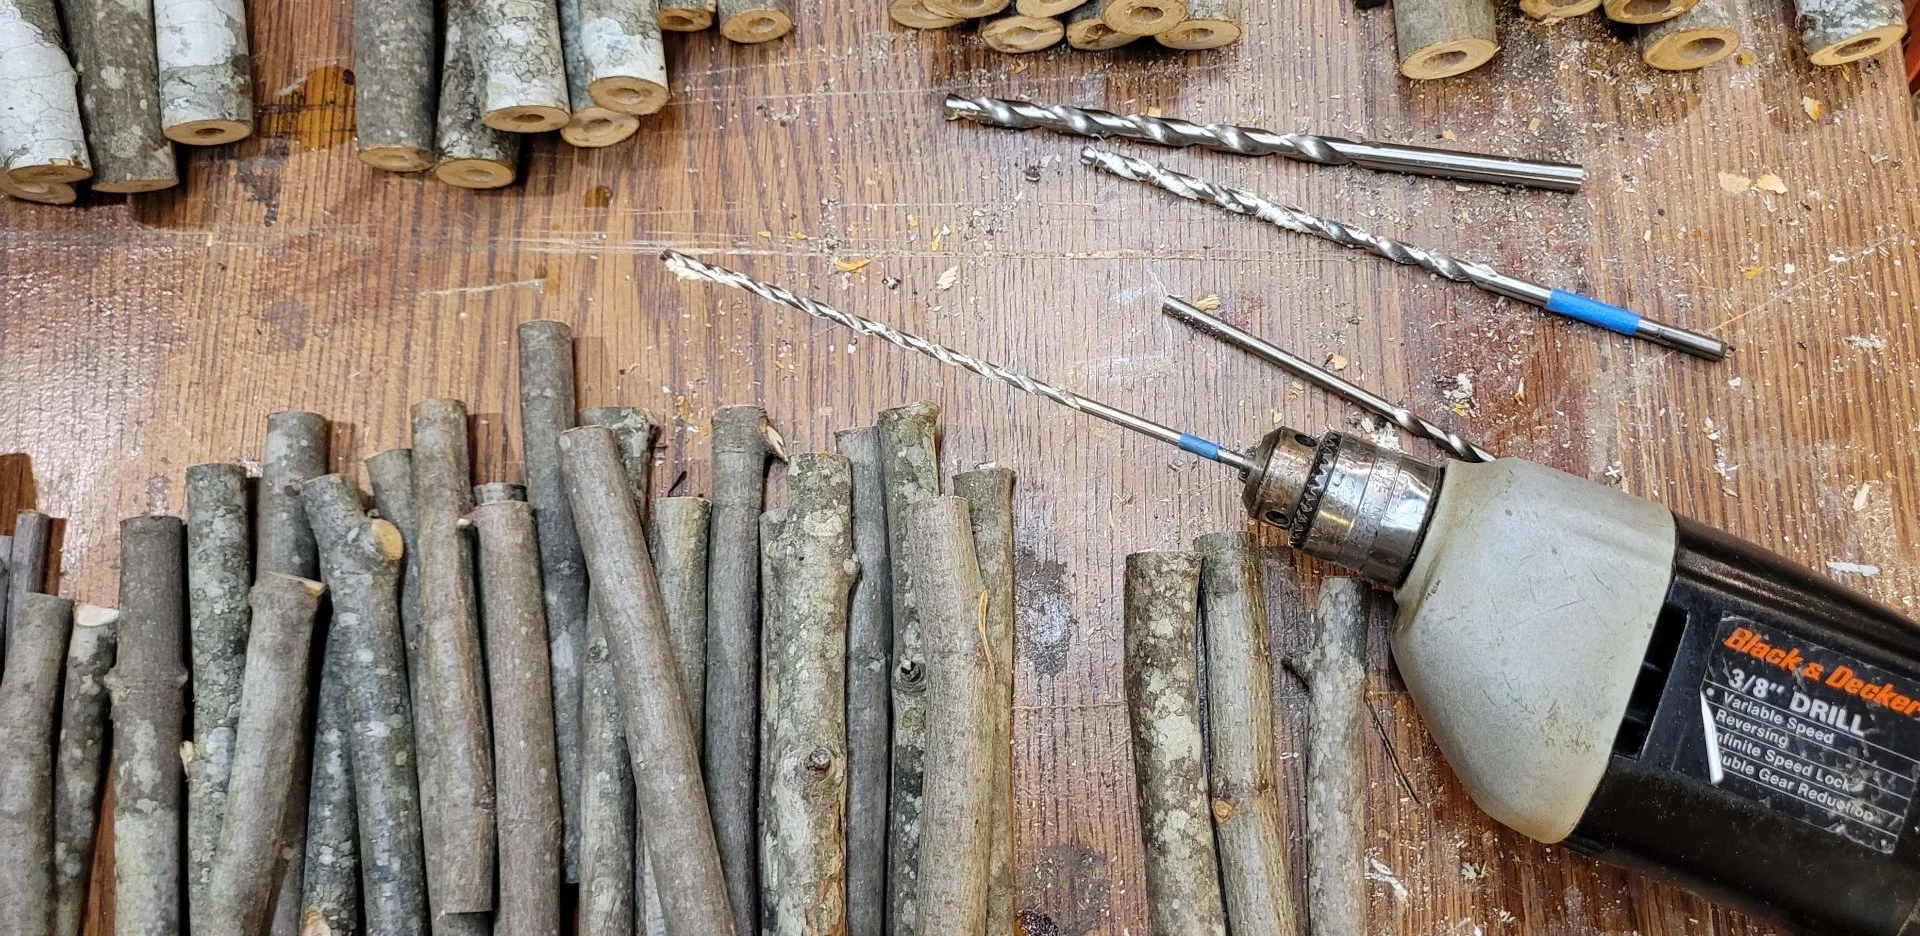
I used the drill press to start the holes then used a set of extra long metric bits in a screwgun to get the full length the bees need
This didn't always go perfectly. I didn't break any bits, but sometimes the holes were crooked enough to punch through the side of the stick and I'd set them aside.
Then I just had to bag up what I'd made and replace the sticks in the bee house:

(Background omitted because it's easier than tidying the shop.)
I'd thought I'd made enough sticks for two years, but it took almost all of them to fill the bee house. Glad I prepared as many as I did.
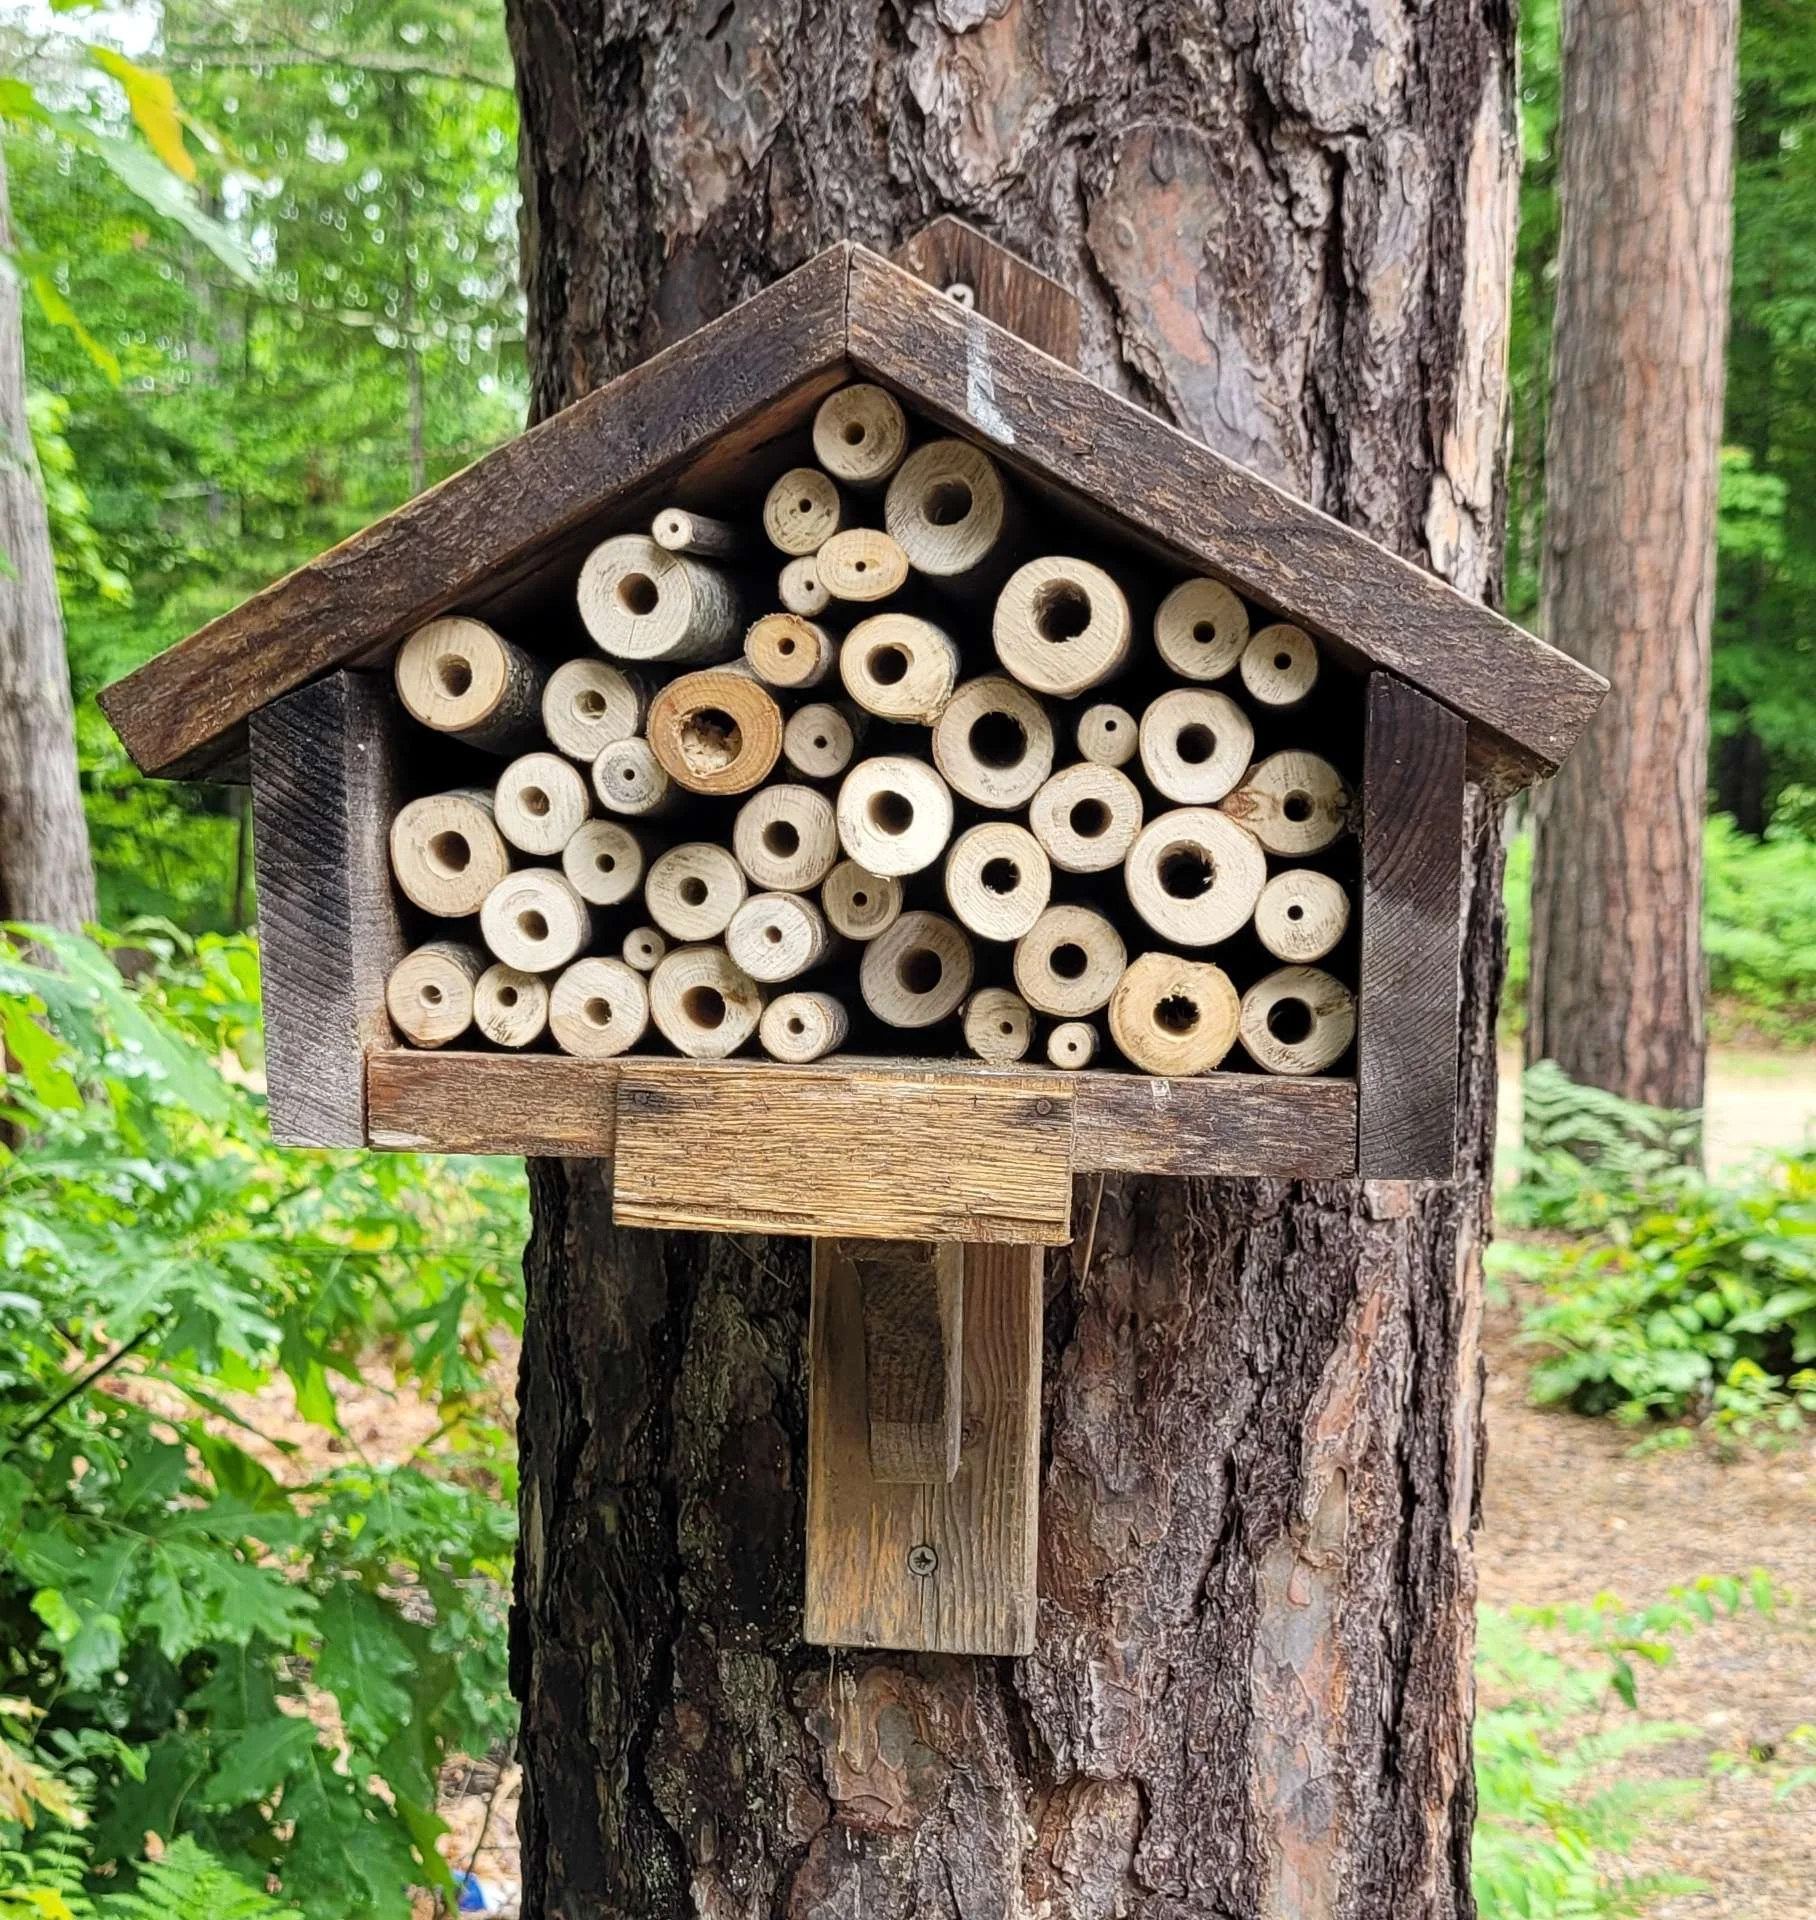
I think I'd call that move-in ready.
Awhile back I posted that one of my cyberpunk short stories got picked up by an anarchist fiction zine. I was excited because I had this related-but-sort-of-mutually-non-canonical photobash comic ready to go, which played with the same concept but in a different tone.
I don't want to spam this community with my comic weekly or anything, so I figured I'd just share a few still panels, spaced out whenever I get to them in the posting schedule. They're just quiet bits of art between the jokes.
Hopefully that's all okay, and if you do want to read this silly webcomic about a stolen secret service protoptype and the endangered deer it thinks is the president I'm posting it weekly here or here

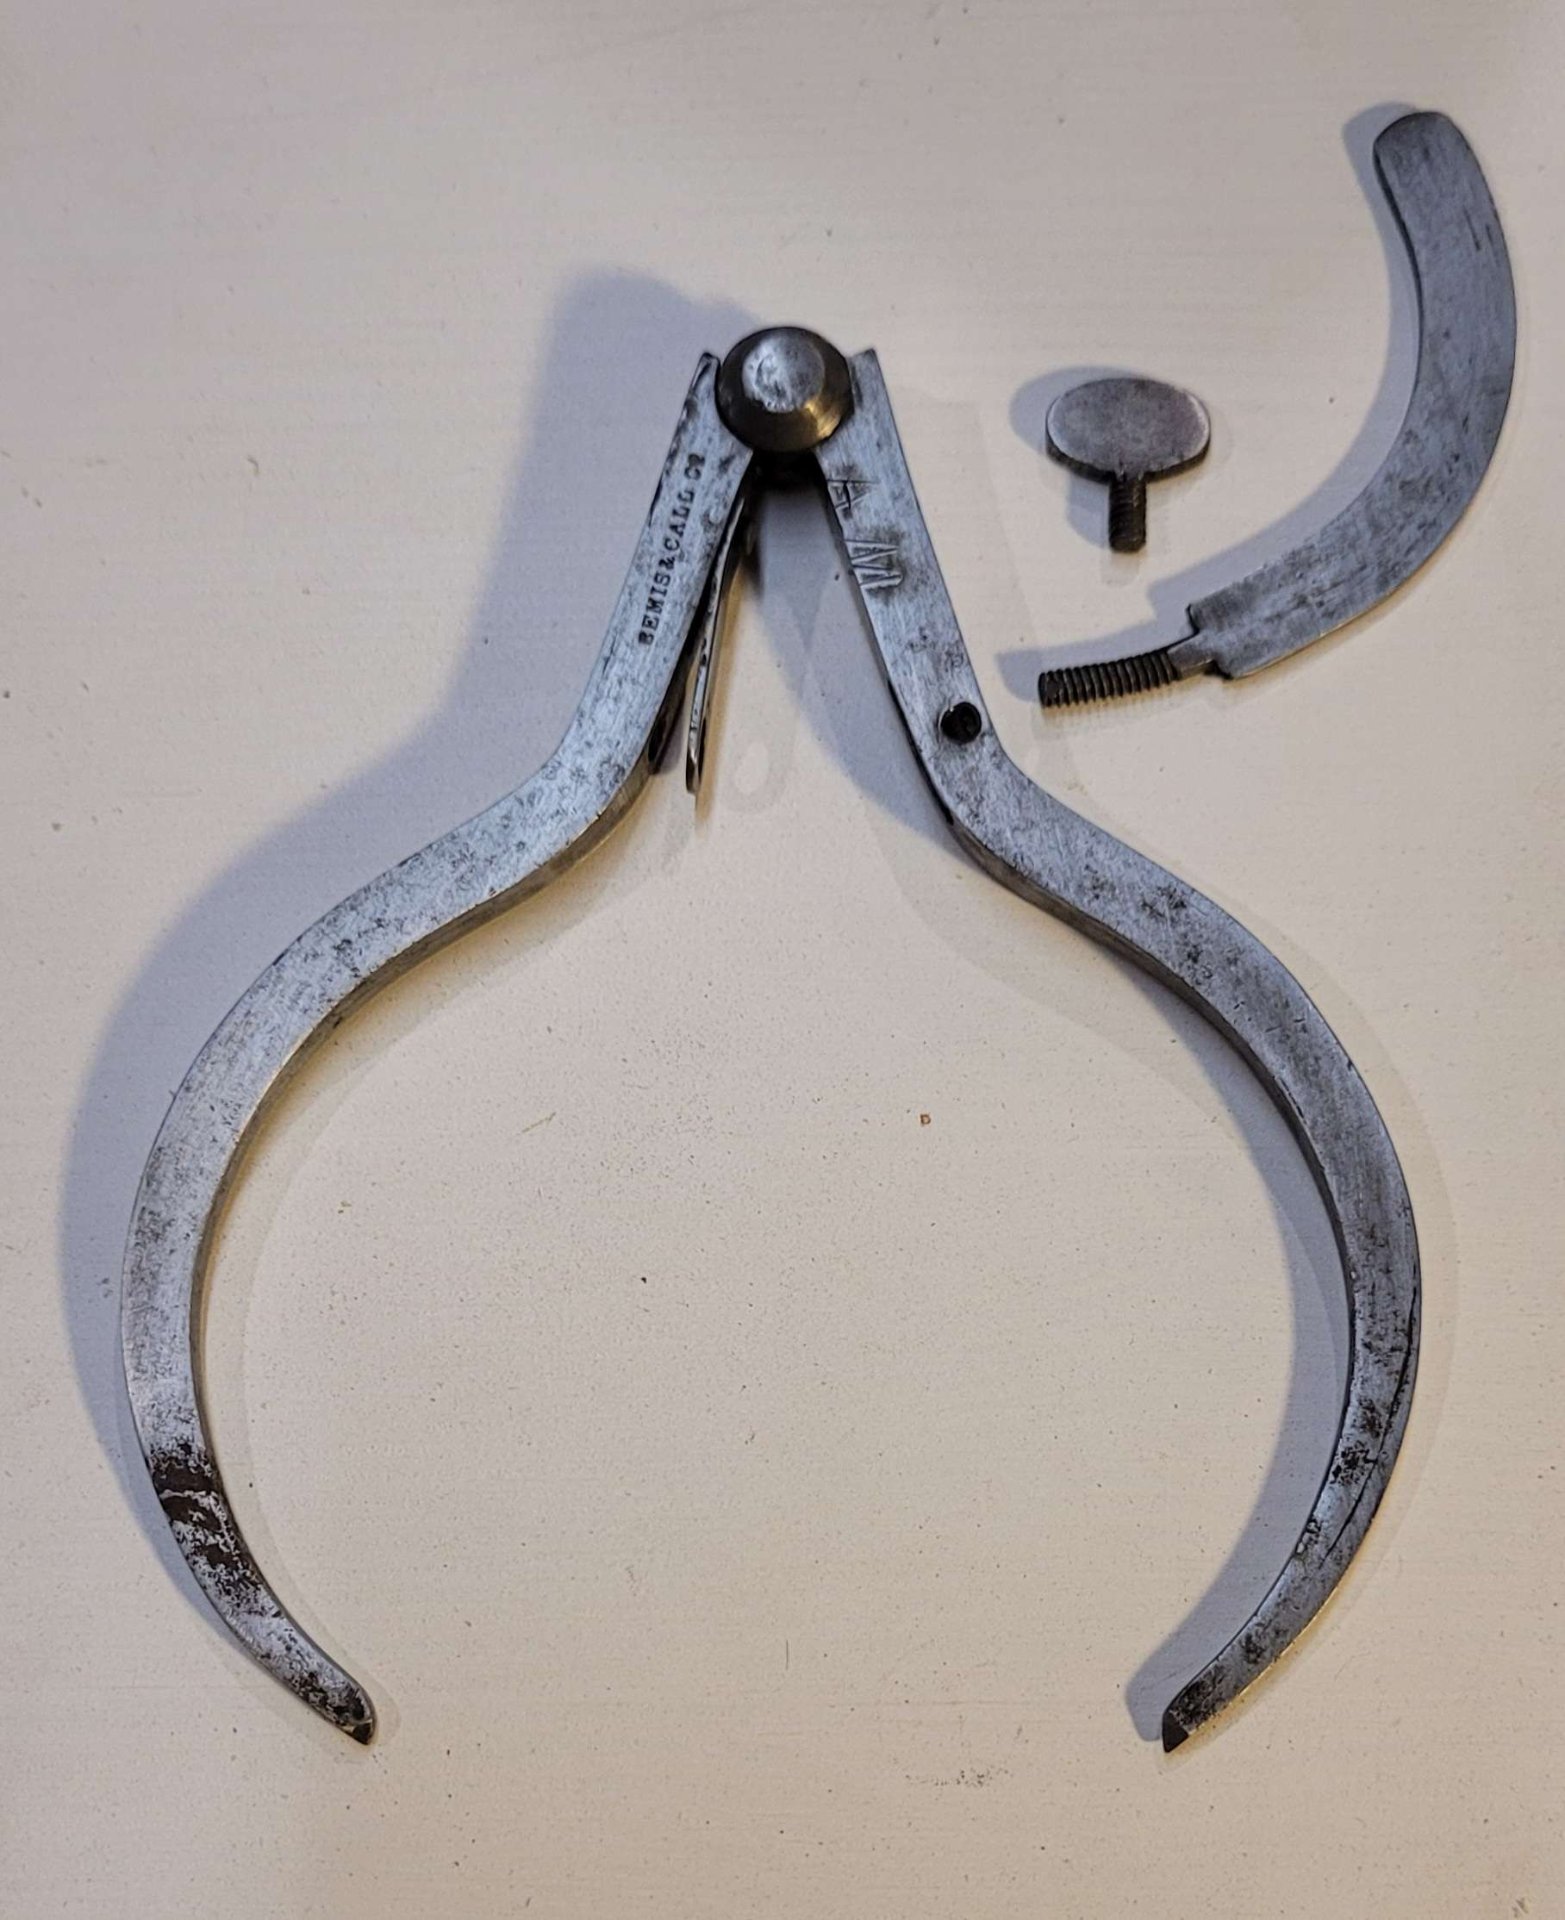
I bought this set of outside calipers at a junk store in my hometown (sort of a consignment, thrift store deal, with lots of old furniture, and the contents of like half a dozen garages right down to the old jars of mismatched screws. I sort of use it like a hardware store).
I like this design a lot, I like the lack of a spring on the jaws, and that you can fasten the little distance measuring arm to the side it measures on, so you can close the calipers around something, tighten that wing screw, then open the calipers to get them back.
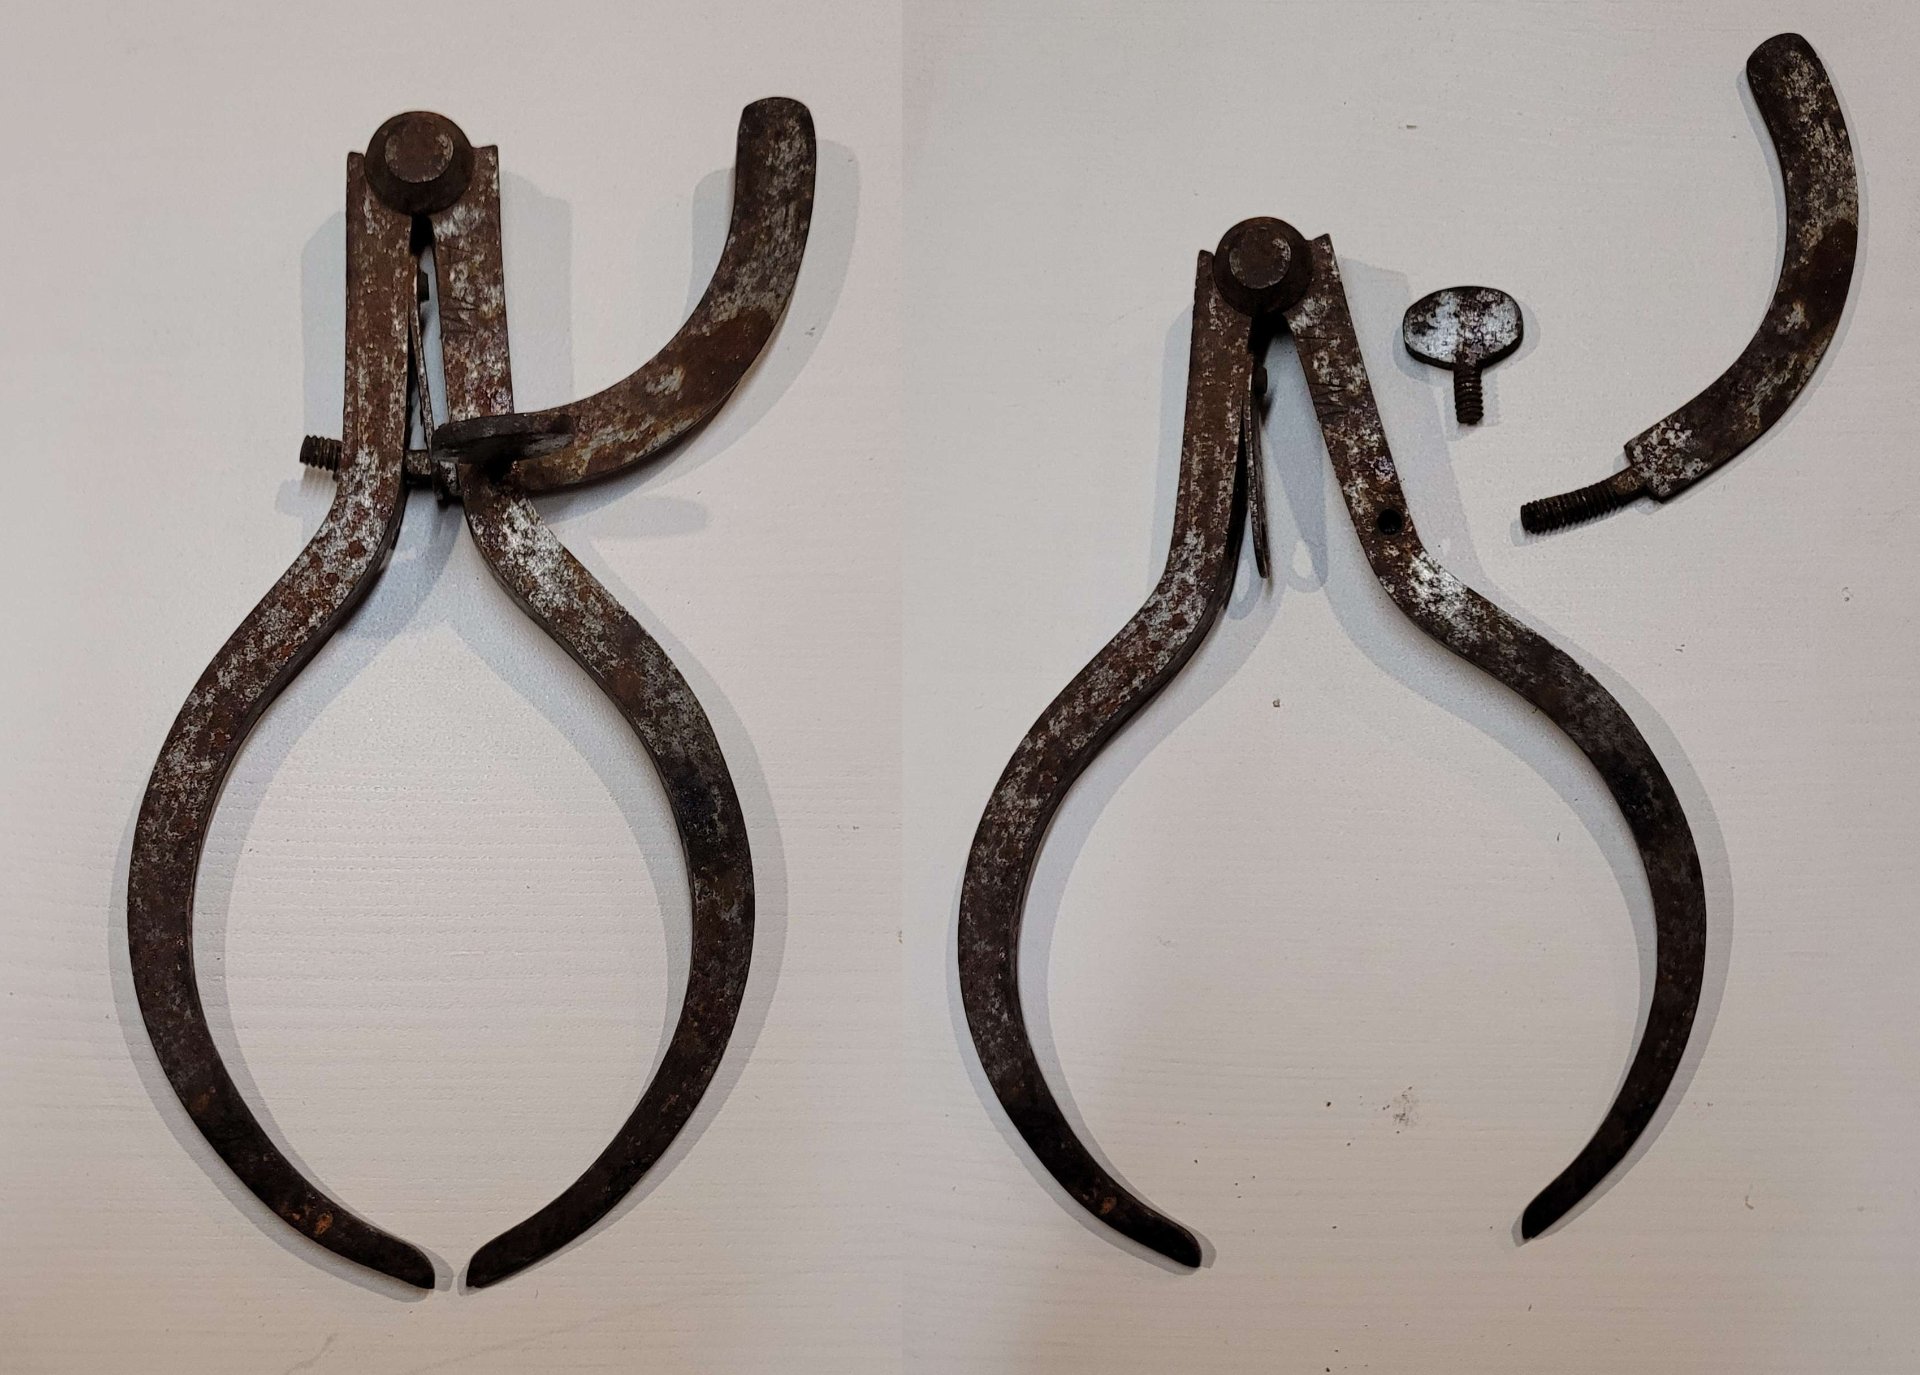
They had some surface rust, so I decided to clean them up. The first step was to disassemble them. Not difficult when there's only three pieces involved.
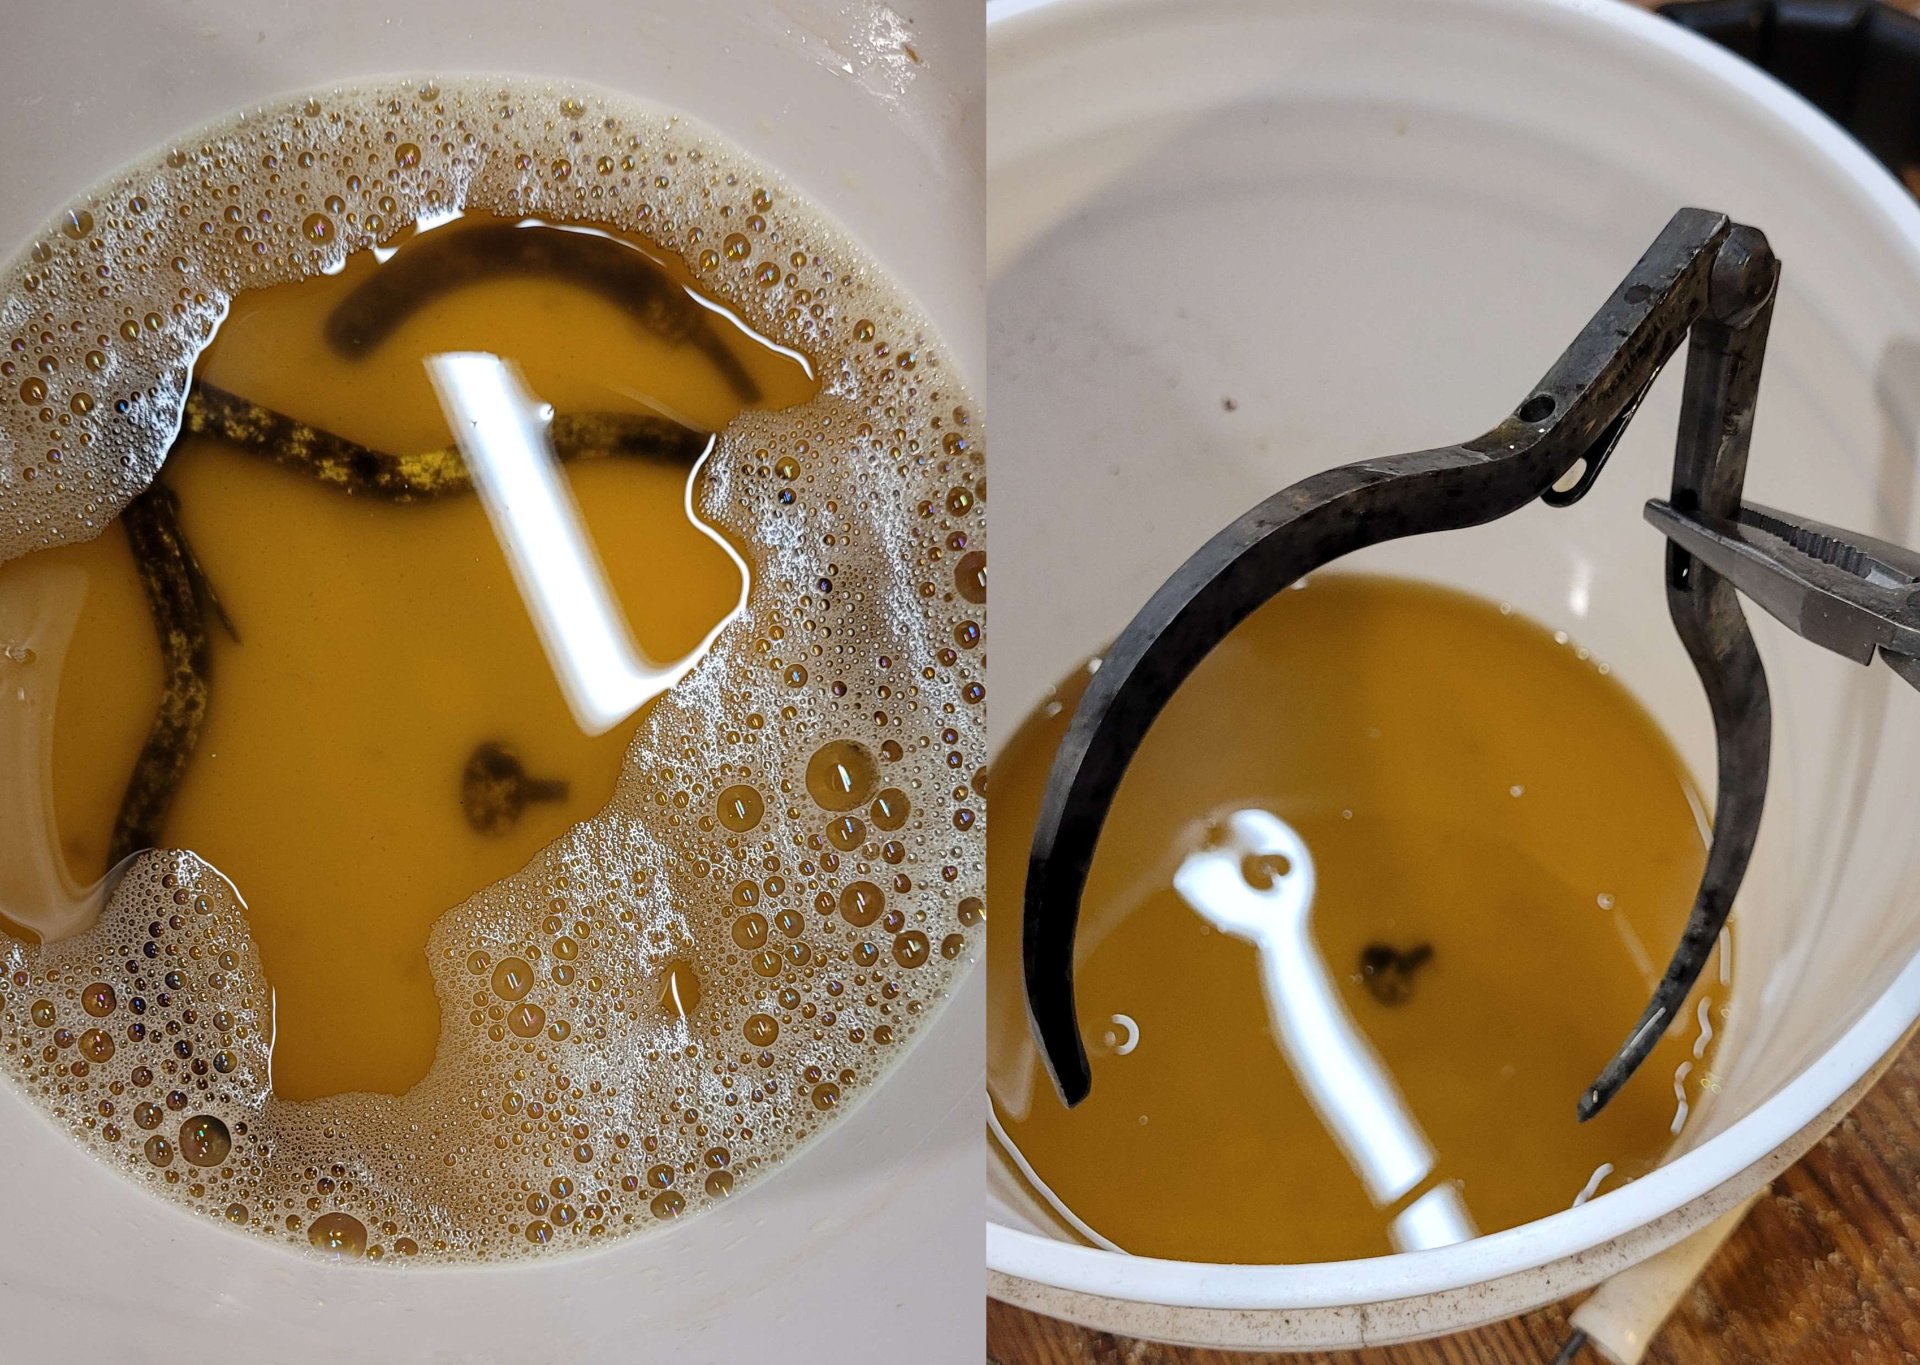
I let them soak in some evaporust for about 8 hours. I really like this stuff, it hits the sweet spot between very effective and not especially dangerous, and it's reusable! They do overestimate how effective it is in their instructions though, so it often takes longer.
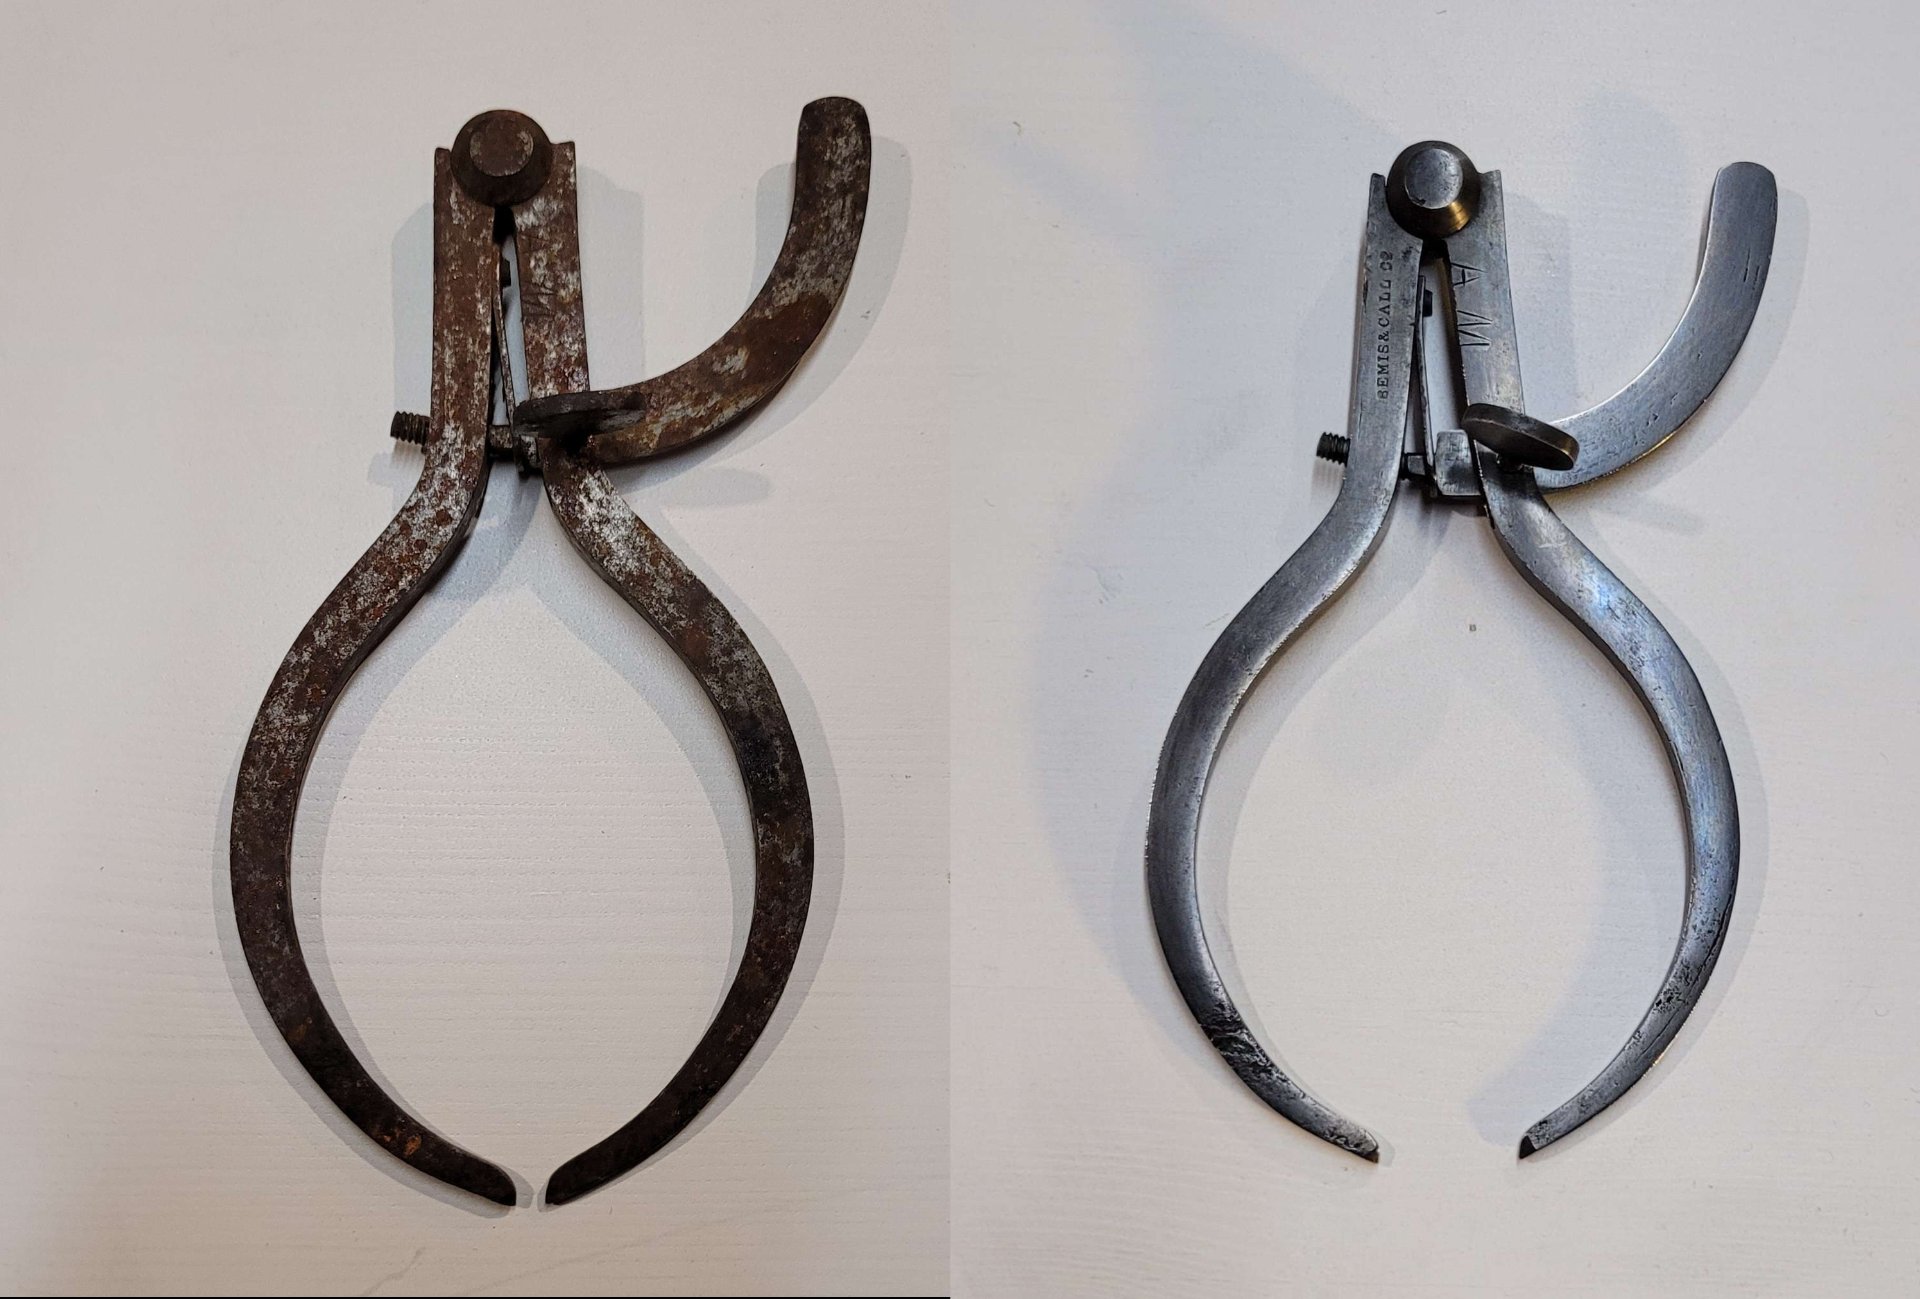
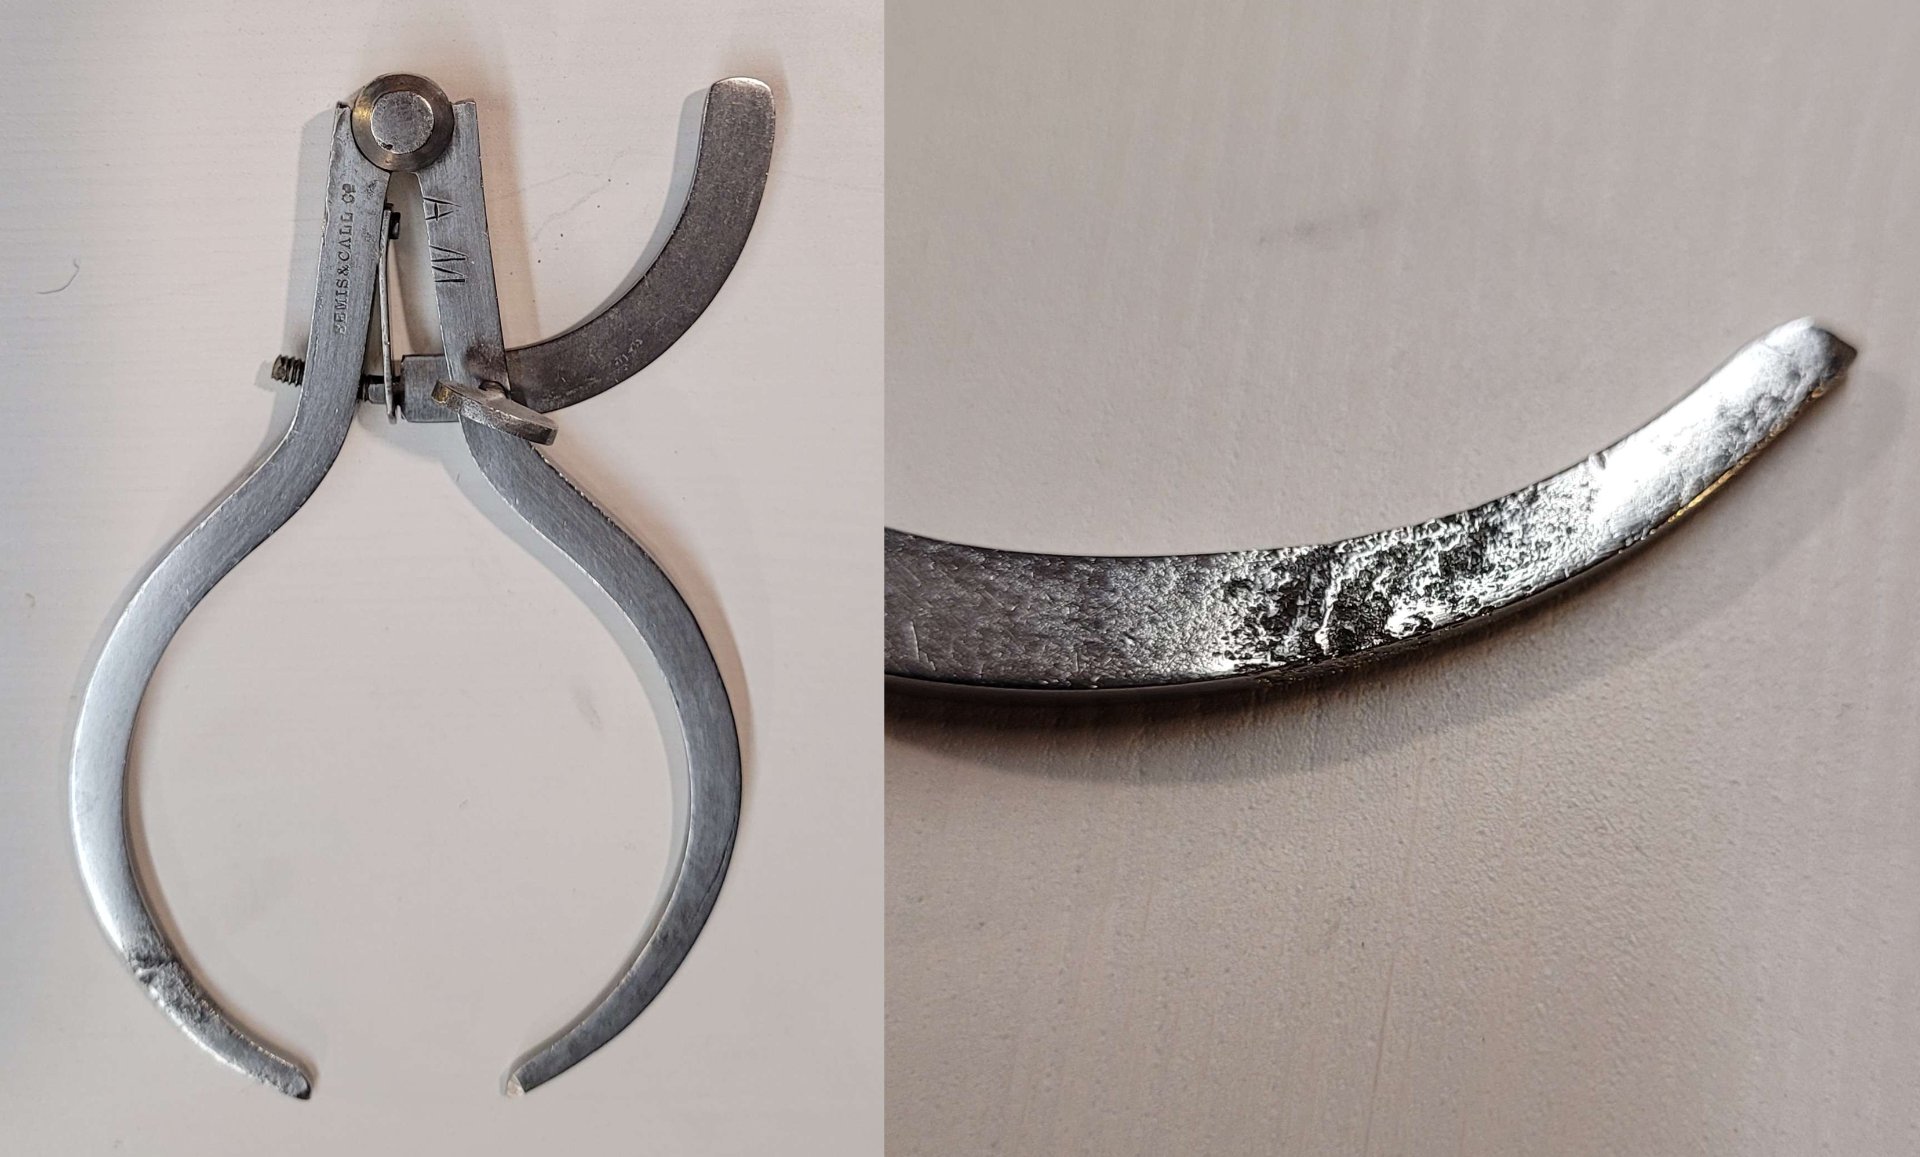
 The calipers, straight out of the evaporust. You can already see some text which was hidden before, along with the initials AM from a previous owner.
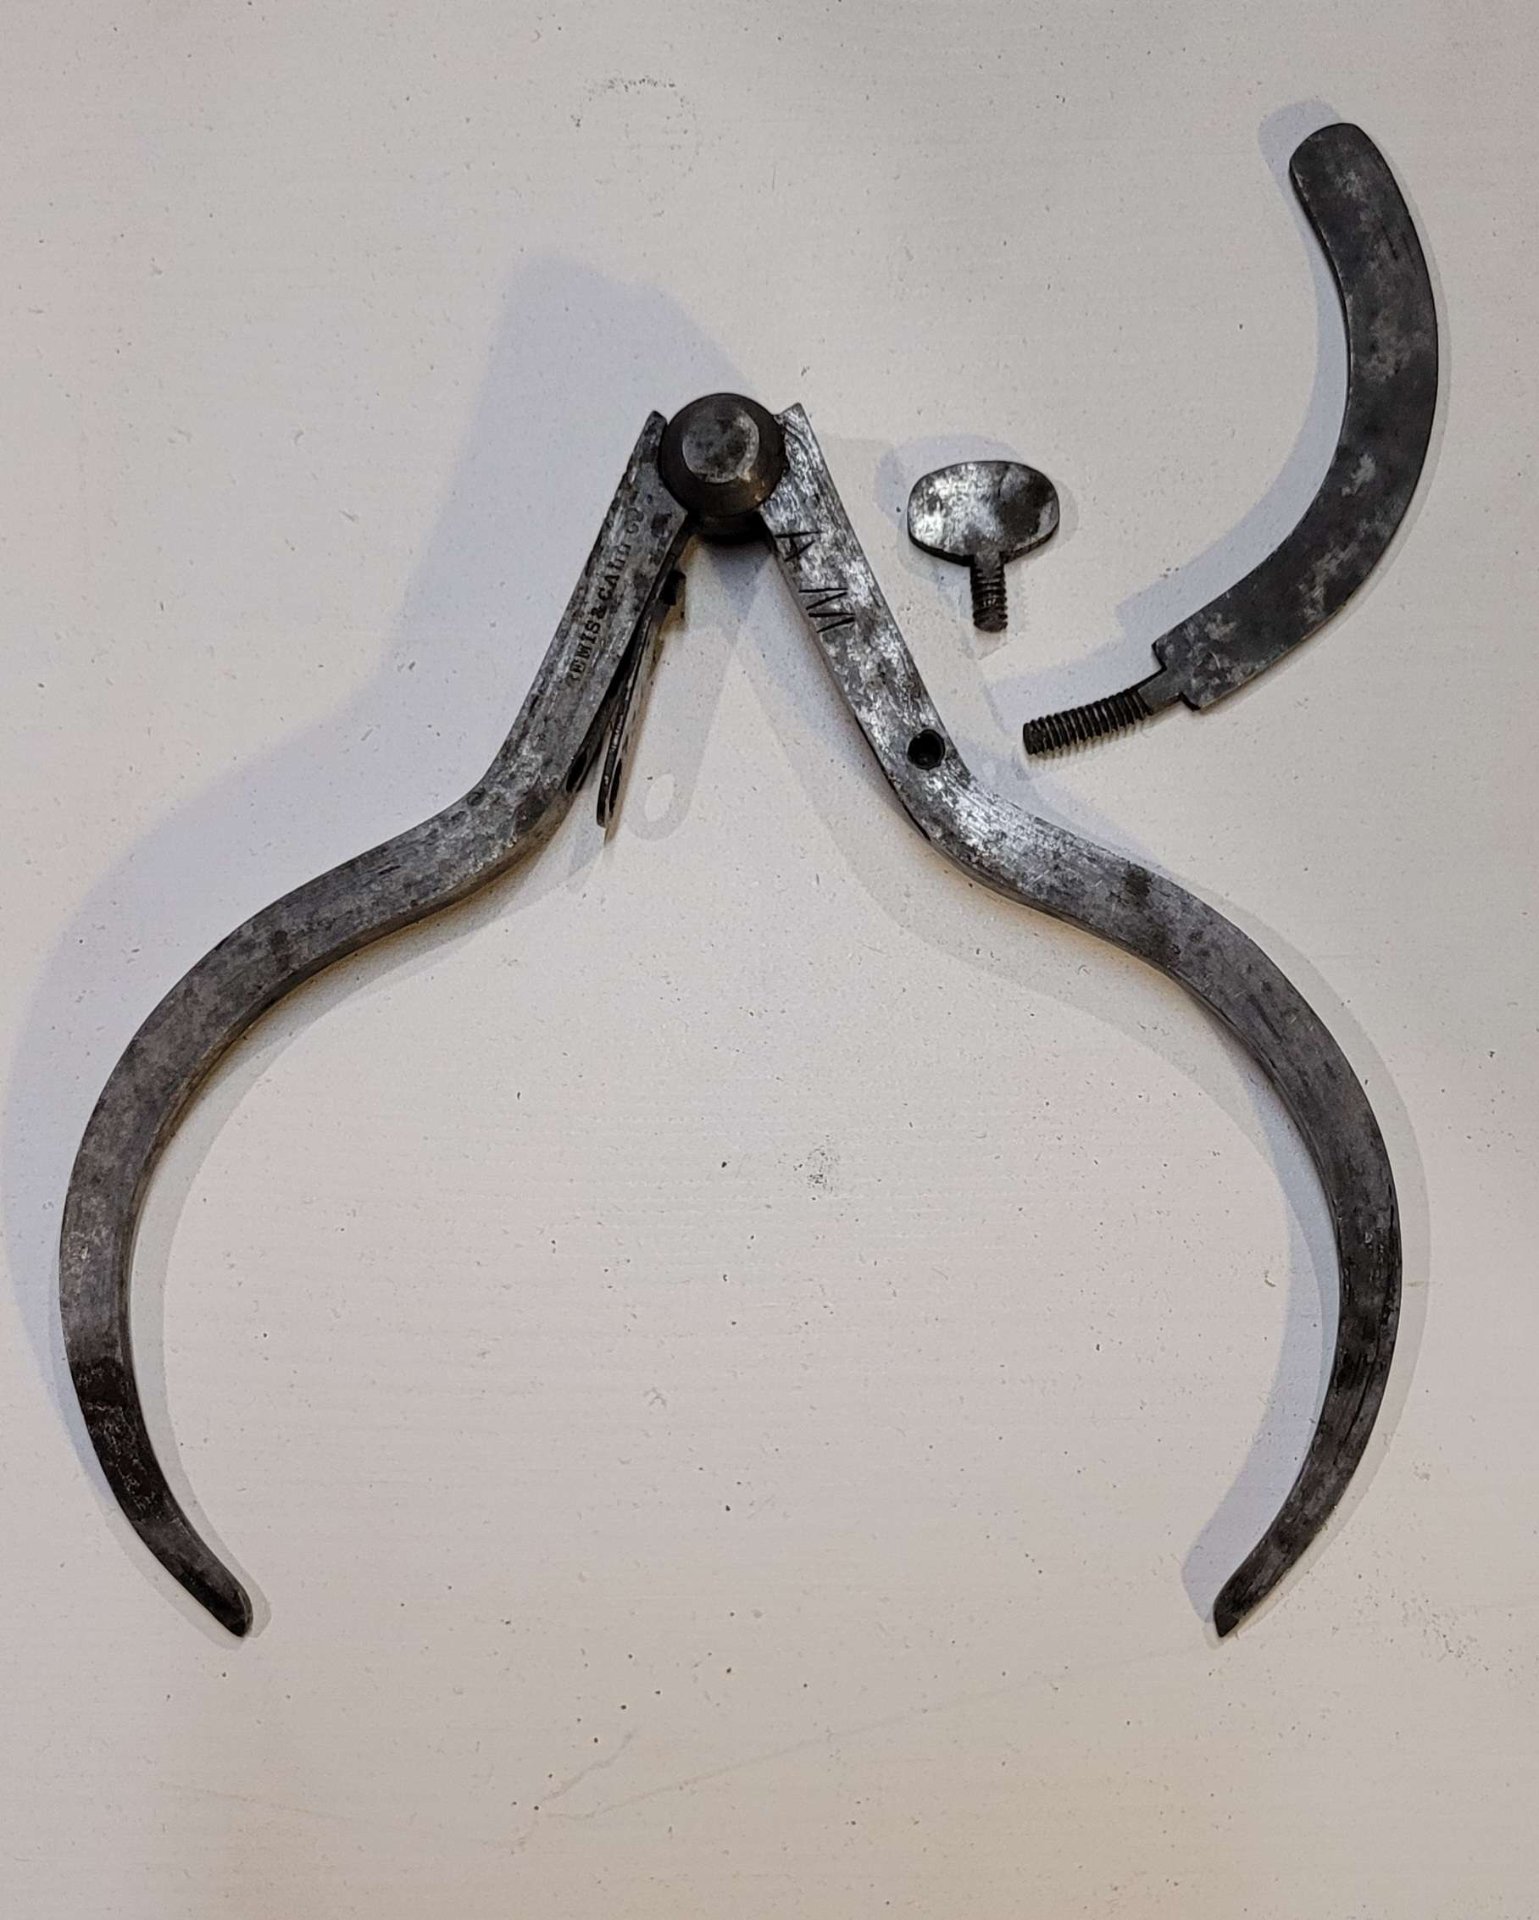
Now that the worst of the rust had been dissolved, it was time to switch from chemical to mechanical cleaning. I sanded it down with 400 grit emery cloth.
 The calipers with only one side sanded.
As I cleaned up the sides, I found a few neat bits of history:
 Here's some funny nicks up near the joint on one side. I wonder what caused them. And the previous owner's mark on the right side, AM. This is a big part of why I love old tools. I love the history they carry with them, even if I don't know all of it.
 Looking better, but still a ways to go. I was surprised to find that there weren't any markings on the little distance arm. I'd been expecting to find little angle tickmarks or something, maybe even printed numbers, but there weren't any to be seen after the evaporust, or once I started gently sanding off the remaining rust and the black crud evaporust leaves behind.
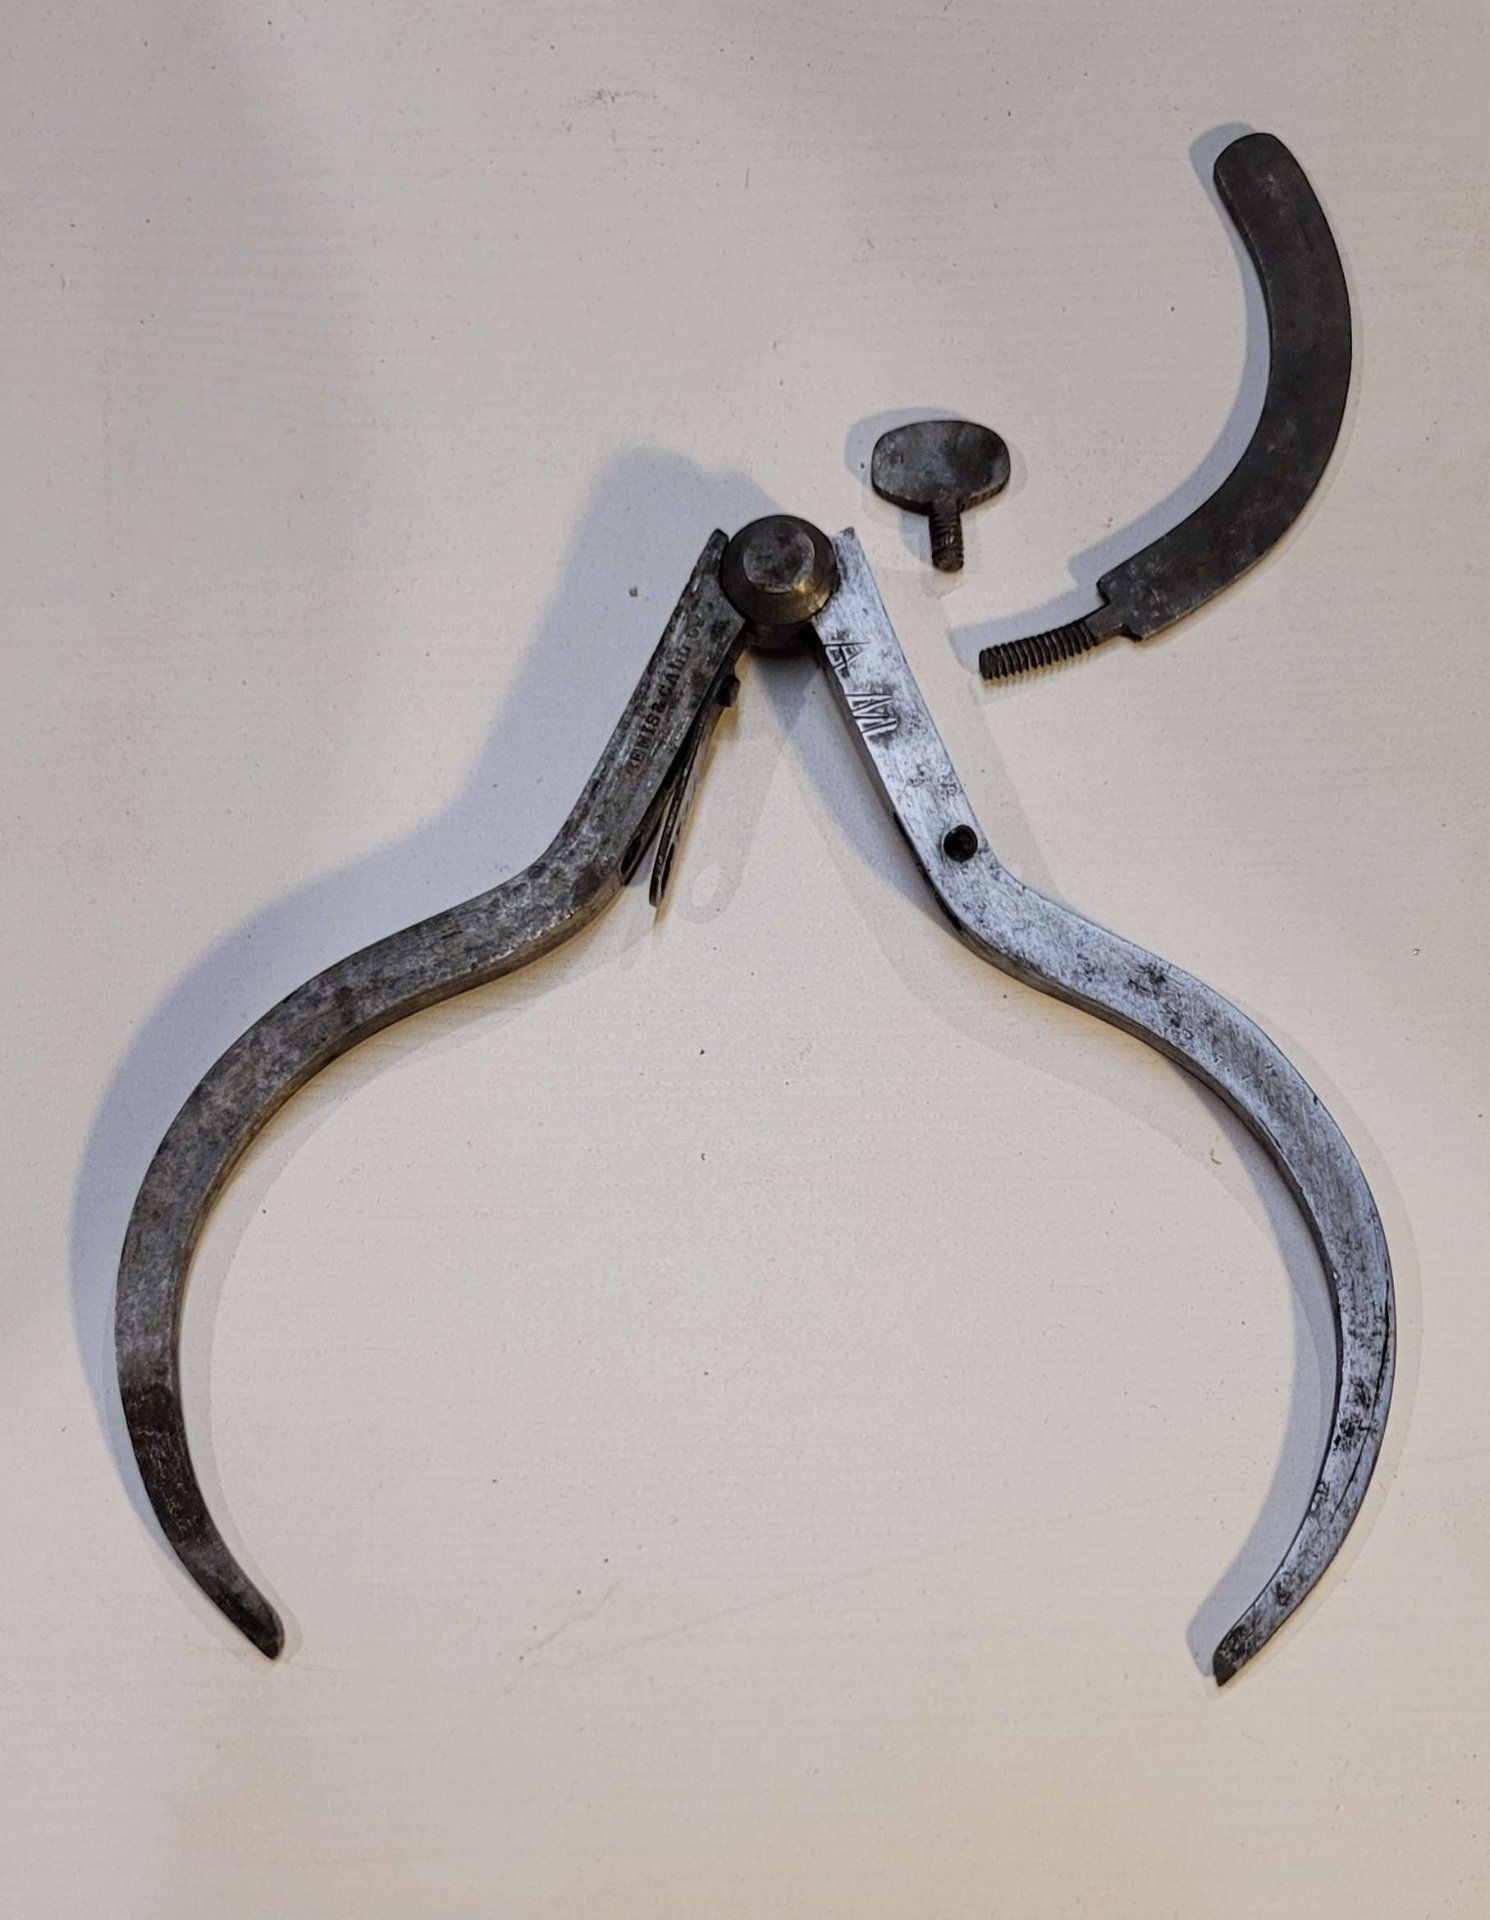
Once I had most of the rust gone, I switched to steel wool. I didn't want to take too much material off the surfaces, and I felt the more flexible steel wool would hit inside the pitting from the rust better.
The steel wool shined it up quite nicely. And here's a closeup of some of the surface pitting left over by the rust on the left side. The back of these calipers didn't have this kind of damage.
It was tempting to leave it here, but I didn't want the rust to return, so I decided to treat the calipers with cold blue, to provide some protection against oxidation. There are other ways to protect steel, but I like the look and it seems to hold up well enough.
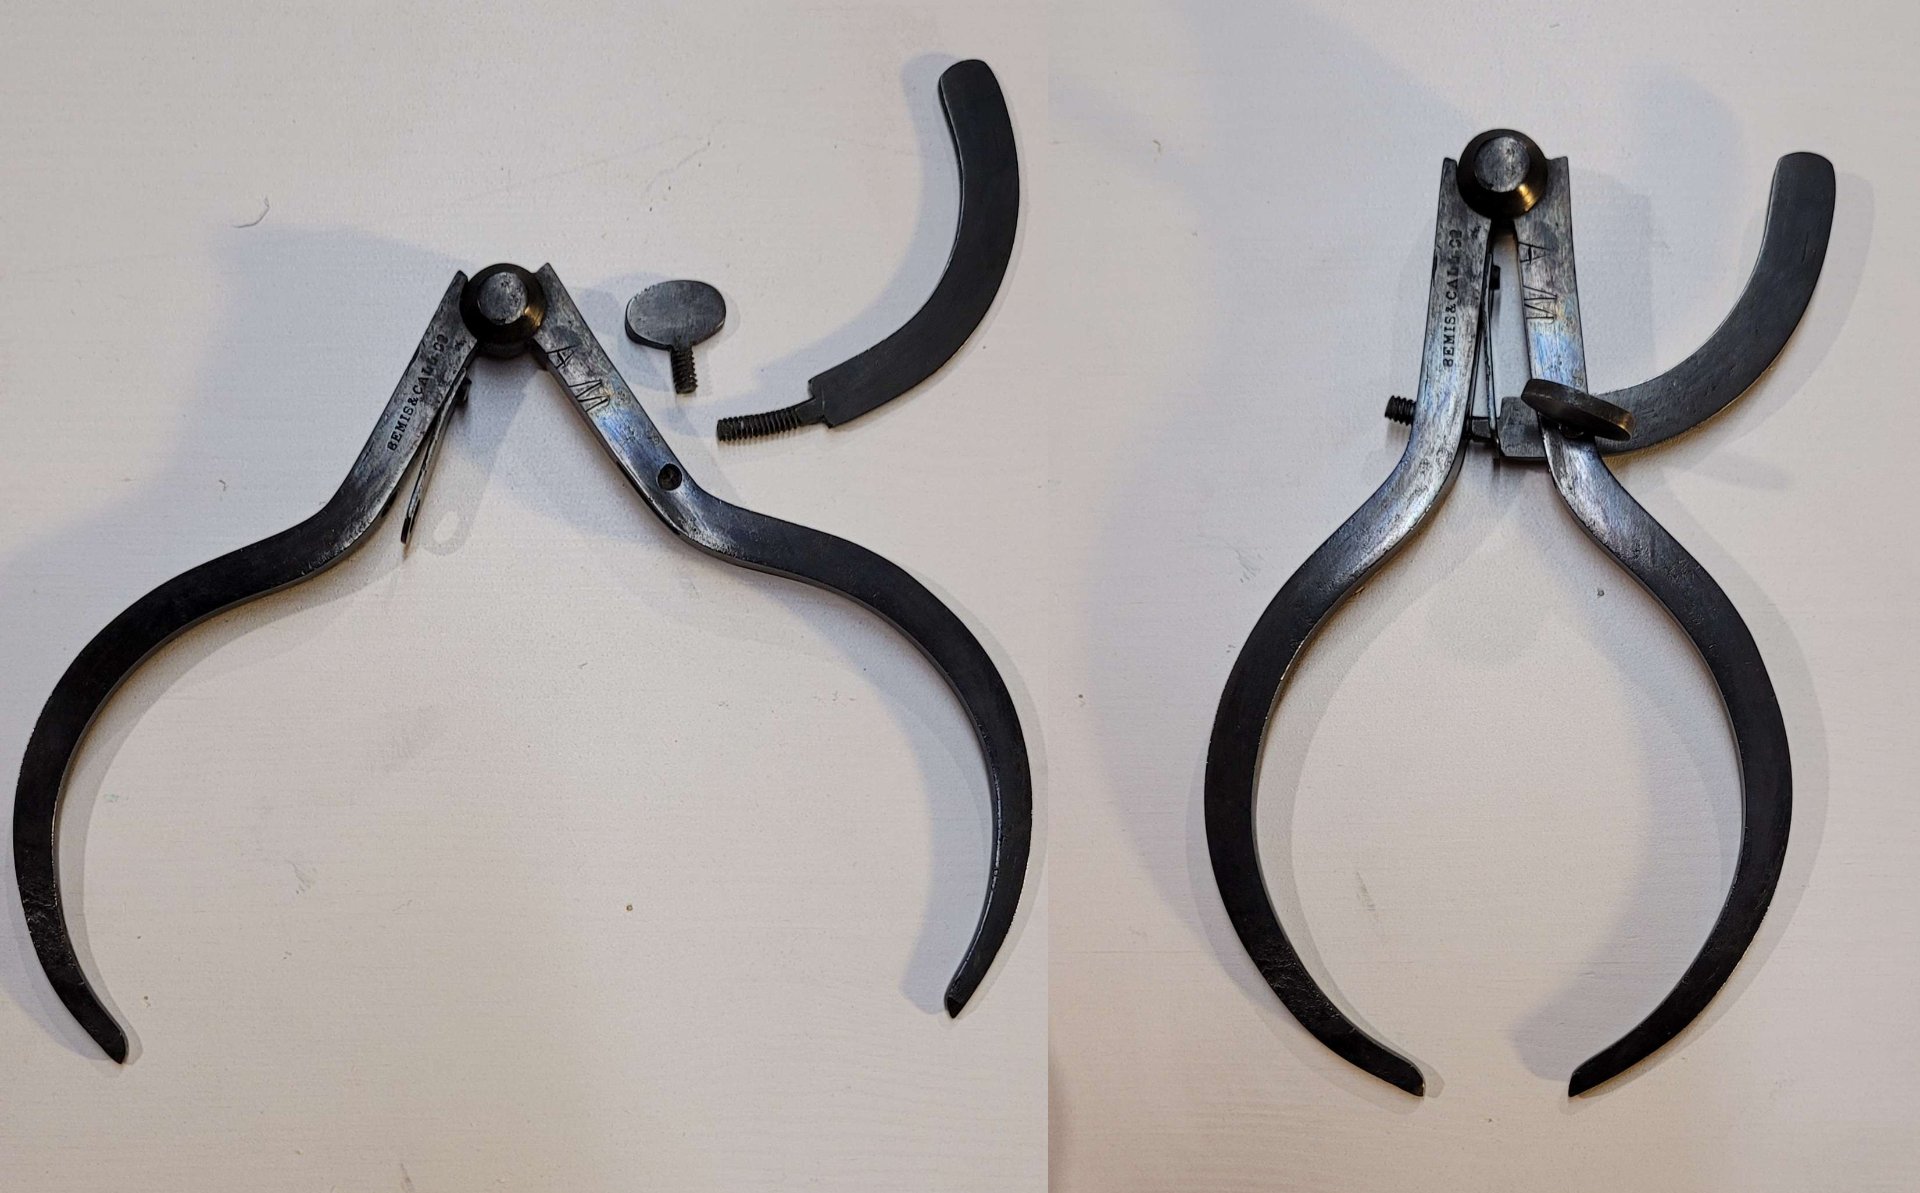
Cold blue always looks a little rough when it first goes on (this stuff is a gel you don't want to get on your hands. You wipe it on, leave it to darken the metal for 60 seconds, and wipe it off again) but a little burnishing with 0000 steel wool will tidy it up:
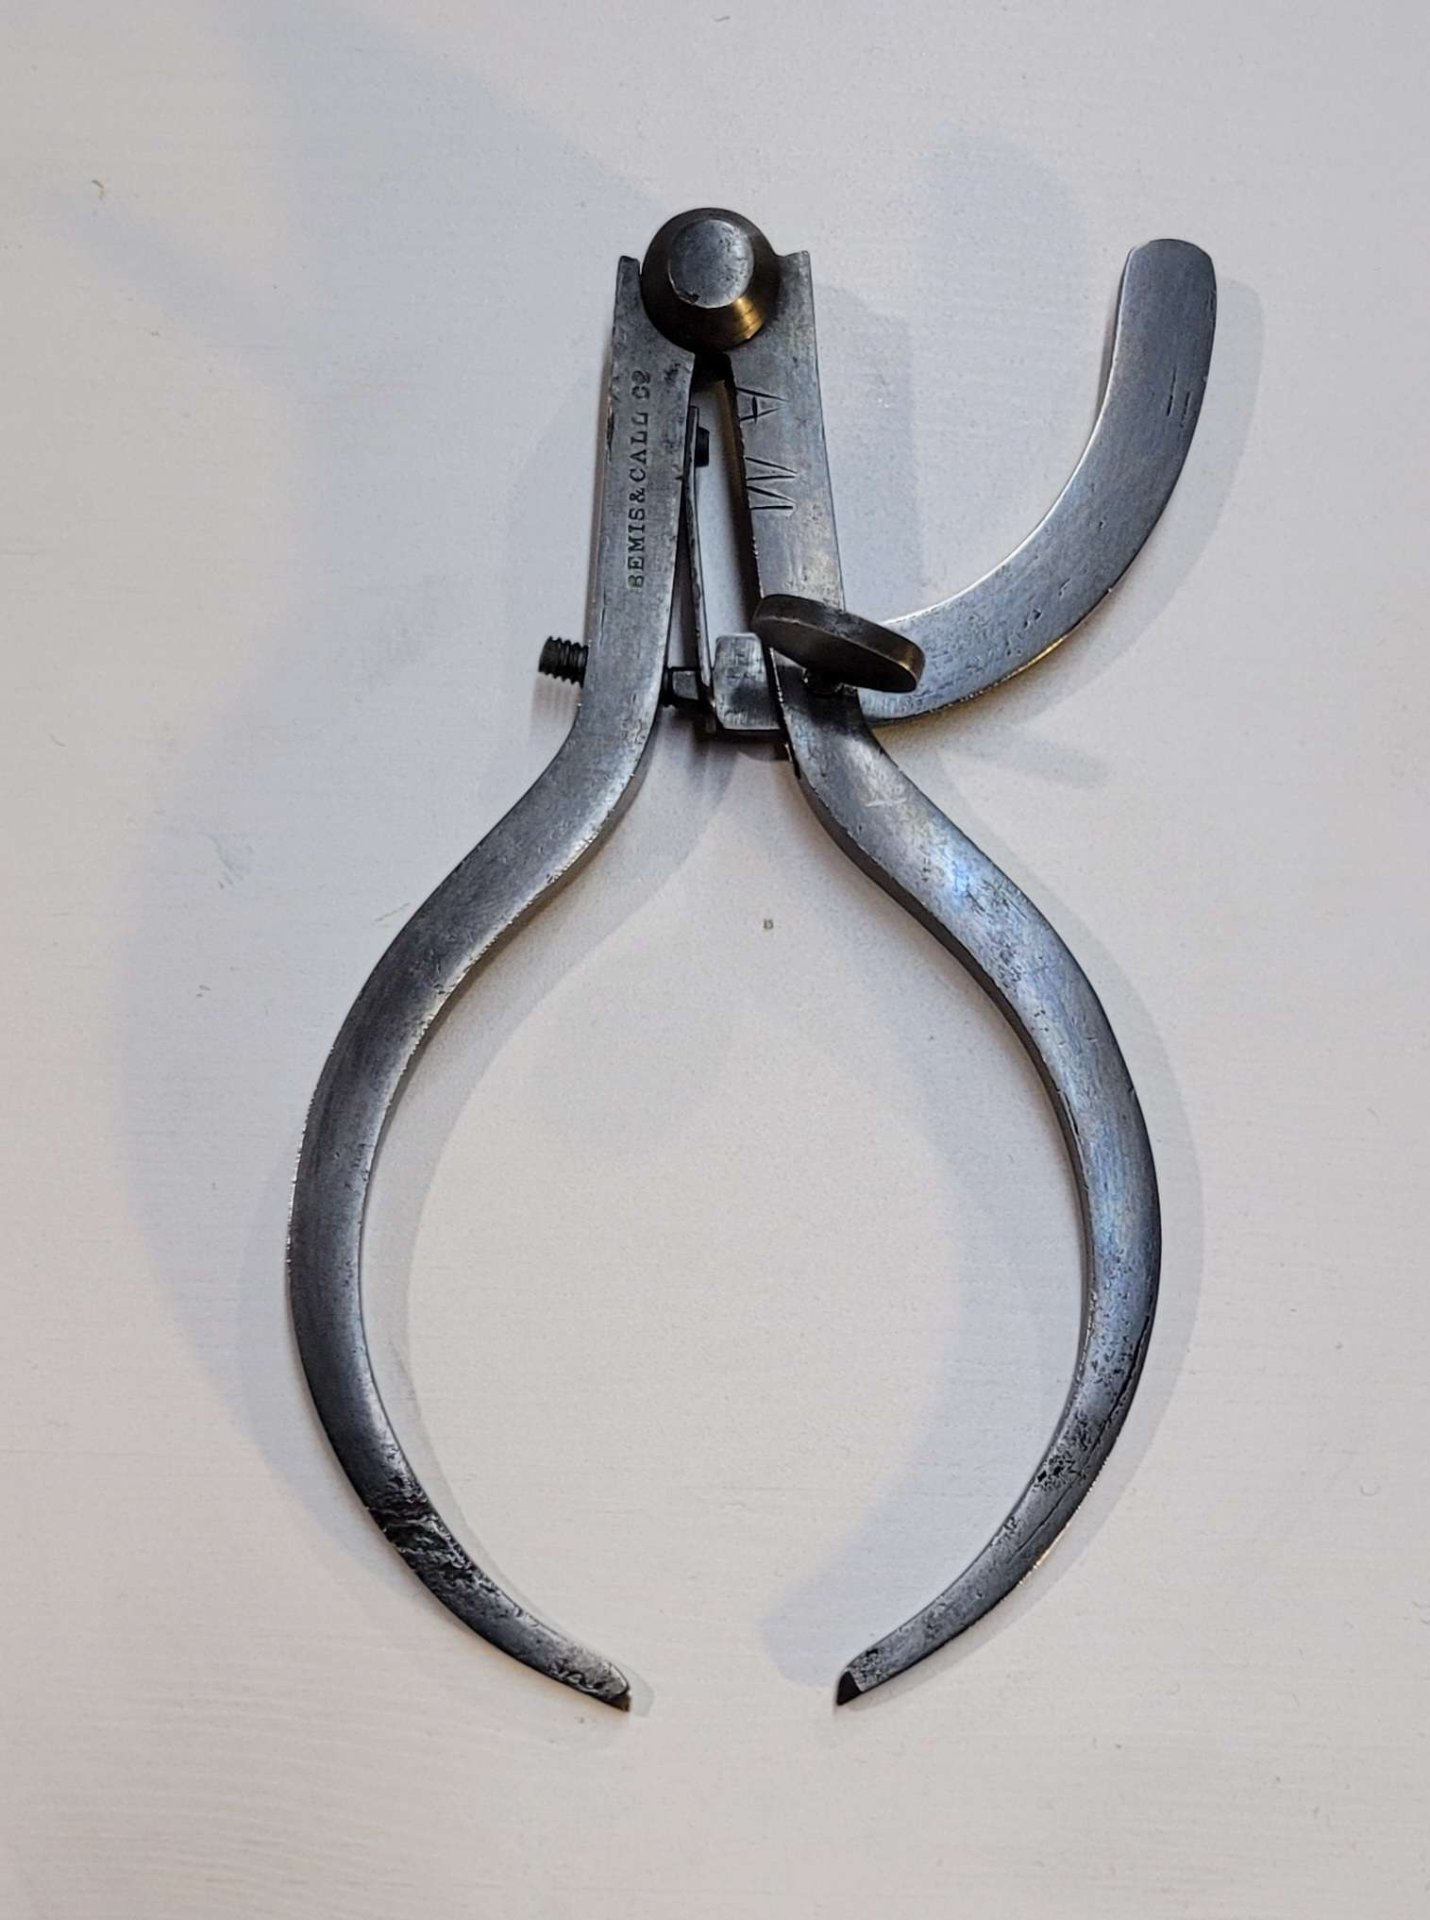
There we go, still pretty shiny, but not as likely to rust again. Not bad considering how it looked in the beginning. Hope you'd approve, AM.
(I wrote this post for the making/fixing things blog I have on our local movim instance. If you're a slrpnk.net local, your credentials will work on movim automatically!)

In the US, bans on foreign cars which limit the number of 'someone elses' pretty dramatically.
Personally I also suspect a bit of collusion - they could sell it for less and undercut the competition but they all make more money if nobody cuts their price.